Category Archives: Computer Science

My trip down memory lane leads me back to TOPS-10 and the PDP-10

I’m going to be nostalgic for a few moments. If you are too young to have any sense of nostalgia, skip ahead to the bold text below. You were warned!

A few days ago, I mentioned that I was having a bit of flashback, thinking of my first experience with time sharing computers back in the early 1980s. I was a child of the microcomputer revolution: I remember reading the articles on the Altaire and the COSMAC ELF in Popular Electronics (I was a precocious 12 year old at the time) and would eventually buy my first computer (an Atari 400) in 1980. By 1982, I was attending the University of Oregon and got my first exposure to “big” timesharing computers: their DEC 1091 (running TOPS10) and their IBM 4341.

I must admit, I wasn’t all that impressed at the time. I did take FORTRAN and COBOL classes though. I actually did JCL and punch cards on the IBM. I worked in the documents room at the Computing Center for a while, and I recall that I made some small modification to their software (in FORTRAN on the DEC) that kept track of check ins and check outs. It may have been the first time I was ever paid to program.

My recollection is that by late in my second year, I was obsessed with the idea of getting an account on one of the three VAX 11/750s in the computer science department, all of which ran BSD. To do that, I needed to start taking graduate level classes. So, I applied for them. I recall sitting in Professor Ginnie Lo’s compiler class on the first day. She asked me if I was a graduate student, and I replied “no”. She then asked me if she had given me permission to take her course. I replied (somewhat nervously, as I recall) “no”. To her credit, she allowed me to stay.

I digress.

Anyway, after getting accounts on one of the department’s Unix machines (and having access to another via my job in the Chemistry department) I found little reason to continue using the DEC 1091. I doubt that I used it more than a couple of times after 1985.

Which, in retrospect, is kind of too bad. The 36-bit DEC architectures were a significant part of computing history. The PDP-10 had a pretty nice architecture, with an interesting, symmetric instruction set. I didn’t have any appreciation of it back then, but with the wisdom granted by experience (and no doubt a certain amount of nostalgia) I find that it is actually pretty interesting.

So… I embarked on a mini-project to recreate the environment that I dimly remember.

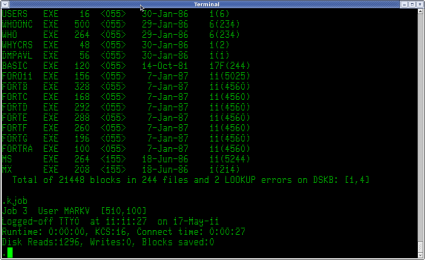
Luckily, you don’t need a physical PDP10: there are emulators that do an excellent job of recreating a virtual PDP-10 for you to program. I am using the simh emulator which is actually a suite of programs for a wide variety of early machines. The latest version of TOPS-10 was 7.04, but in experimenting with it, I found that I had difficulty making their simulated “printer” device work properly. Besides, v7.04 was actually a bit later than when I used the DEC. So, I’ve instead gotten version 7.03 up and running (which dates to around 1986).

Using the online documentation from various sources, I got the installation tapes up and running, and created a simulated system with a single RP06 disk drive. The printer is emulated just as a text file: I was thinking of creating a gadget to store them in individual files which we could view from a web page. I don’t recall anything of our networking with the 1091 (I suspect we had DECNET at the time) but TOPS-10 didn’t support TCP/IP anyway, so networking wasn’t a priority. I’ve installed BASIC and FORTRAN, as well as the TOPS-10 KERMIT tape. Of course you can program with MACRO-10 as well. I’ve got their DECMAIL system installed, but it has difficulty working without DECNET installed, and seems to require a patch. I’ll try to get that working shortly.

Eventually, I’ll get some games like ADVENT online. I created a single user account, but don’t remember some of the finesse points of creating project defaults and SWITCH.INI files. I also seem to have forgotten the logic behind SETSRC and the like, but it will come to me. I never was a TOPS-10 operator, so most of the systems level stuff is new to me (but luckily fairly well documented). For now, I can login, run BASIC programs, edit, compile and run FORTRAN and simple MACRO-10 programs, and… well… logout.

Okay, why do this?

I’m not actually one of those guys who is overly nostalgic. I stare at my iPhone, and I am amazed. I don’t want to trade it for a PDP-10. But I also think that the history of technology is fascinating, and through emulation, we can gain insight into the evolution of our modern computers by actually playing with the machines of the past.

Here’s one obvious insight: this was a time sharing operating system. It seems in many ways the bulk of the system was actually designed to do accounting on the amount of various things that you did. There is all sorts of mechanism for tracking how much CPU you used, how many disk reads and writes, how many cards you punched, and how many pages of line printer output you sent. There was a well defined batch queueing system, so that you could use every bit of available CPU to maximum efficiency. It imagined that there would always be a trained operator on duty to service the machine. In that sense, it is completely the opposite of what we saw developing from the personal computer world: when CPUs became cheap enough, it was obvious that you’d just have one, which you could do as you see fit. If it sat idle, well, it was your computer. But those early personal operating systems didn’t really have any support for multiprocessing or memory protection. It took quite some time for that to trickle into the personal computing world.

It’s also interesting to compare it to an operating system like ITS (which you can also run in emulation), which was developed in a purely academic environment. All of the accounting stuff I mentioned above are completely absent in ITS: the ITS system was designed to basically present a virtual PDP-10 to everyone who was connected to it. There was very little to protect you from mistakes that either you or someone else could make. The command interface was just DDT: the PDP-10 machine language debugger. ITS was an important step in the evolution of computer operating systems.

You can learn about these things by reading books about them, but playing with them will undoubtedly give you some insights that you can’t get by books alone.

Is anyone else interested in this stuff? I’m considering making a virtual PDP-10 available to the public for mucking around with, and maybe even typing up some short notes on how to do common tasks. I’ll probably also try to get a version of ITS running in the same way.

I’ve thought about maybe trying to scrounge some old VT100s (maybe four of them), wire them up to a modern small computer running simh, and creating a virtual system that you could bring to appropriate conferences like the Maker Faire. Kind of a “Computing Time Machine”.

I’ll think about it some more. If anyone else has similar interests (or could mentor me on the ways of 36 bit computers), drop me an email or leave me a comment below.
Magnetic core memory reborn… on an Arduino????

I may have mentioned before, I’m kind of old. One measure of how old I am is the fact that I’ve actually programmed machines that used core memory. Real core memory. Little ferrite donuts on arrays of wires.

Some time ago, I remember running across this awesome blog post from “Wayne’s Tinkering Page” which showed some experimentation in creating a driver for some surplus 1mm ferrite memory cores, effectively creating a single bit memory. I thought that was pretty darned cool. But what’s even more amazing is what Ben North and Oliver Nash have done: create a 32 bit core memory shield for an Arduino.

Links to the report and board plans, bill of materials and software

And they have an excellent report on the project, which includes a reference to a different core memory technique which employed non-destructive reads.

Magnetic core memory reborn

Very cool.

Word squares…

I like to read the Programming Praxis website. Every post challenges you to write some simple programs to boost your skill, akin to finger exercises for a musical instrument. Today’s challenge was an interesting which intrigued Charles Babbage: creating word squares.

I spent about 10 minutes writing one in Python that worked rather well: here is an early version, which I augmented a bit. Running it against /usr/share/dict/words gave way too many squares, with lots of really uncommon words. I had better luck with The 12dicts word lists, which concentrate on more common words. In particular, I came up with this pair of rather pleasing order 5 squares based upon the words BRAIN WAGON.

B R A I N
R E T R O
A T L A S
I R A T E
N O S E Y
W A G O N
A G A V E
G A T O R
O V O I D
N E R D Y

Fun!

A small standalone homebrew computer: FIGnition by Libby8dev

I’m old. I learned to program as a teenager in the 1980s. Back then, we learned to program on small microcomputers. These machines weren’t very powerful, but they had a neat feature: they were self-hosted. In recent years, a large variety of small microcontrollers have become popular. Many of these have capabilities far in excess of what we had back then, but almost without fail the programming environments they use are hosted on much more powerful machines, often using code which measures tens or hundreds of megabytes.

That has always seemed a bit excessive to me, particularly since making the environments simple and self-hosted pays benefits for educational and hobbyist applications.

The FIGnition board is a project which seems to combat this trend:

FIGnition is an educational DIY computer, based around an Atmel AVR microcontroller. It uses 3 chips and only 46 components to provide a complete self-hosted computer with 8Kb of RAM; 384Kb of storage space; an 8-key keypad and PAL video output. It is interfaced and powered by USB and uses V-USB to provide firmware upgrades by implementing a usbasp device. It runs a variant of FIG-Forth.

Currently it isn’t available in the US since it doesn’t do NTSC video, but I suspect that will change soon. I’ll be looking back at this project periodically.

FIGnition – Libby8dev.

Watermarking and titling with ffmpeg and other open source tools…

I’ve received two requests for information about my “video production pipeline”, such as it is. As you can tell by my videos, I am shooting with pretty ugly hardware, in a pretty ugly way, with minimal (read “no”) editing. But I did figure out a pretty nice way to add some watermarks and overlays to my videos using open source tools like ffmpeg, and thought that it might be worth documenting here (at least so I don’t forget how to do it myself).

First of all, I’m using an old Kodak Zi6 that I got for a good price off woot.com. It shoots at 1280x720p, which is a nominally a widescreen HD format. But since ultimately I am going to target YouTube, and because the video quality isn’t all that astounding anyway, I have chosen in all my most recent videos to target a 480 line format, which (assuming 16:9) aspect ratio means that I need tor resize my videos down to 854×480. The Zi6 saves in a Quicktime container format, using h264 video and AAC audio at 8Mbps and 128kbps respectively.

For general mucking around with video, I like to use my favorite Swiss army knife: ffmpeg. It reads and writes a ton of formats, and has a nifty set of features that help in titling. You can try installing it from whatever binary repository you like, but I usually find out that I need to rebuild it to include some option that the makers of the binary repository didn’t think to add. Luckily, it’s not really that hard to build: you can follow the instructions to get a current source tree, and then it’s simply a matter of building it with the needed options. If you run ffmpeg by itself, it will tell you what the configuration options it used for compilation. For my own compile, I used these options:

--enable-libvpx --enable-gpl --enable-nonfree --enable-libx264 --enable-libtheora --enable-libvorbis 
--enable-libfaac --enable-libfreetype --enable-frei0r --enable-libmp3lame

I enabled libvpx, libvorbis and libtheora for experimenting with webm and related codecs. I added libx264 and libfaac so I could do MPEG4, mp3lame so I could encode to mp3 format audio, most important for this example, libfreetype so it would build video filters that could overlay text onto my video. If you compile ffmpeg with these options, you should be compatible with what I am doing here.

It wouldn’t be hard to just type a quick command line to resize and re-encode the video, but I’m after something a bit more complicated here. My pipeline resizes, removes noise, does a fade in, and then adds text over the bottom of the screen that contains the video title, my contact information, and a Creative Commons banner so that people know how they can reuse the video. To do this, I need to make use of the libavfilter features of ffmpeg. Without further ado, here’s the command line I used for a recent video:

[sourcecode lang=”sh”]
#!/bin/sh
./ffmpeg -y -i ../Zi6_4370.MOV -sameq -aspect 16:9 -vf "scale=854:480, fade=in:0:30, hqdn3d [xxx]; color=0x33669955:854×64 [yyy] ; [xxx] [yyy] overlay=0:416, drawtext=textfile=hdr:fontfile=/usr/share/fonts/truetype/ttf-dejavu/DejaVuSerif-Bold.ttf:x=10:y=432:fontsize=16:fontcolor=white [xxx] ; movie=88×31.png [yyy]; [xxx] [yyy] overlay=W-w-10:H-h-16" microfm.mp4
[/sourcecode]

So, what does all this do? Well, walking through the command: -y says to go ahead and overwrite the output file. -i specifies the input file to be the raw footage that I transferred from my Zi6. I specified -sameq to keep the quality level the same for the output:: you might want to specify an audio and video bitrate separately here, but I figure retaining the original quality for upload to YouTube is a good thing. I am shooting 16:9, so I specify the aspect ratio with the next argument.

Then comes the real magic: the -vf argument specifies a rather long command string. You can think of it as a series of chains, separated by semicolons. Each command in the chain is separated by commas. Inputs and outputs are specified by names appearing inside square brackets. Read the rather terse and difficult documentation if you want to understand more, but it’s not too hard to walk through what the chains do. From ‘scale” to the first semicolon, the input video (implicit input to the filter chain) we resize the video to the desired output size, fade in from black over the first 30 frames, and then run the high quality 3d denoiser, storing the result in register xxx. The next command creates a semi-transparent background color card which is 64 pixels high and the full width of the video, storing it in y. The next command takes the resized video xxx, and the color card yyy, and overlays the color at the bottom. We could store that in a new register, but instead we simply chain on a drawtext command. It specifies an x, y, and fontfile, as well as a file “hdr” which contains the text that we want to insert. For this video, that file looks like:

The (too simple) Micro FM transmitter on a breadboard
https://brainwagon.org | @brainwagon | mailto:brainwagon@gmail.com

The command then stores the output back in the register [xxx]. The next command reads a simple png file of the Creative Commons license and makes it available as a movie in register yyy. In this case, it’s just a simple .png, but you could use an animated file if you’d rather. The last command then takes xxx and yyy and overlays them so that the copyright appears in the right place.

And that’s it! To process my video, I just download from the camera to my linux box, change the title information in the file “hdr”, and then run the command. When it is done, I’m ready to upload the file to YouTube.

A couple of improvements I have yet to add to my usual pipeline: I don’t really like the edge of the transparent color block: it would be nicer to use a gradient. I couldn’t figure out how to synthesize one in ffmpeg, but it isn’t hard if you have something like the netpbm utilities:

[sourcecode lang=”sh”]
#!/bin/sh

pamgradient black black rgb:80/80/80 rgb:80/80/80 854 16 | pamtopnm > grad1.pgm
ppmmake rgb:80/80/80 854 48 | ppmtopgm > grad2.pgm
pnmcat -tb grad1.pgm grad2.pgm > alpha.pgm
ppmmake rgb:33/66/99 854 64 > color.ppm
pnmtopng -force -alpha alpha.pgm color.ppm > mix.png
[/sourcecode]

Running this command builds a file called ‘mix.png’, which you can read in using the movie node in the avfilter chain, just as I did for the Creative Commons logo. Here’s an example:


If I were a real genius, I’d merge this whole thing into a little python script that could also manage the uploading to YouTube.

If this is any help to you, or you have refinements to the basic idea that you’d like to share, be sure to add your comments or links below!

Code from the Past: a tiny real time raytracer from 2000

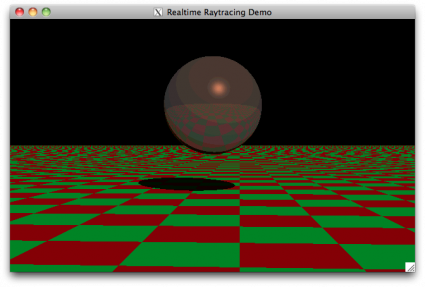
Back in 2000, I was intrigued by the various demos that I saw which attempted to implement real time raytracing. I wondered just what could be done with the computers I had on hand, without using any real tricks, but just a straightforward implementation of ray/sphere and ray/patch intersection. As I recall, I got two or three frames a second back then. I dusted off this code, and recompiled it for my MacBook (it uses OpenGL/GLUT, so it should be reasonably portable) and now it actually runs pretty reasonably. The code isn’t completely horrific, and might be of some use to someone as an example. It’s not clever, just straightforward and relatively easy to understand.

RTRT3, a tiny realtime raytracer

Addendum: I recompiled this on some of our spiffy machines at work, and immediately encountered a bug: there is nothing really to prevent infinite recursion. It’s possible (especially when the sphere and plane are touching) for a ray to get “stuck” between the sphere and plane. The simplest cure is to just keep track of how deep the recursion is by passing a “level” variable down through the intersect routines, and return FALSE for any intersection which is “too deep” (say, beyond six reflections deep). When modified thusly, I get about 96 FPS on my current HP desktop machine, running on one core. It has 12, incidently.

Cool Hack O’ Day: real pixel coding

The problem with working some place with lots of intelligent people is that it is increasingly hard to maintain one’s sense of superiority. Today, I tip my hat to Inigo. He has a very cool demo here, where he creates a program by creating and editing a small image in photoshop, saving it as a raw image file, and then renaming it to a .COM file and running it. It’s a testament to how clever, sneaky, and small programs can be.

Thanks to Jeri reposting this link on twitter, I’m getting lots of hits. Thanks Jeri. But be sure to visit Inigo’s original post to read more about this cool hack:
el trastero » Blog Archive » real pixel coding.

Neat article on William Friedman and Steganography

William F. Friedman is a name that might not be familiar to you unless you are a bit of a cryptography nut. Of course, I am a bit of one: I have a couple of long technical notes that were authored by Friedman on the cracking of some complex WWI era ciphers. But I must admit that I’ve barely scratched the surface of a very fascinating man and his career. The following article talks about Friedman’s work on steganography (the hiding of information in plain sight) and its relationship with Bacon’s cipher. Pretty neat stuff, and includes some material I had never seen before.

CABINET // How to Make Anything Signify Anything.

Demo of Enigma and the Turing Bombe at Bletchley Park

Carmen and I just got back from a trip to London, and we had a blast. One of the geekiest things we did while there was to take a day trip by train out to Bletchley Park to see the site of the codebreaking efforts by the British during WWII. As any long time reader of this blog must know, I’m pretty interested in codes and cryptography, and this was a bit of a personal thrill for me.

While we were there, we managed to get demonstrations of a real Enigma machine (very cool) and the modern reconstruction they completed of the Turing Bombe. I shot some video of it using a Canon G11, which isn’t all that great (the sound in particular is pretty terrible) but I thought I’d archive it on YouTube in case anyone else found it of interest. If you get the chance to go to Bletchley, I heartily recommend it: we spent four hours there, and it really wasn’t enough. Besides the Enigma and the Bombe, they have a reconstruction of Colossus, the first electronic digital computer that was used to break the German teleprinter code that the British called “Tunney”. They also have huts filled with many artifacts of the period, including one containing a bunch of radio equipment, dating all the way back to the crystal sets of the 1910s and 1920s to the Piccolo secure modem transceivers that were used in British embassies well past the war. Nifty stuff.

I have some pictures that I’ll get onto Picasa sometime soon of related nifty topics.

Hershey Vector Fonts

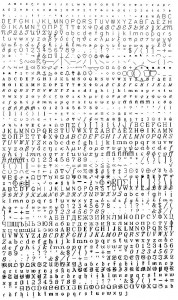
Nearly thirty years ago, I remember hacking together some simple code to display graphics on a WYSE 35 terminal. The terminals supported the TEK 4014 graphics commands to draw vectors, and I found the original “Hershey Fonts”, created by A.V. Hershey at the U.S. National Bureau of Standards, and placed in the public domain.

I’ve come full circle it appears. Having some vector fonts for my oscilloscope experimentation would be really handy. I had nearly forgotten them, until my friend Tom reminded me of them. Digging around found Paul Bourke’s cool web site which archived a lot of this information, and provided a quick, cogent explanation of the data:

The full Hershey set is supplied here for Roman

via Hershey Vector Font.

Colossus: The secrets of Bletchley Park’s code-breaking computers

As long time readers of my blog might remember, I’ve been fascinated by old cryptographic machines. I spent quite a bit of time tinkering around with them back when I was working on Simon Singh’s cipher challenge in his book. In particular, I spent a considerable amount of time reading up on the German Enigma machine, and eventually managed to break Stage 8 of that challenge using an Enigma machine simulator that I coded up. I also have a fair number of books on Enigma.

For all that, I didn’t actually know much about the other great code breaking effort at Bletchley Park: the break of the German “Tunny” code using Colossus, an even more impressive machine than the “Bombe” which allowed the breaking of Enigma. My lovely wife scanned my Amazon wishlist at Christmas, and picked up this book for me for my Kindle.

Colossus: The secrets of Bletchley Park’s code-breaking computers

If your tastes in reading are sufficiently refined to the point where reading about sixty year old code machines is interesting, I think you’ll enjoy the book. It isn’t too technical/nuts-n-bolts, but it does give a good basic idea of how the Tunny operated, and how the British developed an advanced code-breaking bureau that saved thousands of British lives and allowed the preservation of important supply lines in the face of German U-boats. If you are more interested in the history, you might do well to also pick up a copy of Codebreakers: The Inside Story of Bletchley Park, but Colossus includes more technical details on the Tunny.

After the war, the British destroyed Colossus, and most of the records of its function were lost or classified. But in 2000, the British released the “General Report on Tunny with Emphasis on Statistical Methods” which was written in 1945, and details much of the techniques they used to attack the Tunny. It’s online at alanturing.net and also makes for some interesting (and free!) reading.

The J1 Forth CPU, running on an FPGA

Tom showed me a link to The J1 Forth CPU, a very small processor which is coded in Verilog (only 200 lines!) and can run very fast on existing FPGA boards.

It is quite an intriguing design.

Forth is an intriguing if somewhat archaic programming language. In the bygone ages of my youth, I experimented a bit with FigForth on my Atari 400, which I found to be a pretty interesting and fun programming environment, but I found most Forth code to be rather inscrutable and hard to understand, at least, it was hard if you let more than a few days pass between when you wrote it and when you read it. Nevertheless, I don’t particularly fear Forth, and have used another somewhat similar language, namely Postscript, off and on over the years.

Forth is a stack-oriented language. In languages such as C, we are used to having a call-stack which contains not just return addresses, but also local variables. Forth is a different in that local variables aren’t typically stored on the stack. Instead, Forth splits things that C would place on a single stack into two separate stacks: the data stack (often just called “the stack”) and the return stack (or “rstack”). Forth “words” (procedures) generally specify actions that manipulate one or both stacks. For instance, the “plus” word, might take the two values at the top of the data stack and replace them with their sum. The “exit” or “;” word pulls a return address off the rstack, and transfers it to the IP (instruction pointer, basically the PC).

The J1 architecture is reasonably novel in that is optimized for the execution of Forth. It is a 16 bit machine, which has an internal state consisting of a 33 (not sure why not 32, but that’s what the docs say) deep data stack, a 32 deep return stack, and a 13 bit program counter. No condition flags, modes, or registers. It has 8K words (16 bit words) of RAM, and an additional 8K words for memory mapped I/O. Instructions fall into one of 5 classes:

  • If the MSB of the instruction is a one, the remaining 15 bits specify a literal value which is pushed onto the data stack.< ./li>
  • If the upper three bits are all zero, then the remaining 13 bits specify a new value for the PC (an unconditional jump).
  • If the upper three bits are “001”, then the machine pops the data stack, and if the value is zero, the remaining 13 bits specify the new PC (conditional jump).
  • If the upper three bits are “010”, then the remaining 13 bits specify a call address. The current PC is pushed to the return stack, and the remaining 13 bits specify the new PC.
  • The remaining case (upper three bits “011”) specify an ALU instruction. This single instruction can implement many Forth words directly. The remaining 13 bits are split into 7 fields which together specify a complex action. Four bits pick one of 16 operations that are performed on the top value (and for binary operations, the next value) of the stack. A single bits says whether the top value should be copied to the next value on the data stack. Another bit specifies whether the return address should be copied to the PC. Another bit specifies whether the top of the data stack should get copied to the rstack. Two two-bit fields give a set of signed increments/decrements for the data and rstack. And a last bit specifies if a RAM store operation should happen (the next value gets stored in the address pointed at by the top value).

And that’s pretty much it! Many basewords are very, very simple and can be implemented in just one or two op codes. The resulting machine runs very fast. It’s really quite clever: all the more so because it’s actually possible to understand how it works.

It actually is fairly close to the Hack Platform defined in Noam Nisan and Shimon Schocken’s book “The Elements of Computing Systems”. The “Hack” machine has only two kinds of instructions: an “address” instruction (similar to the literal instruction above) and the “compute” instruction, similar to the last: it specifies what function the ALU computes, the destination for the ALU, and a jump condition. They use this chip to implement a more conventional stack-based virtual machine. The two machines have similar specifications and power.

I found them both to be interesting. I’ll be reading the J1 Verilog code closely.

LatticeXP2 Brevia Development Kit, with a deal breaker

I’ve been playing with a BASYS2 FPGA development kit from digilentinc.com, and pondering the world of digital system design. I chose the BASYS2 because of its low price ($70) and because it included a reasonable number of LEDs, switches, a VGA interface and a connector for a PS/2 keyboard. Still, I’ve been looking for other small, reasonably priced FPGA kits, perhaps even ones which aren’t based on the Xilinx chips. Today I learned of a nice looking little $49 kit from Lattice:

LatticeXP2 Brevia Development Kit.

While it doesn’t include the VGA or PS/2 interfaces, it does include a 1Mbit static ram on board, which perhaps makes it more interesting for experimenting with FPGA cpus. But here’s the thing: it includes a parallel port programming cable, and literally no computers I currently use have a parallel port anymore. They tel you that you need a special USB cable: the HW-USBN-2A which is not included. Oh well, think I, that can’t be too bad…

That cable costs $149.

Yes, the programming cable for this FPGA board is 3x the cost of the entire board.

Deal, broken.

Somewhere… over the (simulated) rainbow revisited…

A couple of months ago, I did some simple simulations of light refracting through raindrops in a hope to understand the details of precisely how rainbows form. The graphs I produced were kind of boring, but they did illustrate a few interesting features of rainbows: namely, the double rainbow, and the formation of Alexander’s band, the region of relatively dark sky between the two arcs.

But the pictures were kind of boring.

So, today I finally got the simulation working, did a trivial monte carlo simulation tossing fifty million rays or so, and then generated a picture by converting the spectral colors to sRGB. Et voila!

Horribly inefficient really, but satisfying result.

Addendum: In comparing the results to actual photographs of double rainbows, it seems like my pictures are scaled somewhat strangely (the distance between the arcs seems large compared to the radius). I suspect this is mostly due to the linear projection that I used and the very wide field (the field of view of the camera is nearly 100 degrees, which compresses the center and expands the outside. I’ll have to make some narrower field pictures tomorrow when my mind can handle the math, I’ve reached my limit tonight.