Category Archives: Emulation

More on Caxton Foster’s Blue Architecture…

Okay, it’s been a long time since I wrote anything here. Not really a lot dramatic going on in life, I just have been spending my free time writing for Quora rather than my own blog. But I still am nerding out from time to time. Last night I dusted off an old project of mine and carried it a bit further…

I had written a short post before about a simulator I wrote for Caxton Foster’s “Blue” computer architecture described in his book Computer Architecture. I have the third edition published in 1985. The “Blue” architecture is ridiculously simple: only sixteen instructions, 4096 words of memory, and only one addressing mode. If you click back to my previous post, you’ll see a complete behavioral simulator for it, written in less than an hour.

Somehow this came back up, and I was suddenly intrigued by the idea of trying to write a simple program for it, just to test my ideas about how awful such a machine would be. Ultimately, my goal is to write a simple program that can compute the value of pi to around 100 decimal places. Such a program seems doable, but it’s not a complete cakewalk. But to achieve this, I thought it might be fun to write a simple assembler.

So, I shook the cobwebs that have covered the bits of my brain that understood yacc/lex/bison/flex and wrote a simple assembler for the architecture. It totals only about 250 lines of code, but can handle symbolic labels and all the instructions. It took me about two hours of wall clock time, with my attention split between programming and watching the latest episode of Grimm.

I doubt the assembler is of any real interest, but eventually I’ll get the code onto github.

I then sat down this morning, and wrote this simple program to take the signed value at the memory location VALUE and print it as a signed decimal number. It prints the sign then five digits, with leading zeros if necessary. I didn’t bother to comment
the code, but here it is…

[sourcecode lang=”text”]
PRINTVALUE:
LDA VALUE
JMA NEG
LDA PLUS
OUT
POS:
LDA S0
STA TMP0
SRJ DODIGIT
LDA S1
STA TMP0
SRJ DODIGIT
LDA S2
STA TMP0
SRJ DODIGIT
LDA S3
STA TMP0
SRJ DODIGIT
LDA S4
STA TMP0
SRJ DODIGIT
HLT

DODIGIT:
IOR JMPBIT
STA RETURN
LDA ZERO
STA DIGIT
LOOP: LDA VALUE
ADD TMP0
JMA DONE
STA VALUE
LDA DIGIT
ADD ONE
STA DIGIT
JMP LOOP
DONE:
LDA DIGIT
ADD FE
OUT
RETURN:
JMP 0

NEG:
LDA MINUS
OUT
LDA VALUE
XOR ONES
ADD ONE
STA VALUE
JMP POS

VALUE: .WORD 12323
TMP0: .WORD 0
DIGIT: .WORD 0
S0: .WORD -10000
S1: .WORD -1000
S2: .WORD -100
S3: .WORD -10
S4: .WORD -1
ZERO: .WORD 0
ONE: .WORD 1
ONES: .WORD $FFFF
JMPBIT: .WORD $A000
MINUS: .STRING "-"
PLUS: .STRING "+"
FE: .WORD 48
[/sourcecode]

The assembler spits out a series of 16 bit words which can be loaded into my
simulator…

[sourcecode lang=”text”]
0x602B, 0x9024, 0x6038, 0xC000, 0x602E, 0x702C, 0x8014, 0x602F,
0x702C, 0x8014, 0x6030, 0x702C, 0x8014, 0x6031, 0x702C, 0x8014,
0x6032, 0x702C, 0x8014, 0x0000, 0x4036, 0x7023, 0x6033, 0x702D,
0x602B, 0x102C, 0x9020, 0x702B, 0x602D, 0x1034, 0x702D, 0xA018,
0x602D, 0x1039, 0xC000, 0xA000, 0x6037, 0xC000, 0x602B, 0x2035,
0x1034, 0x702B, 0xA004, 0x3023, 0x0000, 0x0000, 0xD8F0, 0xFC18,
0xFF9C, 0xFFF6, 0xFFFF, 0x0000, 0x0001, 0xFFFF, 0xA000, 0x002D,
0x002B, 0x0030,
[/sourcecode]

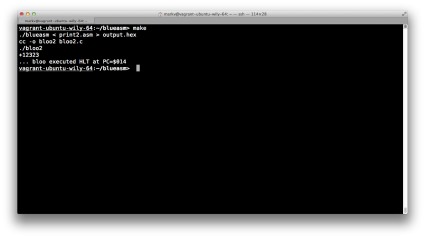
The data above gets simply compiled into my simulator and runs.

Screen Shot 2016-03-26 at 10.57.16 AM

Okay, so what’s fun to note about this?

There is only a single register, the accumulator. You spend a LOT of time loading things, modifying the value, and storing them back into main memory. There is no “immediate mode”, so you have to create memory locations to store common values like “1” and “0”. DODIGIT is a subroutine, which is called by the SRJ instruction. SRJ puts the PC into the accumulator, and then jumps to the specified address. To “return”, you OR in the bits to the accumulator to form a JMP instruction, and then store that at the end of your subroutine. There is no call stack. Although not demonstrated particularly here, the processor does not implement indexing or indirection. There is also no real condition registers such as CARRY or OVERFLOW, so implementing multi-precision arithmetic might be a challenge.

Foster’s book also details additions to this architecture, eventually becoming INDIGO, an architecture which is rather similar to a PDP-8.

Sure, if you are going to really learn computer archtictures, Patterson and Hennessy is probably a better path, but there is something like of pleasing in this archaic trip down memory lane. My pi computing program will percolate in my brain for a bit, and will find implementation on some other evening.

Addendum: Hackaday recently posted about Al Williams’ FPGA implementation of an architecture which is based upon Foster’s Blue machine. I believe he made a number of changes that make it more practical, but it might be worth looking at. He wrote a monitor, which seems to use opcodes which aren’t compatible with mine.

Addendum2: Pondering it some more throughout the day, it seems difficult to implement my idea of a pi computing program for this virtual machine. All of the algorithms that I can think of require 32 bit numbers, and the Blue architecture simply lacks the capabilities needed to implement it. It also is pretty weak on conditional statements: the only condition that you can branch on is the sign bit of the accumulator.
On calculators, Space Invaders and Binary Coded Decimal Arithmetic…

A couple days ago, one of my Twitter or Facebook friends (sadly, I forgot who, comment if it was you, and I’ll give you credit) pointed out this awesome page:

Reversing Sinclair’s amazing 1974 calculator hack – half the ROM of the HP-35

It documented an interesting calculator made by Sinclair in the 1970s. It is an awesome hack that was used to create a full scientific calculator with logarithms and trigonometric functions out of an inexpensive chip from TI which could (only barely) do add, subtract, multiply and divide. The page’s author, Ken Shirriff, wrote a nifty little simulator for the calculator that runs in the browser. Very cute. It got me thinking about the bizarre little chip that was at the center of this device.

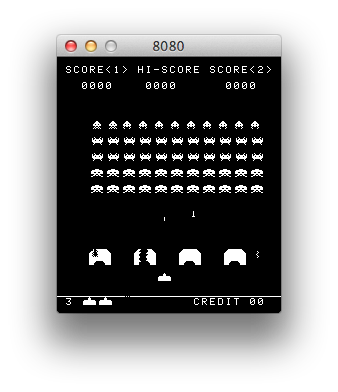
I’m kind of back in an emulator kick. I recently had dusted off my code that I had started for emulating the 8080 processor. I had originally wanted to implement a version of CP/M, but I remembered that the 1978 game Space Invaders was also based upon the 8080. It wasn’t hard to find a ROM file for it, and with a little bit of hacking, research and debugging, I had my own version of Space Invaders written in C and using SDL2, running on my Mac laptop.

Screen Shot 2015-09-16 at 12.46.01 PM

Fun stuff.  The sound is a little crude: most of the sound in the original game was generated by a series of discrete circuits which you can find on this page archived via the Wayback Machine. I briefly played around with simulating some of the sounds using LTSpice based upon these circuits (it appears to work fairly well), but I haven’t got that fully integrated into my simulator yet. For now, it just queues up some recorded sounds and plays them at the appropriate time. Everything is currently working except for the classic “thump… thump…” of their marching. I’ll get that working sometime soon.

Anyway, back to calculators. One thing on Ken’s page kind of made me think: he mentioned that the HP-35 had taken two years, twenty engineers, and a million dollars to develop. Mind you, the HP-35 was pretty revolutionary for its time. But I thought to myself “isn’t a calculator an easy hobby project now?”

After all, I had assembled a KIM-Uno, Oscar’s awesome little $10 board that emulates the KIM-1 microcomputer:

In fact, the KIM-Uno implements a floating point calculator as well. It’s brains are just an ordinary Arduino Pro Mini wired on the back. Arduino Pro Minis can be had for less than $3 from China. Could I make a fun little calculator using that as the basis?

My mind is obviously skipping around a lot at this point.

Of course, a bit more googling revealed that someone had done something very similar using the MSP430 chips from (appropriately enough, also manufactured by Texas Instruments). Check out the build thread here.. It’s pretty nifty, and uses a coin cell to drive it, as well as some very classic looking “bubble LED displays”, which you can get from Sparkfun. Pretty cool.

Anyway…

For fun, I thought it might be fun to write some routines to do binary coded decimal arithmetic. My last real experience with it was on the 6502 decades ago, and I had never done anything very sophisticated with it. I understood the basic ideas, but I needed some refresher, and was wondering what kind of bit twiddling hacks could be used to implement the basic operations. Luckily, I stumbled onto Douglas Jones’ page on implementing BCD arithmetic, which is just what the doctor ordered. He pointed out some cool tricks and wrinkles associated with various bits of padding and the like. I thought I’d code up a simple set of routines that stored 8 BCD digits in a standard 32 bit integer. His page didn’t include multiplication or division. Multiplication was simple enough to do (at least in this slightly crazy “repeated addition” way) but I’ll have to work a bit harder to make division work. I’m not sure I really know the proper way to handle overflow and the sign bits (my multiplication currently multiplies two 8 digit numbers, and only returns the low 8 digits of the result). But.. it seems to work.

And since I haven’t been posting stuff to my blog lately, this is an attempt to get back to it.

Without further ado, here is some code:

[sourcecode lang=”C”]
/*
* A simple implementation of the ideas/algorithms in
* http://homepage.cs.uiowa.edu/~jones/bcd/bcd.html
*
* Written with the idea of potentially doing a simple calculator that
* uses BCD arithmetic.
*/

#include <stdio.h>
#include <stdint.h>
#include <inttypes.h>

typedef uint32_t bcd8 ; /* 8 digits packed bcd */

int
valid(bcd8 a)
{
bcd8 t1, t2, t3, t4 ;
t1 = a + 0x06666666 ;
t2 = a ^ 0x06666666 ;
t3 = t1 ^ t2 ;
t4 = t3 & 0x111111110 ;
return t4 ? 0 : 1 ;
}

bcd8
add(bcd8 a, bcd8 b)
{
bcd8 t1, t2, t3, t4, t5, t6 ;

t1 = a + 0x06666666 ;
t2 = t1 + b ;
t3 = t1 ^ b ;
t4 = t2 ^ t3 ;
t5 = ~t4 & 0x11111110 ;
t6 = (t5 >> 2) | (t5 >> 3) ;
return t2 – t6 ;
}

bcd8
tencomp(bcd8 a)
{
bcd8 t1 ;

t1 = 0xF9999999 – a ;
return add(t1, 0x00000001) ;
}

bcd8
sub(bcd8 a, bcd8 b)
{
return add(a, tencomp(b)) ;
}

bcd8
mult(bcd8 a, bcd8 b)
{
bcd8 result = 0 ;
bcd8 tmp = a ;
bcd8 digit ;
int i, j ;

for (i=0; i<8; i++) {

digit = b & 0xF ;
b >>= 4 ;

for (j=0; j<digit; j++)
result = add(result, tmp) ;

tmp <<= 4 ;
}
return result ;
}

int
main(int argc, char *argv[])
{
bcd8 t = 0x00009134 ;
bcd8 u = 0x00005147 ;
bcd8 r ;

r = mult(t, u) ;
printf("%X * %X = %X\n", t, u, r) ;
}
[/sourcecode]

I’ll have to play around with this some more. It shouldn’t be hard to move code like this to run on the Arduino Pro Mini, and drive 3 bubble displays (yielding 11 digits plus a sign bit) of precision. And I may not use this 8 digits packed into 32 bit format: since I want 12 digits, maybe packing only 4 digits into a 32 bit word would work out better.

Anyway, it’s all kind of fun to think about the clanking clockwork that lived inside these primitive machines.

I’ll try to post more often soon.

The Kim-Uno — a Kim-1 simulator

Ken Boak had mentioned on twitter that someone was creating a blinken-lights front end for the simh simulator of the PDP-8, called the PiDP-8, since you can power the entire thing from a Raspberry Pi. Very cool, but not quite available yet. What was available from Oscar is the Kim-Uno, a simulator for the old KIM-1 computer, a single board computer based upon the MOS6502 with a simple LED display and a whopping 1K of memory, first shipped in 1977 or so for about $245. The simulator is incredibly simple: a board, buttons, leds, and an Arduino Micro to drive it all. I went ahead and ordered one, just for kicks.

But you don’t actually need the hardware to play with this: you can get the code running on an ordinary Arduino Uno. So I did. It’s setup to run Microchess out of the box. Microchess is cool because it can play chess in less than 1K of code, and probably was the first commercial game software produced for hobbyist computers.

The Kim-Uno sketch is a little bit odd though. I’ve begun tinkering with it, and cleaning it up a bit. First of all, I thought it was confusing the way it tried to include the 6502 core emulation (written by Mike Chambers). It is written in C, and to merge it into the sketch required a bit of chicanery using ‘extern “C”‘ directives. Bleh, I renamed cpu.c to cpu.cpp, and cleaned that up. I fixed some forward declarations. I uncovered a couple of bugs by paying attention to compiler warnings. It won’t even come close to compiling on non-Arduino platforms, so I deleted lots of conditional definitions. And I generally just tidied things up. Along the way, I checked out the code that Oscar put in to scan the six digit display, which took a lot of pins. As is happens, I had an 8 digit display which used the 74HC595, which I had gotten working before using an interrupt driven display driver. I merged that code in, and now I had a hardware display like the Kim wired to my Uno. Probably refreshes more often than the original, but looks great!

When I get my code tidied up more, you’ll be able to download it on github. Stay tuned.

Why are tiny systems so big?

The last five or so years has been a remarkable period in computing. About five years ago, I began to fear that computing would be increasingly pre-packaged: that laptops and tablets would totally take over the market and the ability to find computers which were well suited for programming and experimentation would more and more difficult.

But something remarkable happened that I didn’t see coming: the opposite occurred. The market for small development boards and computers exploded. At many different performance levels, and very inexpensive price points, computers for experimentation flourished and people began programming in a way that they didn’t before. We see the rise of platforms like the Arduino, the Raspberry Pi, and the Beaglebone Black at super-inexpensive price points. It is truly an awesome time for computer experimentation.

But aesthetically there is something that jars me a bit: that these small, simple systems aren’t really that small or simple. Consider the Arduino Uno: it is a small 8 bit computer with only 32K of flash memory. But the development environment for the Arduino isn’t self-hosted: you need a separate cross compiling host, and the software is dozens of megabytes in size. In the 1980s, we had systems of comparable overall power (based upon processors like the 6502 or Z80) but these machines typically self-hosted interpreters (most commonly for BASIC) that allowed development to proceed without an additional cross-compiling development system. While these systems lacked some of the power of modern development environments, they also were simpler and easier to master.

Systems like the Raspberry Pi are at least self-hosted. I really like that feature: you load up an SD card with a system like Raspbian or Ubuntu, and you have a complete Unix system. But I can’t help but wonder if this is a bit too daunting for the hobbyist without three decades of Unix experience.

I guess what I think is interesting is providing a smaller, closer to the “bare-metal” environment for embedded programming that can be self-hosted: that can run on the target hardware, with only the thinnest layers of operating system.

Okay, so that’s the idea. What options are there?

One of the most interesting things I’ve begun looking at is Fabrice Bellard’s TCC compiler. Having a C compiler built into your embedded machine may seem a bit odd, but Bellard’s compiler is relatively tiny and can generate code for either Intel or ARM. Experimenting with a few of my own programs shows it to be remarkably capable: it compiled both my toy raytracer and the dump1090 software defined radio program. The resulting code is obviously not super efficient: my raytracer runs about 1/2 speed relative to the code compiled with gcc. But it does work, and the compiler is fast and small enough to self host. Pretty interesting.

What kind of target hardware should we target? It seems like we can get a lot of leverage by targeting ARM based boards, and adopting popular, easily available platforms would make it easier for people to get started. In most respects, it’s hard not to pick the Raspberry Pi: it’s popular, it’s available, and a fair amount of information about “bare metal” programming it seems to be available. It also seems that we can use emulators like QEMU to help bootstrap and debug.

Do we need an operating system? If so, how much of one? It’s kind of an open question. I’d like to see something whose size is maybe a few thousand lines of code. Minix? Xinu? A simple real time OS/executive maybe?

The Beaglebone: an $89 Time Machine…

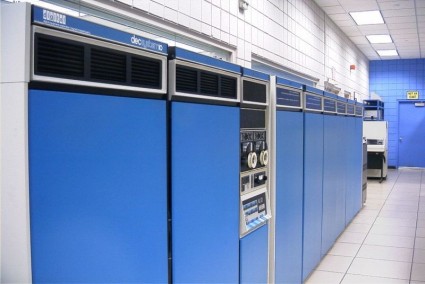
A DEC SYSTEM 10, just like the computers of my past.

At the Maker Faire, I splurged for a little bit of computing hardware called the Beaglebone. It’s an $89 ARM based computer that runs at 700Mhz, and includes a MicroSD card slot and Ethernet, as well as a USB connector. I wasn’t sure what I was going to use it for, but I frankly can’t resist cheap hunks of hardware, and unlike the Raspberry Pi (which frankly is more interesting, since it includes video, which the Beaglebone lacks) you can actually walk up to a counter (well, at the Maker Faire you can) and buy one. So I did. Because Tom bought one. And I wouldn’t want to be left behind.

But what to do with it? Well, it boots Linux off the SD card, so I could do anything with it that I could do with a Linux machine. I’ve mused about my computing past before on this blog. So, I thought: “let’s see if I can get simh installed on it, and simulate the PDP-10/DEC 1091 of my computing past.

It’s frankly pretty trivial to do. It’s got gcc and wget installed, so all you have to do is fetch the source and compile it. You might want to get the pcap library installed so you can do simulated networking, and the machine itself is pretty slow (I discovered that when it’s powered from the USB, it runs at only 500Mhz, which seems really slow). But there is no trouble getting it installed. Then, all you need is some software to run on it.

In my previous excursion into the world of simh, I worked through installing TOPS-10 from scratch, but I didn’t feel like stumbling through that process again, so I searched the web and found a prebuilt image suitable for use. I downloaded it, unpacked it, and ran pdp10, starting it just as documented.

And… I was again hurled back through time. BASIC, COBOL and FORTRAN. 36 bit architecture. Craziness. Running on $89 worth of hardware, consuming 1W and the size of an Altoids tin.

I haven’t benchmarked it, but I suspect that it runs several times as fast as the original machine. I configured it to allow one to telnet into the server to simulate serial connections. I’m sure with a little work, I could dust off the corner of my brain that held information about this stuff, and figure out how to get ADVENTURE running.

And then I thought to myself: what if I wanted to hook real serial terminals to it? A little investigation reveals that the Beaglebone has six hardware UARTs. One is dedicated for connection via USB, but four are wired to expansion pins. I dug a little more, and uncovered this awesome project: the DECbox. The author mounted a beaglebone inside of a vintage DEC VT100. He even talks about modifying the VT100 to have serial connectors on the back so you can hook in additional terminals. Since the Beaglebone can simulate a wide variety of DEC machines, you could have a PDP-8, PDP-10 or PDP-11 all inside the same space.

Very cool. I’ll be keeping my eye out for a real VT100.

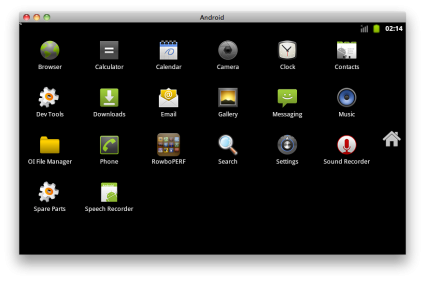
Addendum: in my spare time, I downloaded an image for the Gingerbread release of the Android OS. Because the Beaglebone doesn’t have a display, you start a VNC server which serves as a virtual graphics device, and then connect to it via a VNC client like TightVNC (for Windows) or Chicken of the VNC (for Mac OS X). I did this more for curiousity than anything else: it’s too slow to really be an adequate demo platform. But it might be of interest.

Gingerbread Android, running on the Beaglebone and viewed using Chicken of the VNC.

Addendum2. I was digging around to find power requirements for the board. It turns out that if you don’t use the onboard USB, the current is supposed to be around 170ma, which makes the power less than 1W. But using the USB raises that a lot: the peak is almost 500ma during boot, which is about 2.5W. If you are concerned about power, ditch the USB as a power source.

ksim 8080 simulator released

Fellow hacker Eric Smith has released the code for an 8080 simulator. I spent a few hours hacking my own 8080 emulator a few months ago, and at least got it to run Tiny BASIC, but I was never quite successful in getting it to boot CP/M. Among some of the problems were that I wasn’t quite assured that I implemented all the opcodes properly. There are some programs which act as an “opcode exerciser”, and produce a series of checksums that you can use to detect bugs, but I found that even well known simulators like simh didn’t match the output from real 8080s. It appears that Eric has done the heavy lifting and figured this stuff out, and released the fruits of his labor as a GPL’ed reference implementation, checked against the actual running against an original Sol20. I’ll have to go back sometime and see where my own simulator has gone awry, but until then, thanks Eric!

ksim 8080 simulator released | What's All This Brouhaha?.

8080 bottles of beer…

Okay, not 8080 bottles, but 99 bottles of beer anyway…

[proof:~/adad] markv% ./adad
::: brainwagon 8080 emulator version 1.0
::: 637 bytes of code loaded.
99 bottles of beer on the wall, 99 bottles of beer.
Take one down, pass it around, 98 bottles of beer on the wall.
98 bottles of beer on the wall, 98 bottles of beer.
Take one down, pass it around, 97 bottles of beer on the wall.
97 bottles of beer on the wall, 97 bottles of beer.
Take one down, pass it around, 96 bottles of beer on the wall.
96 bottles of beer on the wall, 96 bottles of beer.
Take one down, pass it around, 95 bottles of beer on the wall.
... output trimmed for the sake of brevity ...
5 bottles of beer on the wall, 5 bottles of beer.
Take one down, pass it around, 4 bottles of beer on the wall.
4 bottles of beer on the wall, 4 bottles of beer.
Take one down, pass it around, 3 bottles of beer on the wall.
3 bottles of beer on the wall, 3 bottles of beer.
Take one down, pass it around, 2 bottles of beer on the wall.
2 bottles of beer on the wall, 2 bottles of beer.
Take one down, pass it around, 1 bottle of beer on the wall.
1 bottle of beer on the wall, 1 bottle of beer.
Take one down, pass it around, no more bottles of beer on the wall.


::: 53132 cycles counted.
::: 0.00 seconds elapsed.
::: 0.03 seconds on a 2Mhz 8080.
::: 11.50 x speedup.

Emulator progress, and envy…

I’ve made a tiny bit of headway, but also encountered a link which makes me envious of much greater hacking skill. Óscar Toledo did an 8080 emulator that can boot CP/M as part of the 19th International Obfuscated C Code Contest, winning Best of Show. Its brevity is the “soul of wit”. Check it out.

Toledo 8080 emulator

Óscar also has written several tiny chess programs, and a Javascript chess program. Awesome.

While I didn’t find his code to be all that helpful (it’s, well, dense to say the least), I did find his approach to be helpful. A few additional minutes of hacking, and I managed to get the Tiny BASIC that he runs on his simulator to work on my own. Witness the following BASIC program:

>LIST
  10 PRINT "A PROGRAM TO EXPLORE THE 3 * X + 1 PROBLEM"
  20 FOR I = 1 TO 10
  25 T = I 
  30 GOSUB 100
  35 PRINT
  40 NEXT I
  50 STOP
 100 PRINT T,
 110 IF T = 1 GOTO 1000
 120 LET J = T / 2 
 130 IF 2 * J # T GOTO 140
 135 LET T = J
 136 GOTO 100
 140 T = 3 * T + 1 
 150 GOTO 100
1000 PRINT
1010 RETURN

OK
>RUN
A PROGRAM TO EXPLORE THE 3 * X + 1 PROBLEM
     1

     2     1

     3    10     5    16     8     4     2     1

     4     2     1

     5    16     8     4     2     1

     6     3    10     5    16     8     4     2     1

     7    22    11    34    17    52    26    13    40    20    10     5    16     8     4     2     1

     8     4     2     1

     9    28    14     7    22    11    34    17    52    26    13    40    20    10     5    16     8     4     2     1

    10     5    16     8     4     2     1


OK
>

Not bad! I suspect that even though my 8080 simulator is still pretty rough, I could get CP/M booted on it in much the same way that he did. More later.

More on my 8080 emulator…

I spent some more time hacking on my emulator today. The key to getting an emulator to work is to have good, clear references on how the system works, and some example code that torture tests your simulator. Except for the DAA instruction (more on that later), the documentation for the 8080 is pretty good, and reading about several of the VHDL and Verilog simulations of the 8080 turned me onto CPUDIAG.ASM, a program which was designed to exercise the 8080 (apparently early NEC clones of the 8080A had difficulties with the DAA instruction). As it turns out, this little chunk of code proved to be incredibly useful.

;***********************************************************************
; MICROCOSM ASSOCIATES  8080/8085 CPU DIAGNOSTIC VERSION 1.0  (C) 1980
;***********************************************************************
;
;DONATED TO THE "SIG/M" CP/M USER'S GROUP BY:
;KELLY SMITH, MICROCOSM ASSOCIATES
Click here for the complete source.

After a couple of hours more tinkering, my efforts were rewarded with:

::: brainwagon 8080 emulator version 0.0
::: 1453 bytes of code loaded.

 CPU IS OPERATIONAL

Huzzah! Okay, there are still a few things this thing doesn’t test, like interrupts and the like. And I couldn’t figure out how the DAA instruction is supposed to work. It’s not clear to me that SIMH implements this properly either, a quick peek at their code seems to show that none of the ADD instructions do anything to set the auxillary carry bit. For now, I just commented out the offending tests. I’ll put them back in when I have some confidence that I understand how they are supposed to work.

Now that the instructions basically work, it appears that the next thing to do would be to try to figure out how to boot CP/M on the virtual machine. Then… tidy it up to see if I can shrink the code (the code for my linux box is about 12K). Then… well, we’ll see.

An 8080 emulator…

A couple of days ago I got intrigued by this cool project which ran CP/M on an AVR. The basic idea was to equip an AVR with an external RAM, and then write a compact 8080 emulator to run on the AVR. Instead of floppy drives, the AVR accesses data stored on a small SD card. I thought it was really cool.

So I decided to see how far I could get.

A couple of hours work spent watching TV had the basic framework in place, and it’s beginning to execute code. For instance, here is the simple “Hello World” program, written in 8080 assembler (it presumes that you are running on a CP/M system to supply a printing system call):

bdos    equ     0005H
        org 0x100
start:  mvi c,9
        lxi d,msg
        call bdos
        hlt
msg:    db 'Hello World!', 0xA, '$'
end     start

Unless you like assembling code by hand, you need an assembler. I thought about using a simulated CP/M system running on simh, but that quickly got annoying, so instead I searched around and ultimately stumbled on asmx, a multi-CPU assembler which seemed to work just fine. It produced a nice little Intel hex format file, which my emulator can then load. I trap calls to the BDOS entry vector, and implement them with standard C calls (at the moment), and the net result is the rather unimpressive:

::: brainwagon 8080 emulator version 0.0
::: 23 bytes of code loaded.
Hello World!

Most of the control functions work, I need to get the conditional returns to work properly. I don’t have interrupt support yet, nor does it compute cycle counts, but the overall framework is quite good. I suspect that another couple of hours of work will get 95% of the instructions working, and then I could consider doing something like implementing Space Invaders. Ultimately, I kind of want to run a simple simulated CP/M system. We’ll see how it goes: stay tuned.