Annoying: the videos which I inserted in here late last night seemed to not be working this morning. Granted it was late and my COVID soaked brain may not be working at full efficiency and I haven’t done this in a while but… I’ll get it sorted out later today.
It’s been sometime since I made any update to my blog. I keep thinking I’m going to restart, but then it delays. Sigh. But some events do occur which make me think that at the very least I should write up some notes, and the April 8th total solar eclipse was one of them.
An old and dear friend of mine, Jeff and I started planning this trip back in August of last year. Originally we had conceived of traveling to Texas, but research indicated that if we tried wanted the absolute best chance of seeing the eclipse, historically Mazatlan, in Sinaloa Mexico was going to be the better choice. It was, however, neither cheap nor convenient. We could not find a reasonably (sub $3K) that would fly us directly to Mazatlan from anywhere reasonable, so we did a crazy flight which involved Jeff driving to meet up with me at my home, then flying OAK->LAX. We ended up spending the night in LAX, then flying learly from LAX to Mexico City, an 8 hour lay over then flying from Mexico City to Durango, where we got in late at night and ended up renting another hotel. In the morning, we drove from Durango to Mazatlan. We had originally reserved two rooms for four nights, but as it happened our return flight (which was our departure just in reverse, Durango->Mexico City->LAX->Oakland, but all in one day) was leaving at 6:00AM, so we had to leave a night early. We ended up convincing our hotel not to charge us for the extra night, and got a separate hotel in Durango. We thought that our hotel in Mazatlan was going to be a single kingsize bed, so we each got a room, but as it happens, our suites were a king+double and we could have easily just used one room. Oh well. It wasn’t cheap, but we did all the traveling outbound without significant problem. Our 3.5 hour drive from Durango to Mazatlan was via a toll road, and was both fast and efficient. The only true excitement was our spotting of a cluster of small puppies (“wild chihuahuas!) that came across the road. They were cute, but I was busy driving and didn’t get any pictures.
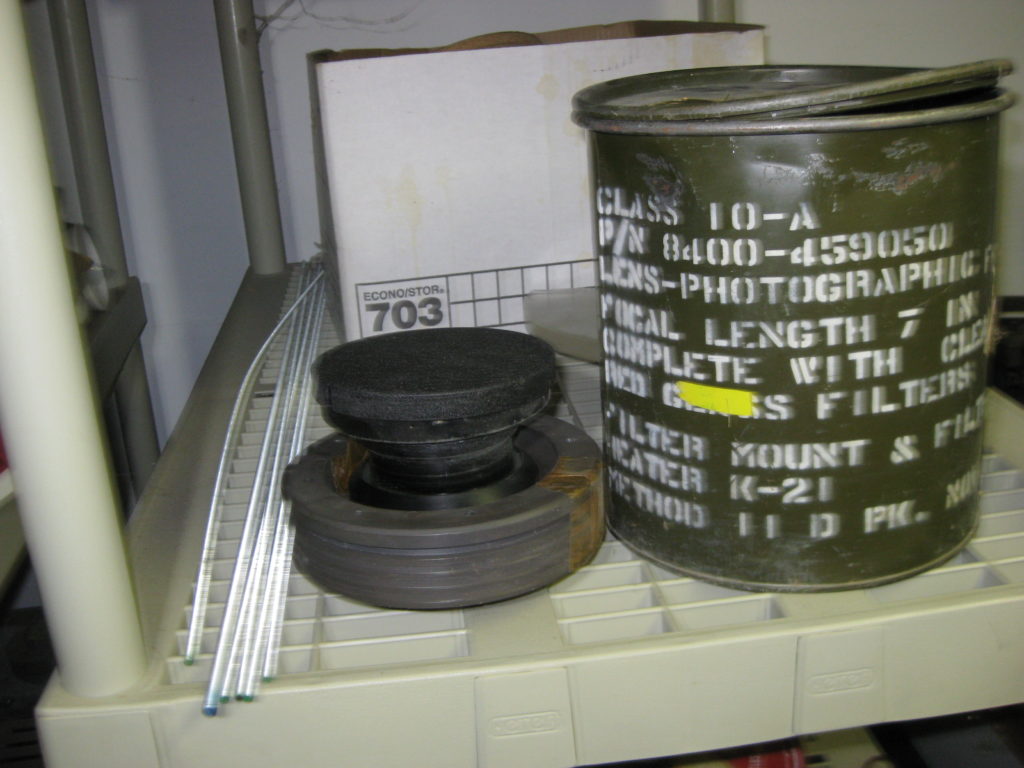
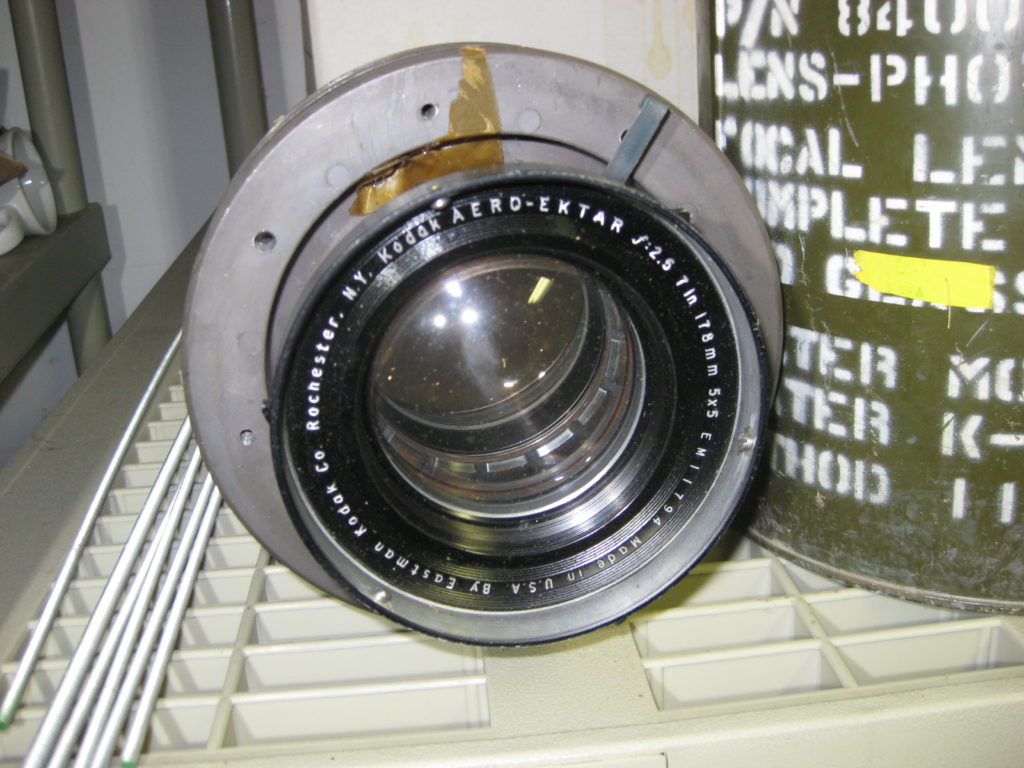
Jeff and I each brought an SLR with appropriate filtration. Mine was a Canon T5i that I had purchased used, a snazzy solar filter that clipped on magnetically, and a “Heliofind” automatic solar tracker. The notion of the tracker was that I wanted it to automatically track the sun, and therefore would free me from the problem of actually watching the camera and adjusting it. My idea was to automate all the exposures using a program called “BackyardEOS” because Jeff had previously used the Nikon version during the 2017 eclipse that he viewed from Madras, Oregon. I had purchased an appropriate 15ft Mini-USB cable, and had done some previous experiments. As a backup plan, I had experimented with adjusting exposures manually, and tripping it with an inexpensive intervalometer. I had done tried this before during the October 2023 annular eclipse that we did as a dry run/practice. (I should really get those pictures here too).
But during our couple of days in the windup to the eclipse, I did some additional testing in our hotel room, and one thing became obvious: that BackyardEOS wasn’t really designed for eclipse photography. In particular, it had no idea what time the eclipse was, or even what time it was. If I wanted to preprogram a “plan” for the eclipse, I’d have to set it up, and test it manually/repeatedly. We experienced some situations where the software got ahead of the cameras ability to keep up, and then would lock up, which I thought would be stressful at minimum and disasterous at worst. So, I sought another situation.
I decided to use the program SETnC for my windows laptop. https://robertnufer.ch/06_computing/setnc/setnc_page.htm
It had a number of advantages and gave me some confidence that it might work better. It was designed specifically for eclipses, and had the data from the April 8th eclipse. Once I entered our latitude and longitude, it determined the exact time for our local circumstances. I then set it up to take a set of three exposures every five minutes during the partial phase, then about eight seconds ahead of second contact, to eight seconds after, it would snap a picture every second to catch “Baily’s Beads” and “the diamond ring”, and during the 4 minutes of totality, it would cycle with images from 1/1000 to 4 seconds. We bracket these exposures so long in an attempt to catch both details of the prominences, as well as details of the corona, and even (potentially) earth shine. I had originally intended to shoot these in RAW+JPG mode, but it was clear that my aging camera couldn’t keep up with my desired pace. With some reluctance, I set the camera to capture merely JPG pictures. In retrospect, I wonder if part of my poor performance is really due to the relatively pedestrian write speed of my budget SD cards.
Note to self: before next eclipse, do more extensive testing of write speeds of better cards, to see if I can do raw mode with a better card.
All photos were shot with a basic 75-300mm telephoto (about $150 new) at f/8 and ISO 100.
Or, at least that was my intention. I had two small problems:
Note to self: setting the ISO mode was tricky. On the day of, the first few minutes during partial eclipse set ISO to AUTO instead of 100. This was probably undesirable, and made the exposures rather hard to predict, and many of those photos seemed to be overexposed. It’s better to leave fewer decisions to the automatic camera settings. Make sure that ISO is set properly.
Additional note to self: I didn’t actually set the zoom to the full 300mm of the camera, despite that being my attention. I suspect that this was because I shot some quick test shots of the beach at a more modest zoom setting (230mm) and then never reset the camera. The extra 25% image scale would have been good to have.
Another note which I thought was odd: the SETnC program doesn’t understand local time zones. You have to set your laptop to be in UTC or it won’t do the right thing. This was less than entirely convenient, but once I realized that, it wasn’t hard to get it to do do what I wanted.
I did some test runs the day before, and had increasing confidence that it might do something good. It was exciting.
But the weather forecasts were… not promising. The weather maps indicated a band of clouds very closely followed the track of totality. We decided that on the morning of the 8th, we’d get up early and decide if we wanted to drive out of town, or risk it out near the beach. I was up at around 4:00am, couldn’t get back to sleep. We had arranged to meet with Jonathan (a geocaching acquaintance of Jeff’s) at 7:00 to make the final determination.
We had some high clouds that ranged from “very thin” to “troublingly dense”. We weren’t sure what was going to happen, but decided that it was probably no more likely to get better circumstances within an hour of driving, and there would be additional risks. We decided to setup at our hotel. About 9:00am, I headed down to scout.
Our hotel (the Palms Resort of Mazatlan) had been a pretty lively “party hotel” for saturday and sunday, but this was Monday, and seemed to be a bit more calm. We had a couple of places on the pool deck that looked like it could have been okay, but we instead decided to shift to the adjacent hotel’s pool deck, and set up.
I began to get hopeful. While there were still high clouds, they didn’t appear to be too dense. When partiality began, I had my laptop ready, my mount was tracking, and I had focused the best I could. (I did manual focusing, as I was not sure the autofocus would actually do better). I had the computer setup, but also rigged up the intervalometer/remote camera release. I was pleased to find that even while the computer was in control of exposures, I could also trigger the shutter by hand. I wasn’t certain that would work.
Here I am with 15 minutes to go:
Once the partial phase had begun, i had three issues:
First, the Auto ISO issue I mentioned above. I had temporarily paused the automatic mode of SETnC, did a tweak, and then set it running again. Oddly, it then reran all the events which had occurred up to the current time, but then seemed to be acquiring the new photos in the right node. No harm, no foul.
Secondly, I did manage to get the software into its “test” mode. In test mode, it advances the clock to the time just five seconds before the next “event”. This is helpful when you are testing the day before, but it was somehow triggered accidently, probably because it was hard to read the screen of my laptop in the son.
Lastly, when I took it back out of “test” mode, for some reason it informed me that it wouldn’t do any additional partial phase photos for 8 minutes. This was because in test mode it had thought it was 8 minutes later, and so those things were “done”. This is where my intervalometer/camera release came in handy. I just snapped individual photos at more or less random intervals until the software plan caught up to “real” time.
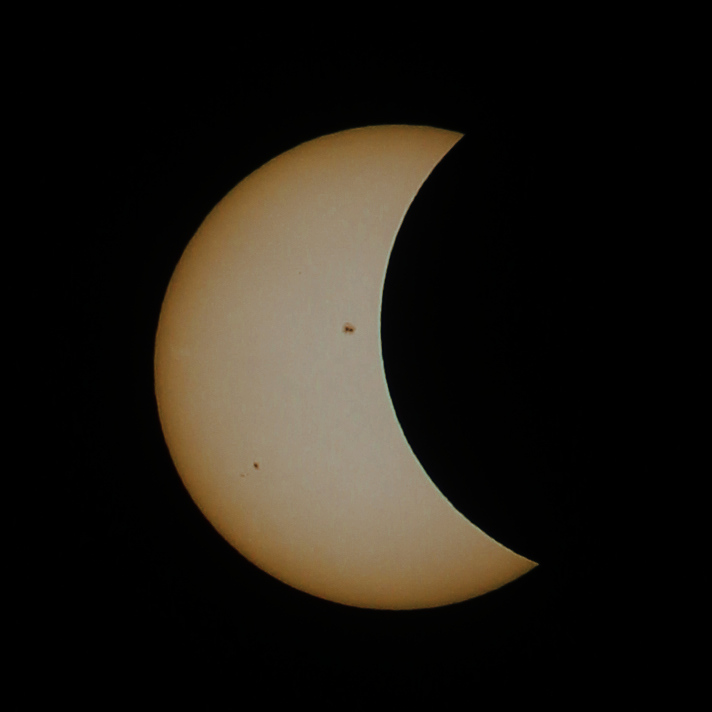
There continued to be high clouds, but through our mylar glasses, would continued to be able to see the clear partial phases. Here is a (lightly) post-processed image of the partial phase, showing the most prominent sunspot.
Jeff had setup his Gopro beneath his camera tripod, aimed out at the ocean and later uploaded this footage of the entirety of totality (or is that the totality of entirety?) In real time, it’s hard to see the upcoming lunar shadow (approaching at something like 1500mph) but if you scrub through it you can see it pretty clearly.
https://youtu.be/_uvY844okfc?si=xZSppEzsWDOzz2k4
As the countdown got closer, the quality of the light got strange, and then dimmer. At about 12m45s into the video, you can hear me call out that “it’s going!” and then around 13m10s, totality begins.
My camera setup worked really well. I shot 410 photos overall. Here is the best of the best, cropped from their originals, but processed only very minimally.
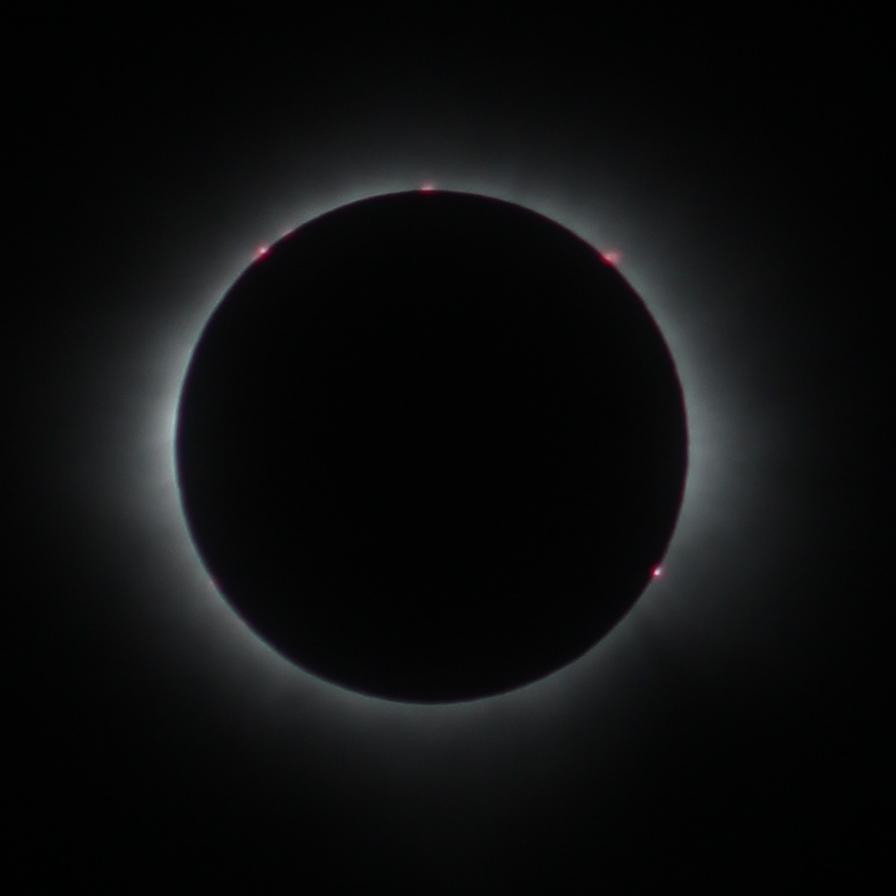
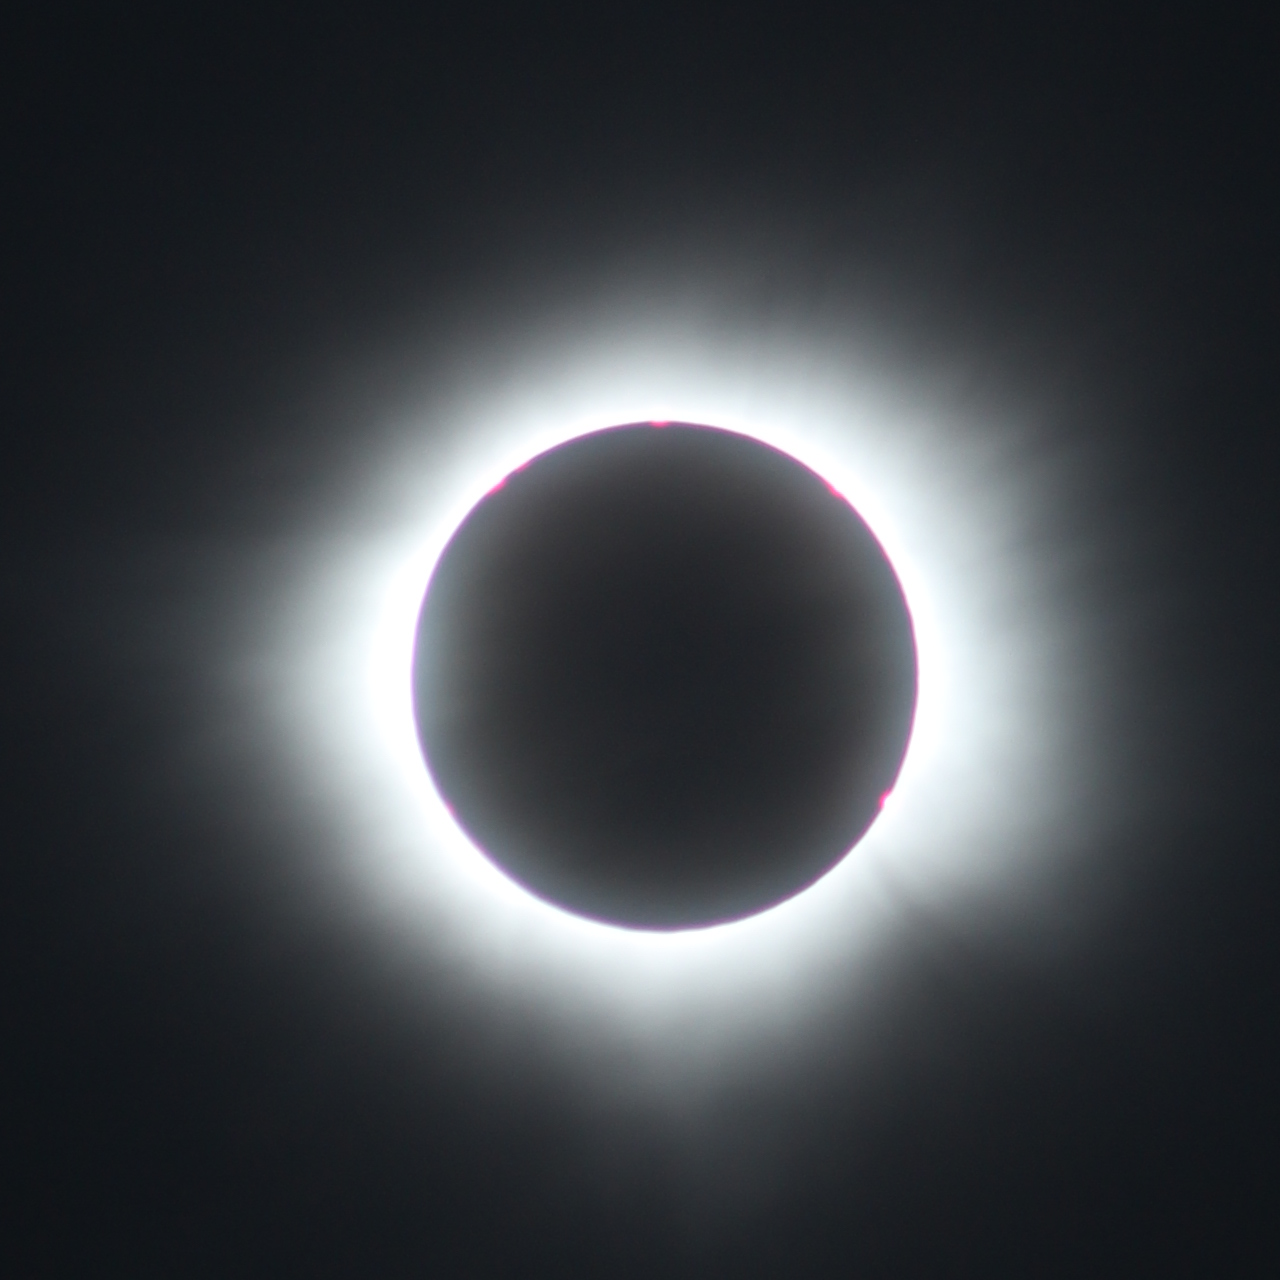
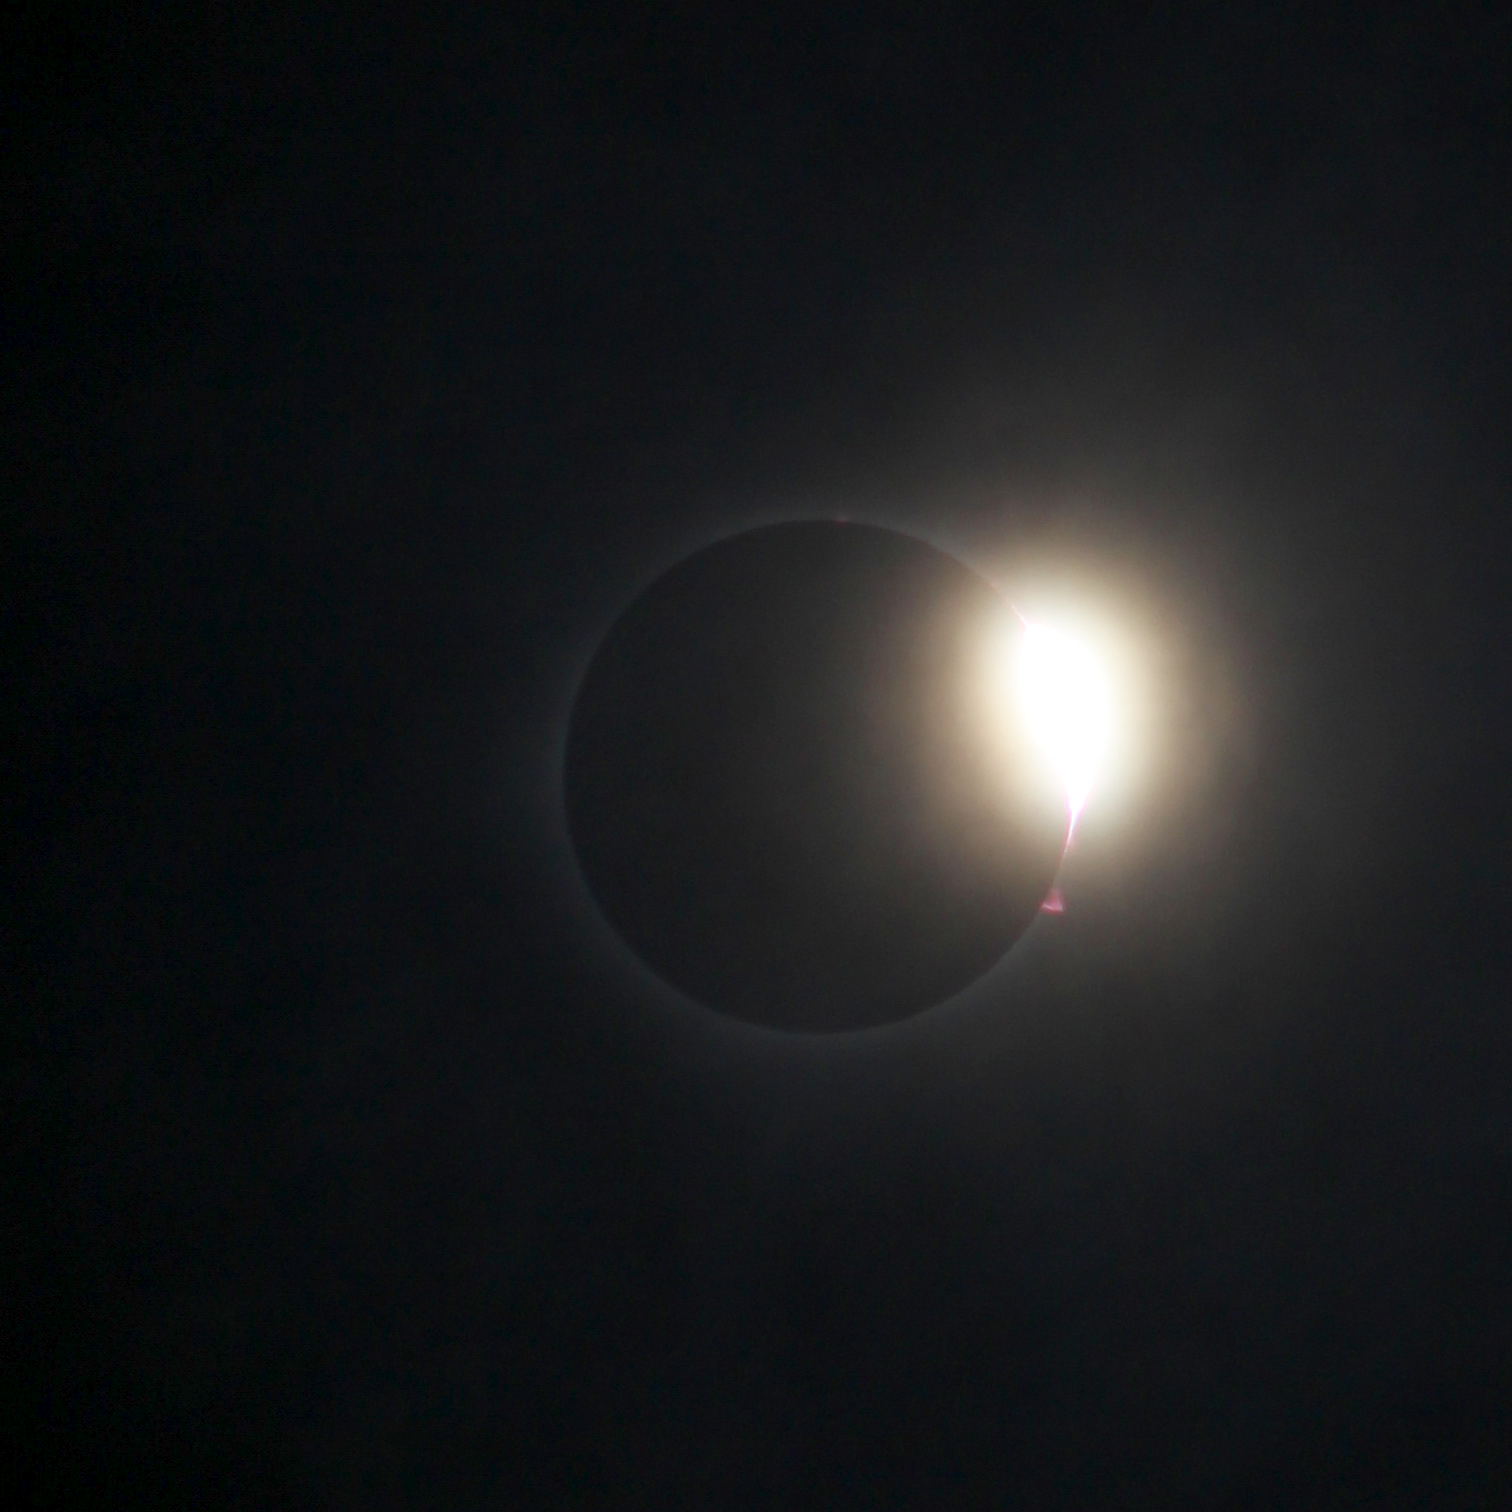
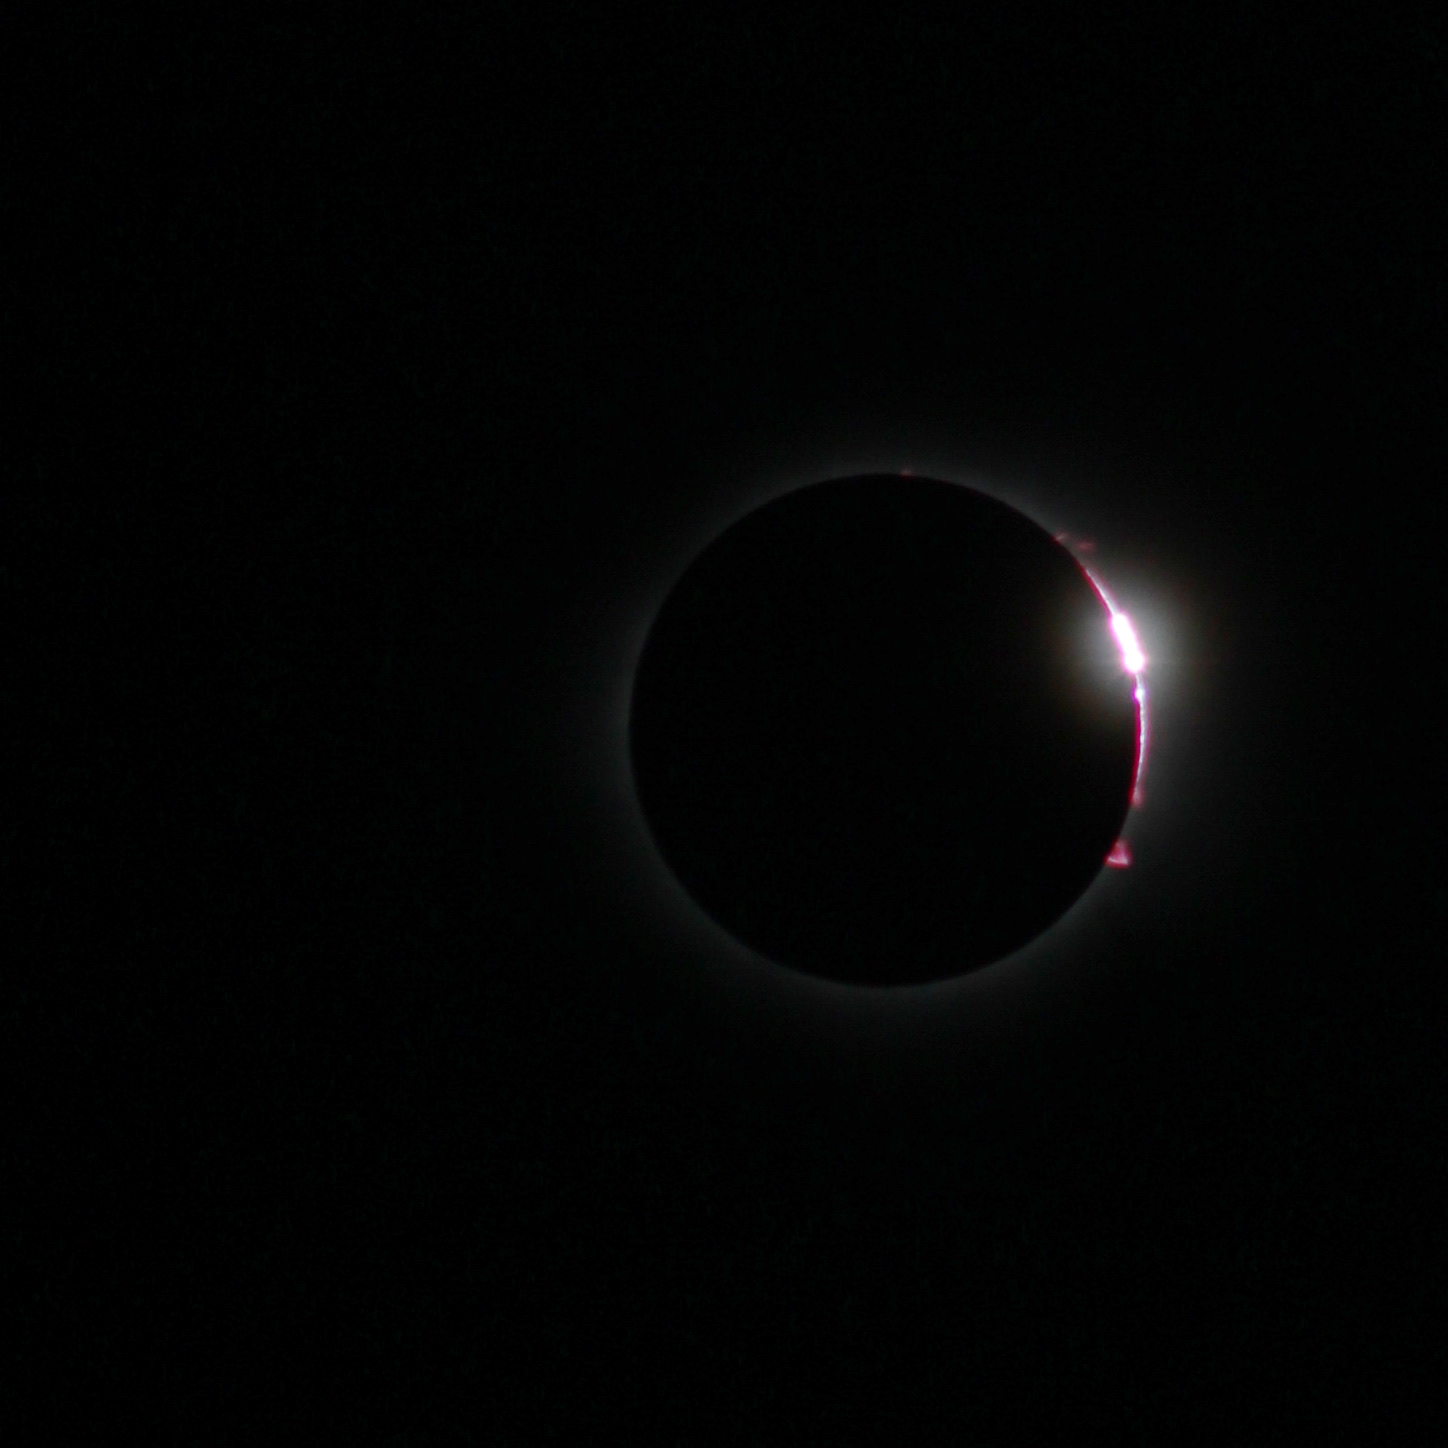
I had time to record some video of myself. Pardon my language in the first little bit. I didn’t think my Google Pro 6 would do a good job of recording the eclipse, so instead I just recorded a selfie of myself, talking about what I was seeing. I must admit: I was oddly emotional. I’m not the kind of guy who never cries, but neither is it a common occurrence. In the background you can hear the voice of an opera singer, who was standing near by and decided to sing. It was amazing. It’s hard to describe the actual appearance of totality. The combination of the super-bright “bailies beads”, with the halo of the corona against the dark sky, the appearance of Venus and Jupiter. It was indescribable.
And then, four minutes later, it was over. I was enormously excited to get back to the hotel room to see how the pictures turned out. I was enormously pleased. WIthin an hour I had my first photo up on Facebook, and it appeared that I may have had one of the earliest photos, and while the pictures weren’t the most astounding technically, I was pretty damned happy and proud that they had worked out. Pretty awesome for a first time eclipse photographer.
We had a blast. It was great to spend time with my friend Jeff, and my new friend Jonathan. We ate a lot of Mexican food, and enjoyed ourselves throroughly. We both caught COVID on the way back, which accounts for some of why this account is a bit late, but it was totally something that ticks my bucket list. Thanks to Jeff for being my stalwart friend and traveling companion, and I urge anyone who can get in the path of totality to try to do it.
Truly fucking amazing.