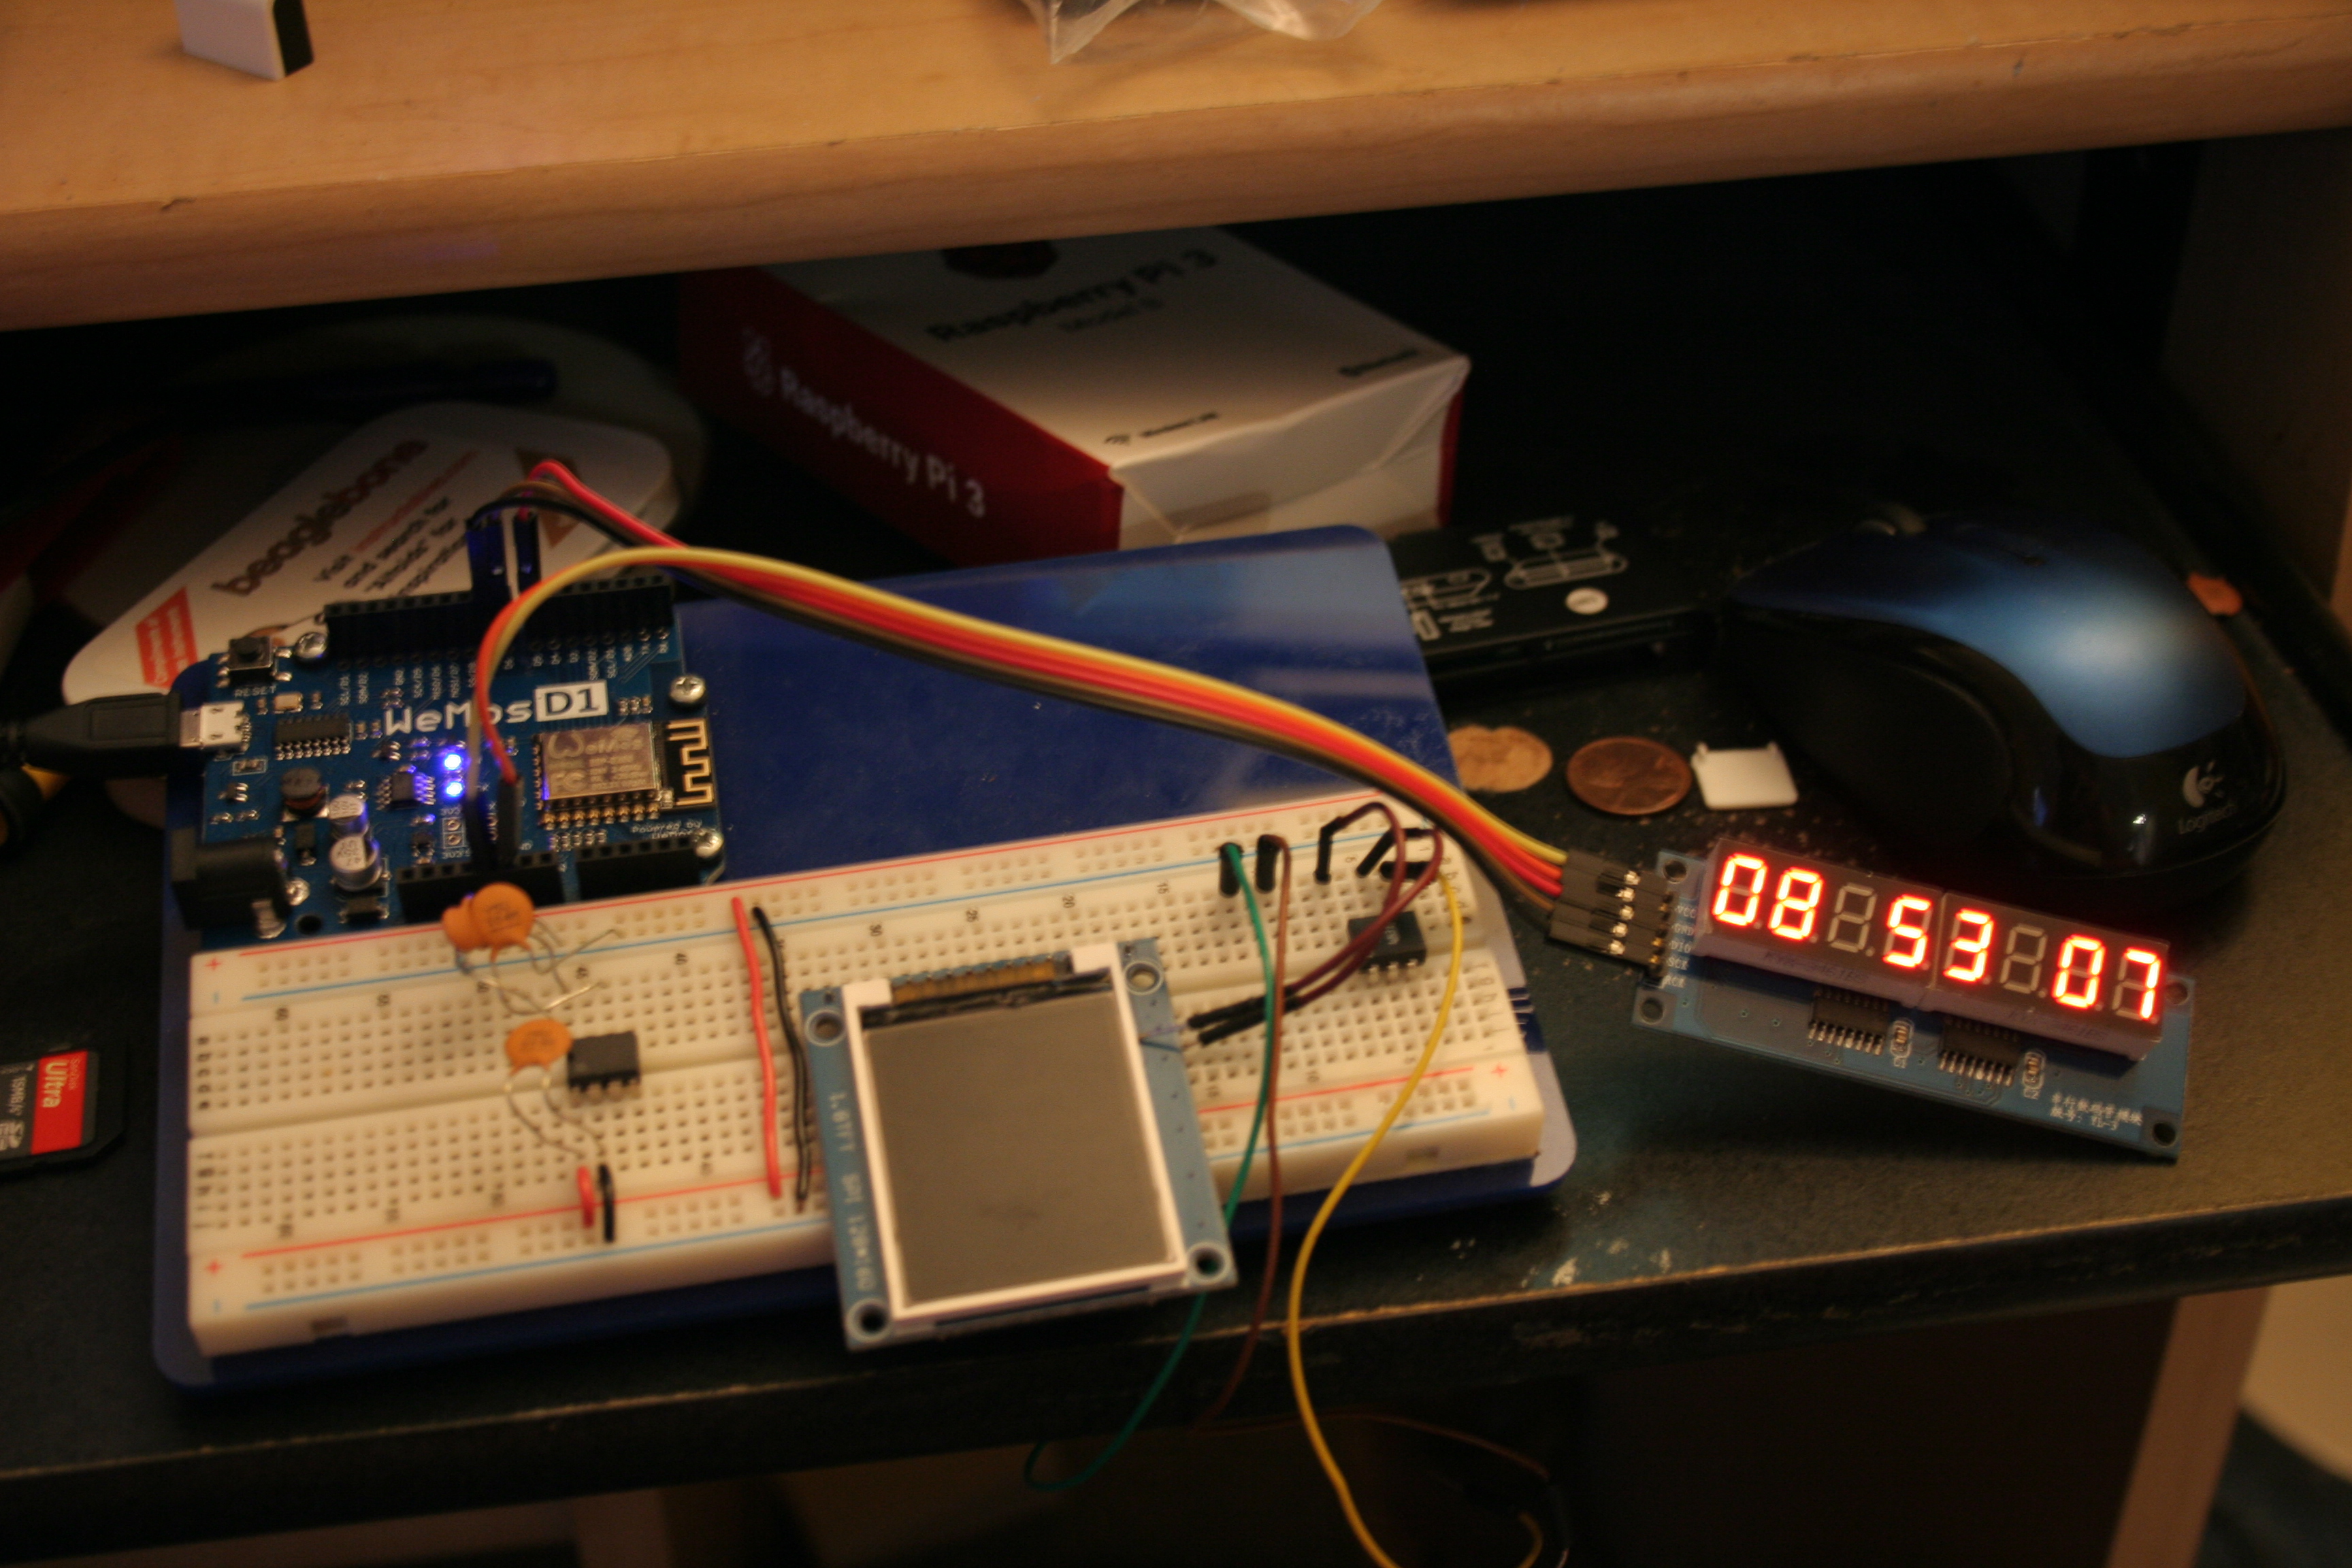
I didn’t have a ton of time to tinker when I got home, but I did play a tiny bit more with the WeMos D1 R2. I got it mounted on an old breadboard that I had previously used for Arduino experiments, and then tried reflashing it with new, fresh NodeMCU firmware that I built on the cloud. That did not result in success, but I’m willing to bet that was because of something stupid I did, although what precisely that may have been is still a mystery to me. But I then dusted off some old “clock” code that I wrote for the Arduino, and tried a quick port to the WeMos. Several of the libraries that I used on the Arduino (RTClib and TimerOne) were not supported on the ESP8266, so for the moment it’s not a real time clock: it just counts in seconds, and uses the Ticker library instead. But in the span of fifteen minutes that I eeked out just before bed, I got it working:
Pardon the poor quality snapshot against all the clutter on my desk.
So far, I’m having fun with the WeMos. I will probably a sketch which uses the WiFi next, and perhaps the MQTT framework.
I just got a trio of WeMos D1 R2 boards from Banggood this morning. I haven’t had a chance to do anything with them yet, other than power one of them on and check it for basic function, but I thought I’d give a brief review.
For those of you who maybe haven’t been tracking the ESP8266 based boards, they are basically a small 32 bit processor which run at 80Mhz and include WiFi. What’s really astonishing is how cheap they are: simple ESP-01 boards are available for around $3. These super cheap boards don’t have a lot of expansion pins, and are a little bit of a hassle to program though, since you’ll need a FTDI or similar serial cable.
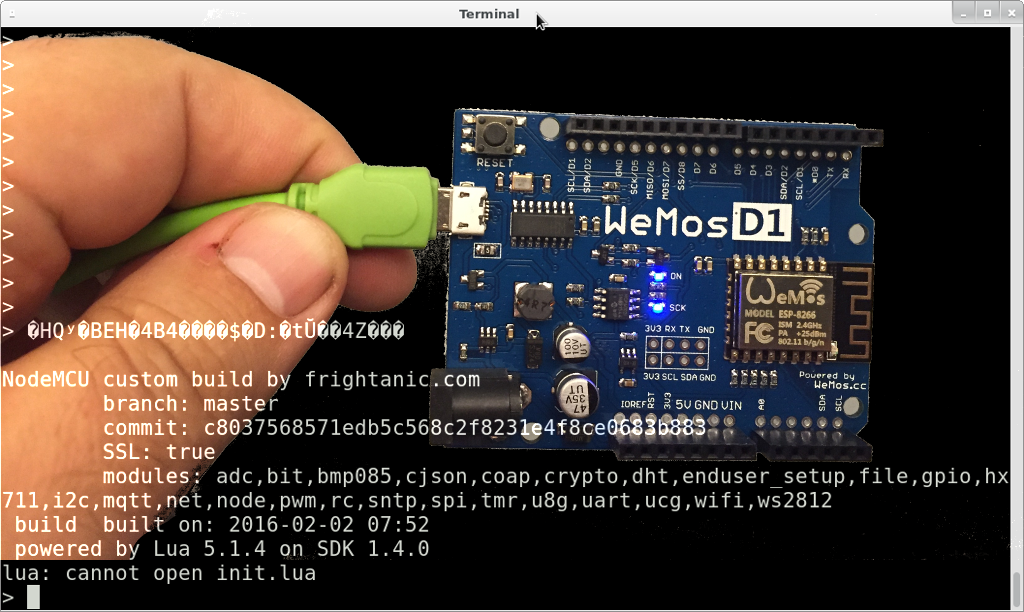
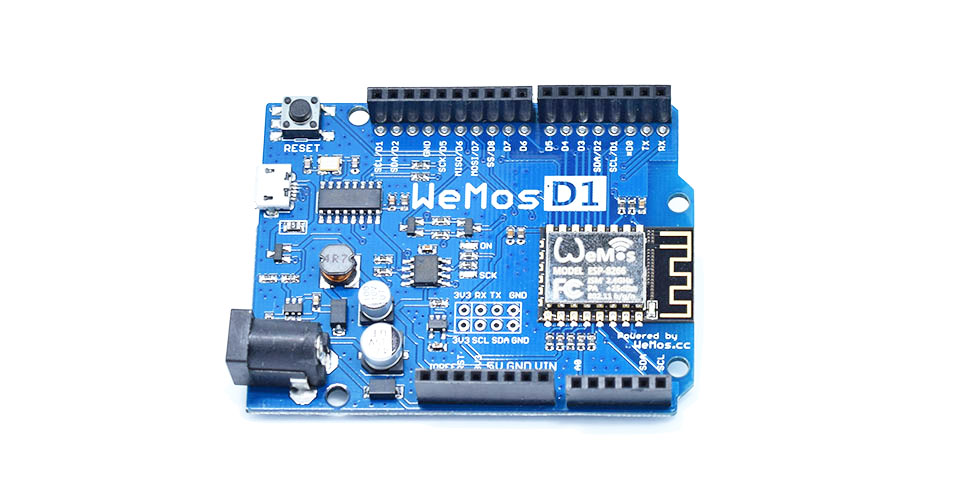
The WeMos D1 R2 takes one of these modules (the tin package to the right) and mounts it with all the necessary interface logic to interface to USB. When I plugged it into my linux box, the following messages showed up in the output to “dmesg”, indicating that it had connected it to the serial port ttyUSB0:
[48095.058498] usb 1-3.3: new full-speed USB device number 7 using ehci-pci
[48095.186475] usb 1-3.3: New USB device found, idVendor=1a86, idProduct=7523
[48095.186482] usb 1-3.3: New USB device strings: Mfr=0, Product=2, SerialNumber=0
[48095.186485] usb 1-3.3: Product: USB2.0-Serial
[48095.191571] ch341 1-3.3:1.0: ch341-uart converter detected
[48095.251692] usb 1-3.3: ch341-uart converter now attached to ttyUSB0
Then, I ran “sudo screen /dev/ttyUSB0” and connected to it. It was booted into a custom build of the “nodemcu” firmware, which runs the open source language “lua”. You can read the documentation and figure out how to access many of the peripherals and libraries.
The quality of the boards seems quite high. One thing to note is that while the pin layouts and physical form factor of the boards is identical to the Arduino, the ESP8266 board supports much fewer pins. There appears to only be a single analog input, and the labeling of the digital “D” pins are somewhat odd, and it appears that multiple pins may be connected to the same input. It also appears that there are a different set of labels on the bottom of the board, which is truly confusing.
I’ll dig in a bit more when I have some time and figure out what the deal is.
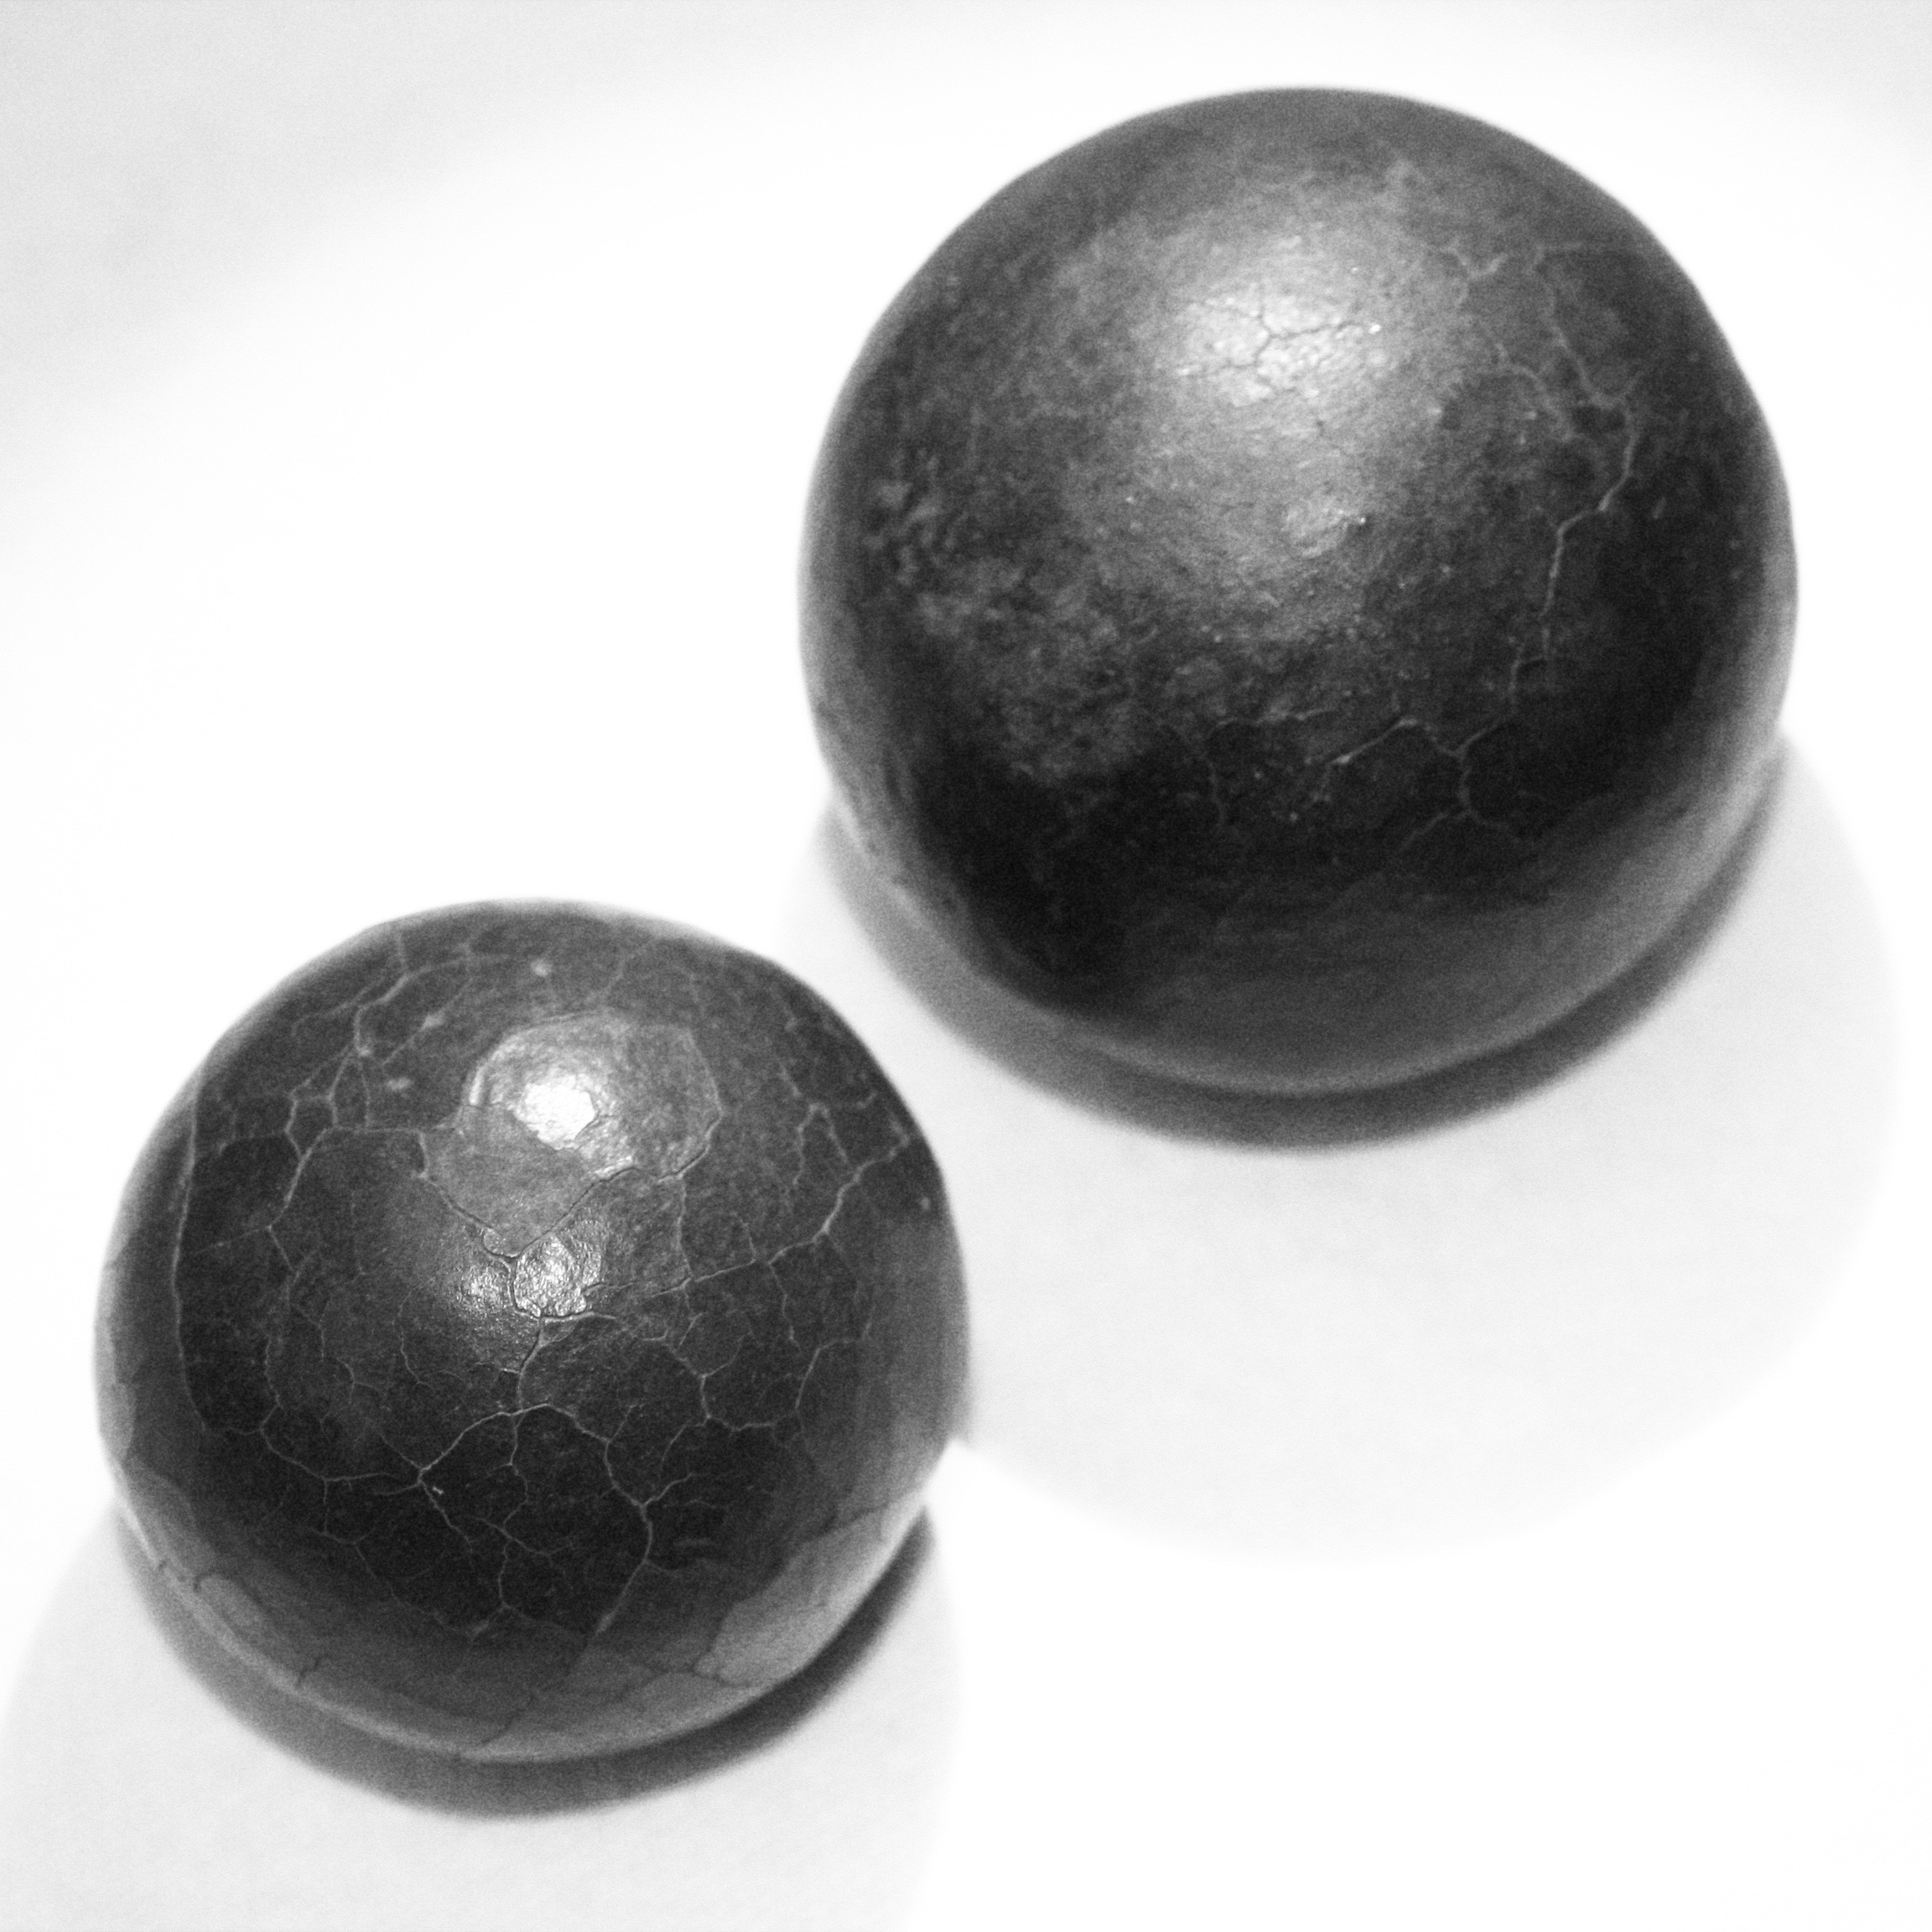
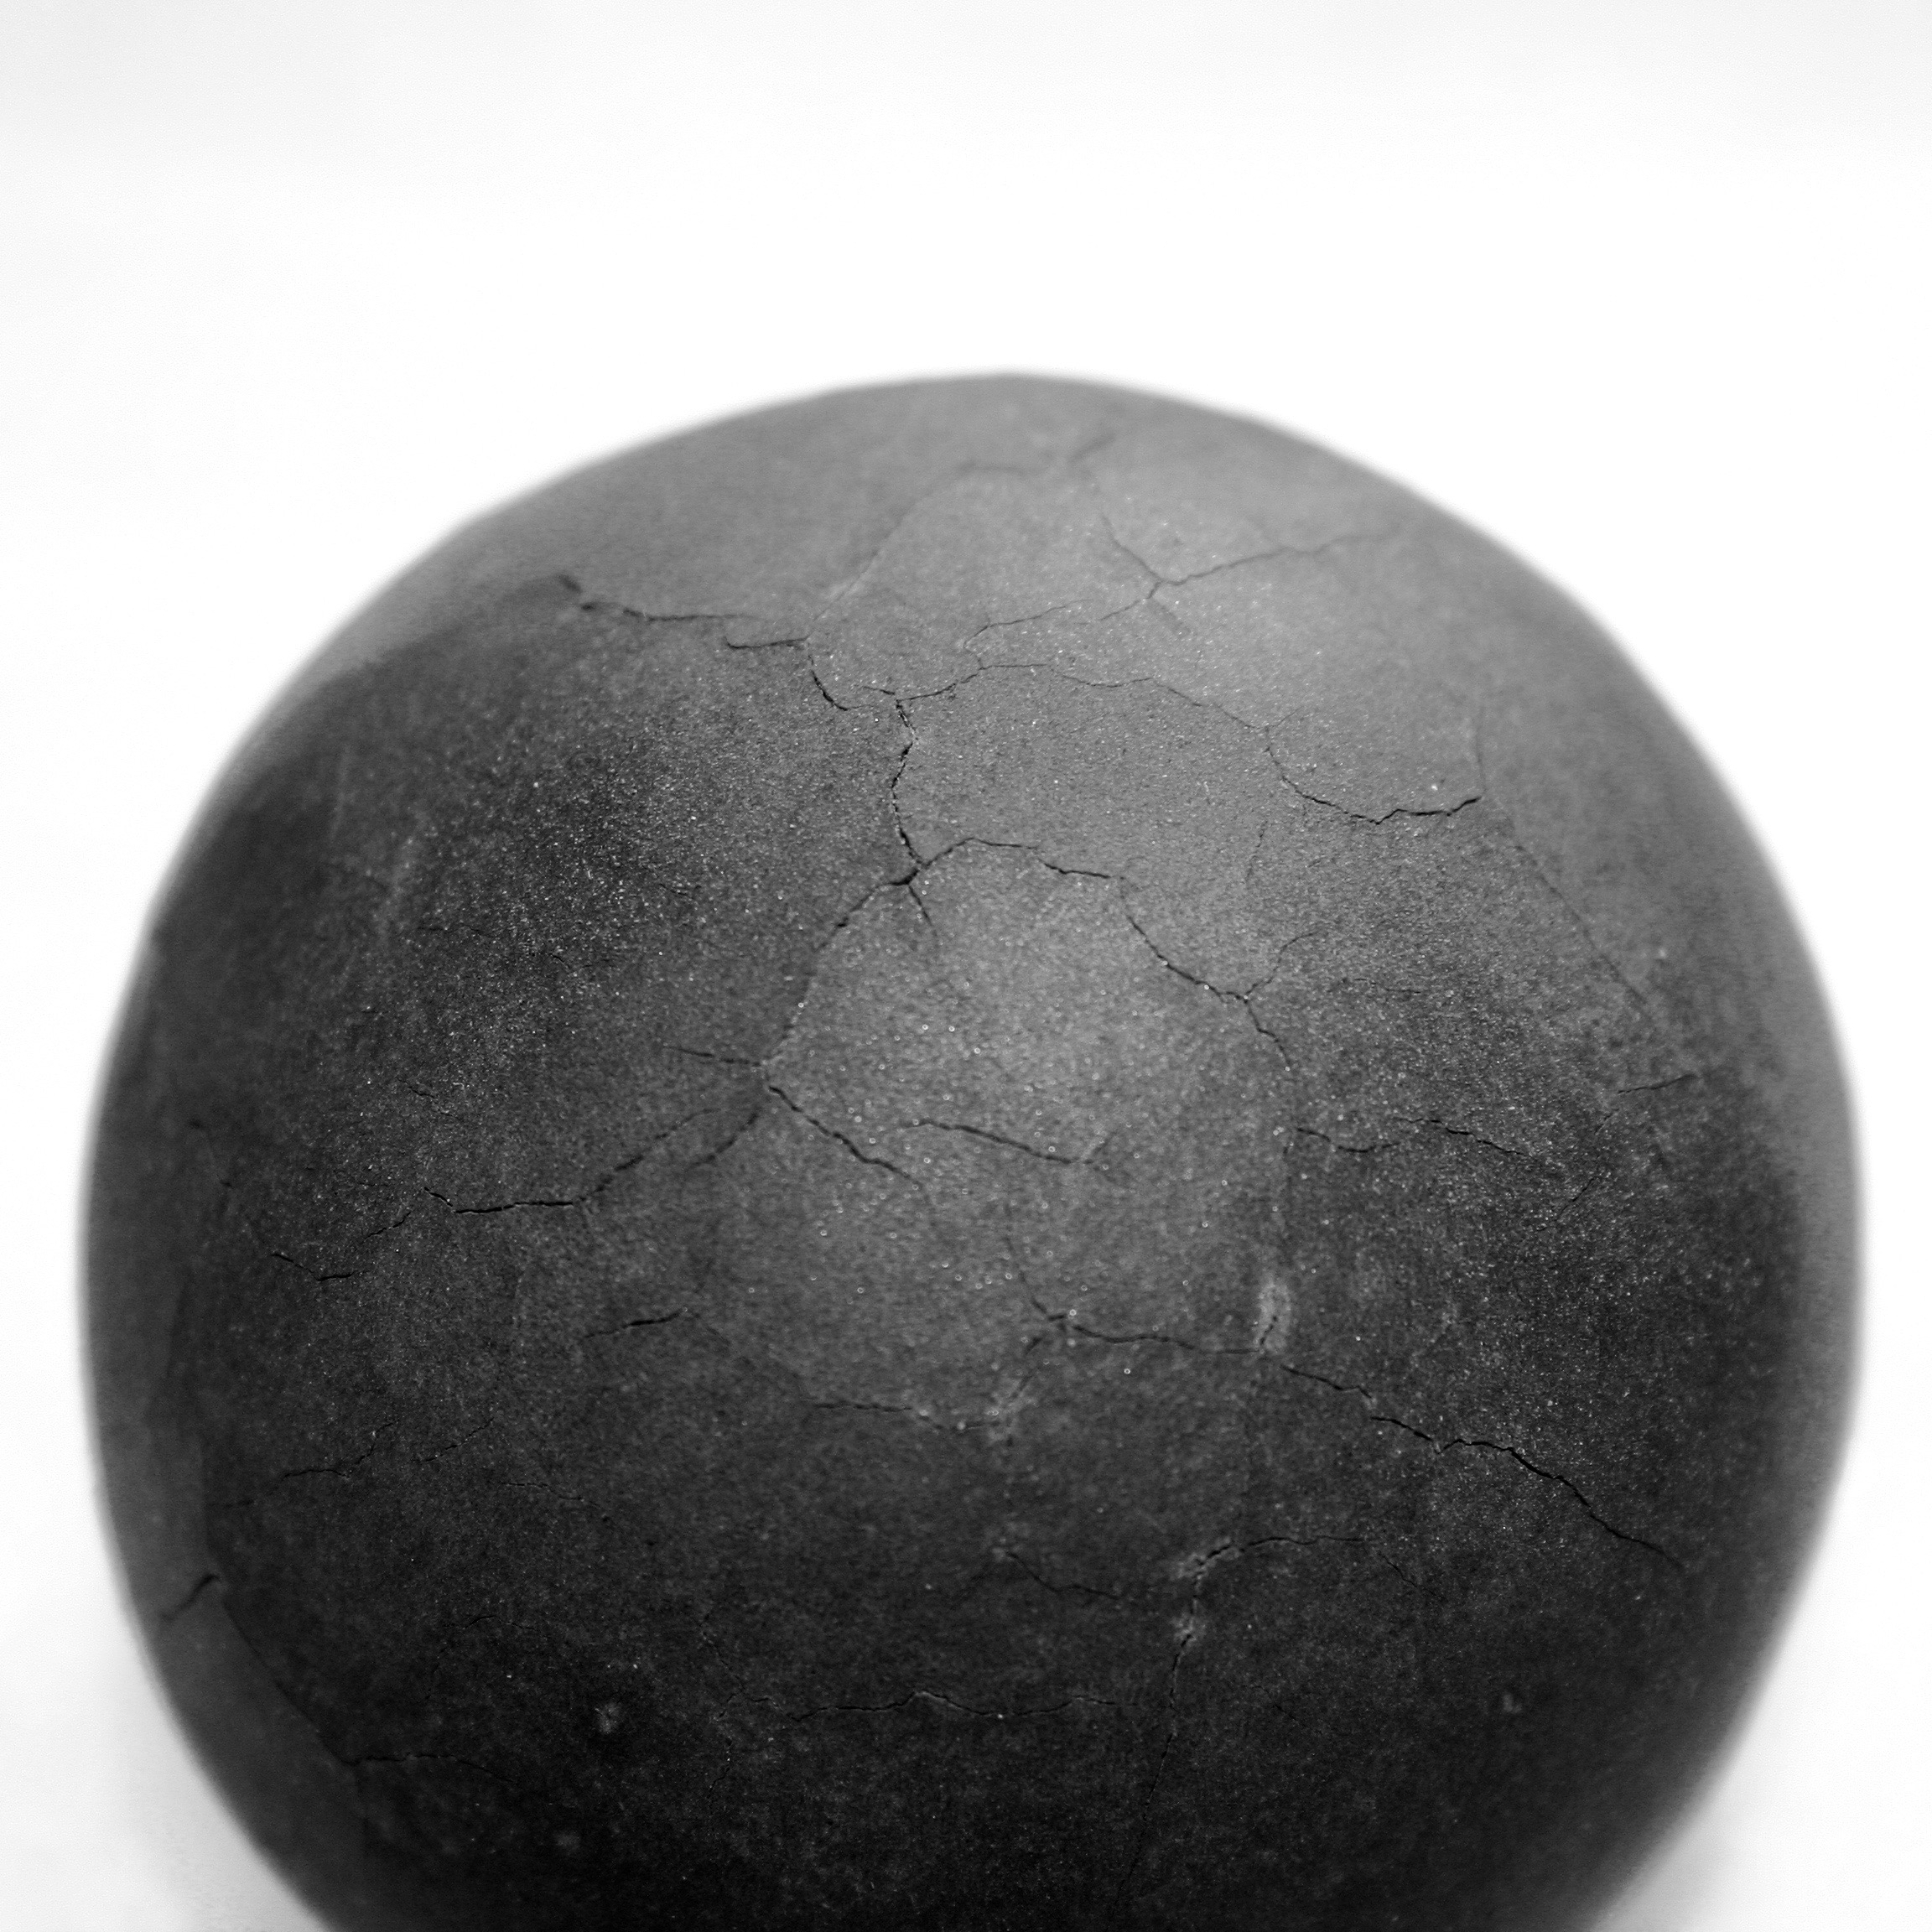
Okay, I’ve done two, with nearly identical outcomes: a fine network of relatively shallow cracks in the “capsule”, the thin layer of fine particles which encapsulate the core. I’ve been rereading various accounts on how other people make dorodango, and have noticed a couple of differences which I think I am going to test.
I suspect now that I’m being too timid in my initial drying of the core. After forming the wet inner core, you then sprinkle on relatively fine, dry dust until it won’t hold any additional material. What I was doing was then cycling this in a plastic bag, essentially drying the core very slowly, while adding additional finer and finer material. Eventually, when I did dry out this fine material, it was relatively inflexible, and as the core shrank slightly, it tension cracks. I’m now wondering if the bulk of drying shouldn’t happen while the outer skin is still relatively coarse. So, my next ball will be worked relatively longer in its primitive stage, and will be allowed to dry overnight. One account says that if it cracks, it will likely do so in the first 30 minutes of this stage.
I think I am going to ditch the soil that I purloined from Golden Gate park as well. It has a lot of faintly greasy black silt embedded in it, which is quite slick and messy. My normal backyard dirt was easier to work. I may also buy a bag of fire clay just to see what I could do with a 50/50 clay sand mixture.
The ESP8266 is an amazing little processor: cheap and capable and (most interestingly) WiFi enabled. I have some of the older “nodemcu” boards that I got for about $7 each, but there are newer alternatives that include up to 4M of flash memory, and a variety of interesting form factors.
I noticed that WeMos was producing these boards which nominally have the Arduino Uno form factor. With a 15% discount coupon from banggood.com, I got three of them on order for under $16. I’ll let you know how they work out. I’m normally not a fan of the classic Arduino shape, but I do have a number of 3d printed cases and bumpers that can be used, which makes them relatively easy to mount and wire up.
If you want to program the ESP8266, you might try using platformio, which makes it easy to use both the native SDK as well as a simpler Arduino based framework. It also supports a number of other embedded architectures, including the Arduino, but allows you to use your own editor and the like to build and organize your code. Worth looking at.
I use ffmpeg to add some information overlays to the videos that I often upload to YouTube. I’ve documented these before, but I had a problem that arose from time to time that I never figured out: occasionally my encodes would seemingly just go on forever, and never terminate. I discovered today that this was because the use of the “overlay” filter. It apparently keeps generating frames even after the main stream has terminated, which seems odd to me, but… whatever. If you add the repeatlast argument, you’ll get what you want.
Eek! I was getting a bit impatient with my dorodango, so I decided to leave it out in the open air when I went to work today so I could let it dry out a bit. I returned to it having dry cracks! Note to anyone attempting this: don’t be impatient. Let it dry out slowly.
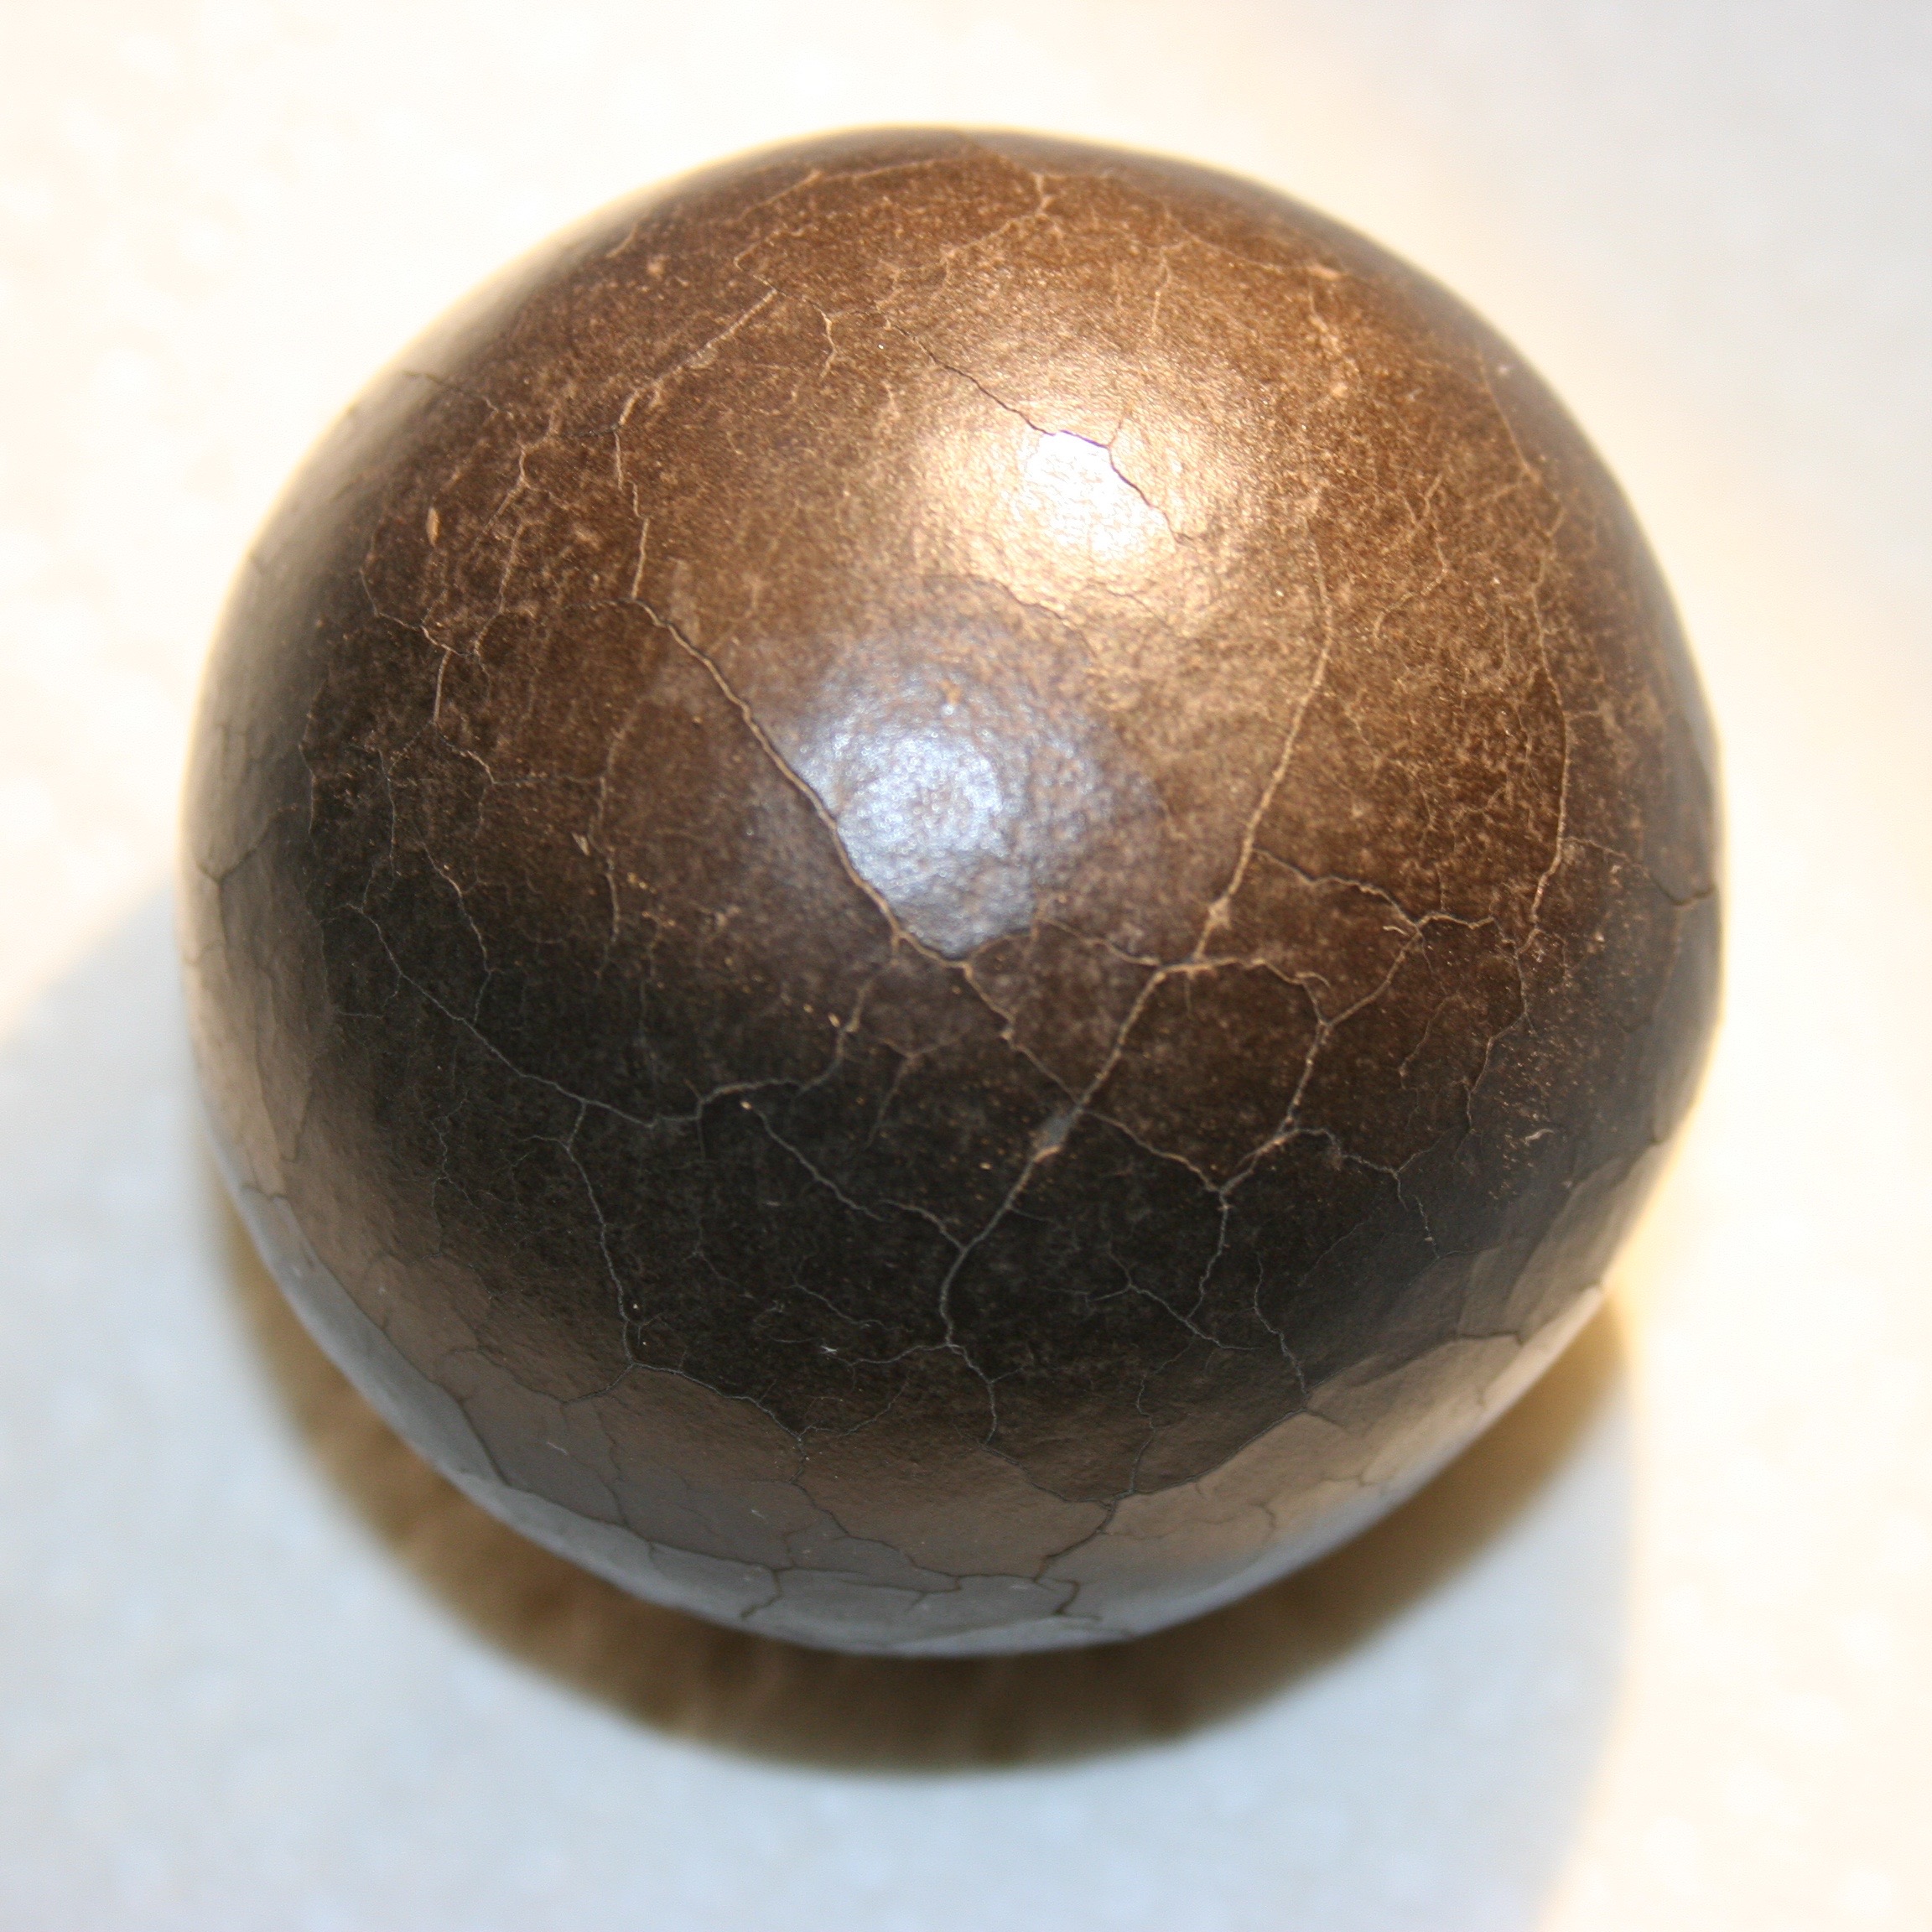
On the other hand, it does still look pretty cool. I snapped this with my Canon Digital XT and did a bit of tweaking to enhance the contrast and the cracks, and frankly, it looks pretty good. I put it back in a bag and put it in the refrigerator to sit for a half hour. I’m thinking that maybe that will draw some residual water to the surface, and maybe a little more dust rubbing will polish it. I wouldn’t mind if there were some cool looking cracks in it, if the surface was smoothed out.
It’s all an experiment!
Addendum: The center of the worst crack appears to be where the dorodango was the least round. My guess is that as the tension of the drying dorodango would have been evenly distributed if it were perfectly spherical, but the defect caused the stress to bunch up and break through. It’s spent a couple of rounds in the fridge, and the smaller cracks are filling in nicely, the center of the cracking is the only part where you can feel the cracks. I’ll try a few more rounds in the fridge to see what happens.
Addendum2:
It’s beginning to take a polish, at least for a bit. A little work with some dry fine dust and a paper towel yielded this:
On Sunday, I started a new project which on the face of it, seems like an enormous waste of time, but if you’ve been reading my blog for any period of time, you know that wasting time is pretty much the bread and butter of my online presence, so here we go.
I’ve started work on a dorodango (????).
A dorodango is essentially a ball of mud, carefully formed into a sphere, and then covered with layers of dried dirt until it becomes a smooth, solid sphere, and then polished to a high shine.
I’m sure that some of your are blinking your eyes and wondering if I’ve gone stark raving mad. Wonder no further. It is kind of a lunatic thing to do. On the other hand, it’s also relaxing, and gives me time to think about interesting things, or just clear my mind and think of nothing at all. And, of course, the materials you need are quite literally just some dry dirt and a little water.
If you want to see some excellent examples, you can surf over to Bruce Gardner’s excellent dorodango.com website and have a peek. My example will no doubt be less beautiful, but still pretty interesting.
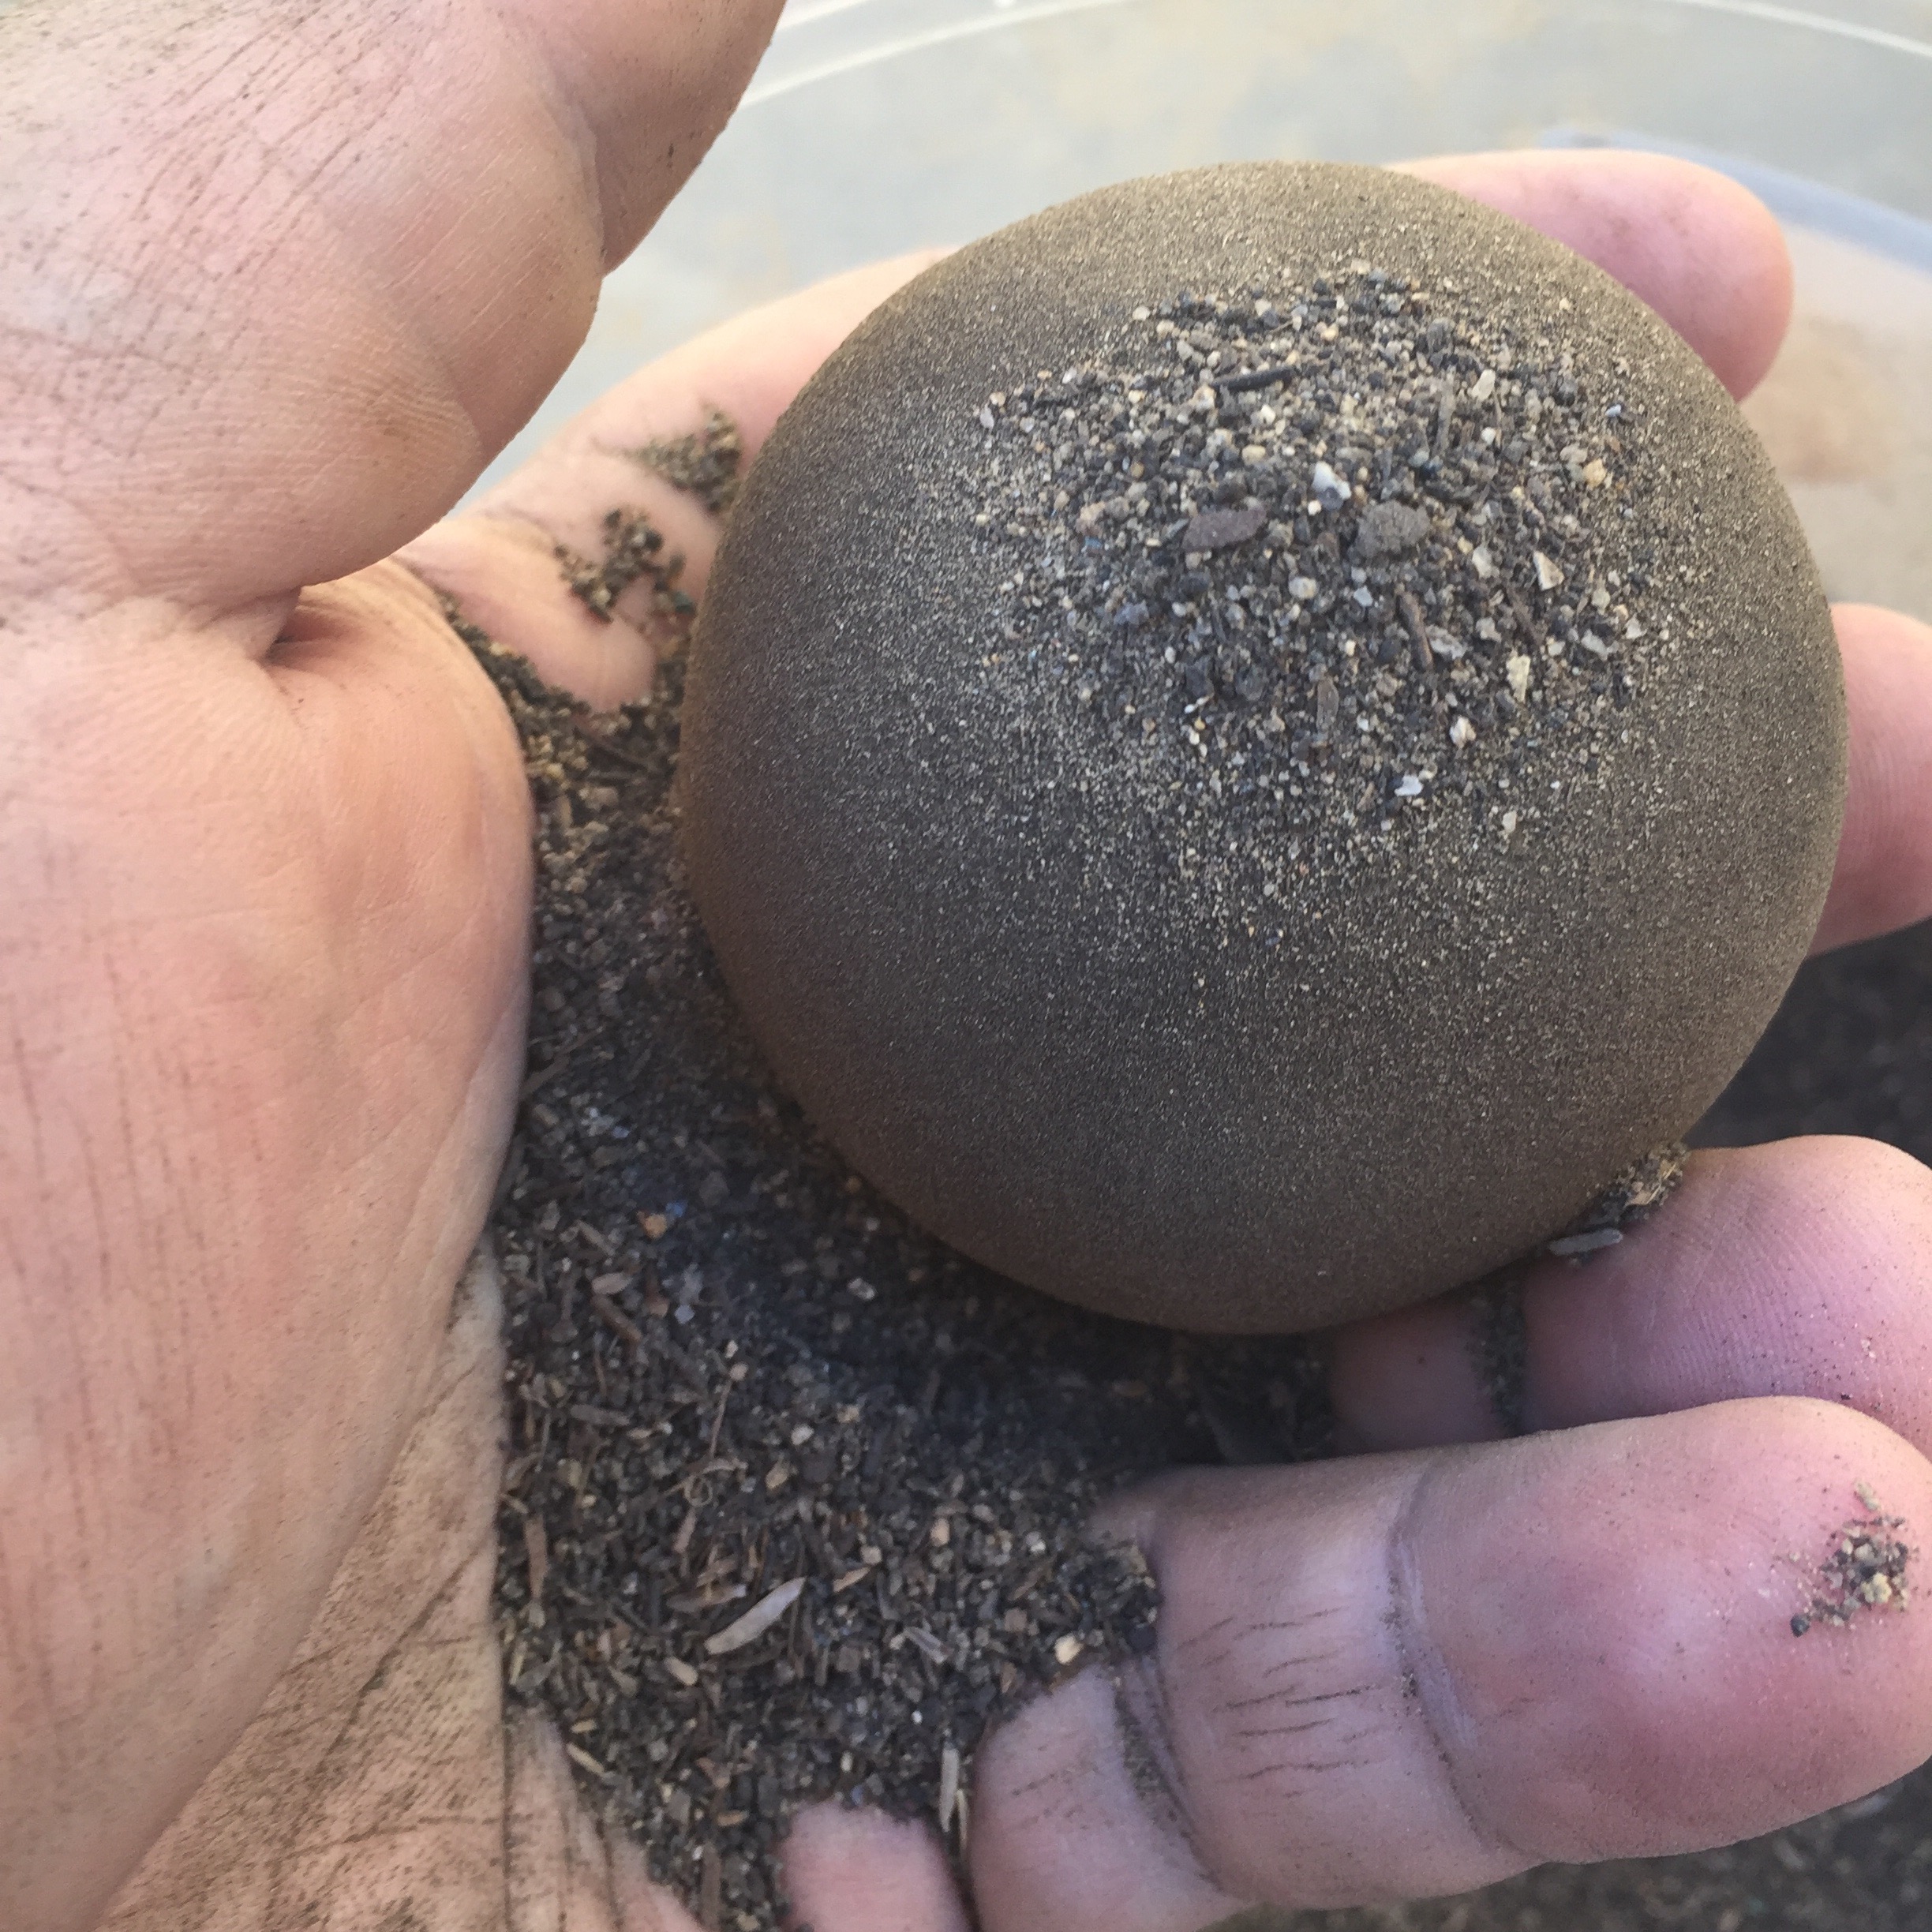
I began by going out to my back yard with a small shovel and a strainer I bought just for this purpose for $1 at the Dollar Tree. I went to the portion of my garden which doesn’t get regular watering, and where the ground is very dry, and scooped up a bunch of dirt, and ran it through the sieve to remove the large pieces of gravel and other organic matter, which I dumped into a cheap $1 food container. Once I had a layer a few inches thick of relatively fine material, I strained some more into a smaller container. When I felt that I had enough material to form the initial core, I added some water (probably too much) and worked it into a paste. I then formed a rough ball, squeezing out some of the (again, too much) water, and then forming it roughly into a ball, shaking it back and forth between my two hands until a relatively good sphere was formed.
I then held it over my container of dry dirt, and sprinkled the surface with this, adding some, and then brushing it off with the base of my thumb. At this stage, the core is still pretty easy to squish, and several times, cracks would form across the ball. I then added a little bit more of the dirt and wiped across the crack, and they would go away. For a half an hour, I fought the appearance of new cracks, and then they seem to stop. The surface became quite smooth, and the ball was no longer easy to compress out of shape, although I was handling it pretty gingerly. I kept adding dry dirt to it, and rubbing it gently off with the base of my thumb until the surface appeared quite dry, and dirt would no longer stick to it. Then, I put it in a ziplock bag and set it aside in my garage on top of a piece of foam so it wouldn’t create a dent. After a few hours, water will condense out on the bag and on the surface, and you extract the ball and add more fine dirt. I’m currently in the process of repeating this process until the core is completely dried out. Then, there will be more polishing to bring up the surface sheen.
Here’s a brief iPhone video I made of the ball in progress (apologies for the vertically oriented video). The texture of the ball is already quite smooth and leathery. I estimate it will take a few more days of intermittent work before I’ll begin to work on polishing it.
I’ll hopefully post a picture of the beautiful finished sphere in a week or so. If this sounded boring, consider that I did most of the work while sitting outside, watching hummingbirds and generally relaxing. I found it a great stress relief.