Day 28, Ronchi Tester (a work in progress)
As some of you know, I am an amateur telescope maker who volunteers on Fridays at the Chabot Telescope Maker's Workshop at the Chabot Space and Science center. Over the years, I estimate that I've helped something like seven hundred people work on grinding and polishing their own telescopes. For those of you who do know this, it may shock you that I actually don't have a good means for testing telescopes at home: I've relied on the workshop (and largely the expertise of Paul Zurakowski, sadly passed) for testing telescope optics. I am pretty adept at using the Ronchi test to diagnose gross problems with mirrors, but have relied on others to do the necessary quantitative testing.
I have a 12.5" f/5 that is essentially awaiting that final bit of figuring and testing. Now that retirement is upon me, I am trying to work up to finishing that telescope. Toward that end, I'd like to be able to figure and test the optics as I work on them, rather than relying on being able to converge to a finished optic in the three hours a week that the Workshop meets.
As a baby step along this path, I thought it would be good to get at least a basic Ronchi tester working.
Coincidently, one of the students at the workshop who I've been helping has also reached the final figuring stage,
and I thought it might be cool to use my 3D printing skills to make each of us a simple Ronchi tester.
A Ronchi tester is actually a pretty simple gadget. It consists of:
- a light source/diffuser
- a "Ronchi screen", which is a piece of glass with precise black and clear lines etched on it (often made from plastic film these days)
- and.. that's really about it.
Light from the light source passes through the Ronchi grating, bounces off the mirror, and is returned to the focus near the grating. By peering through the grating, you can judge the overall figure of the mirror. A spherical mirror will appear to have a pattern of straight lines, while a parabolic mirror (usually the intended figure for most of the scopes we make) will have a pattern which bows out in the middle when viewed from inside focus.
Other than getting a grating (which is kind of a pain, more on that in a later post) it's dead simple. So, of course I had to make it complicated, justified by the notion that I would be making two of them.
It seemed to me that 3D printing was the way to go. So, several iterations later, I got this.
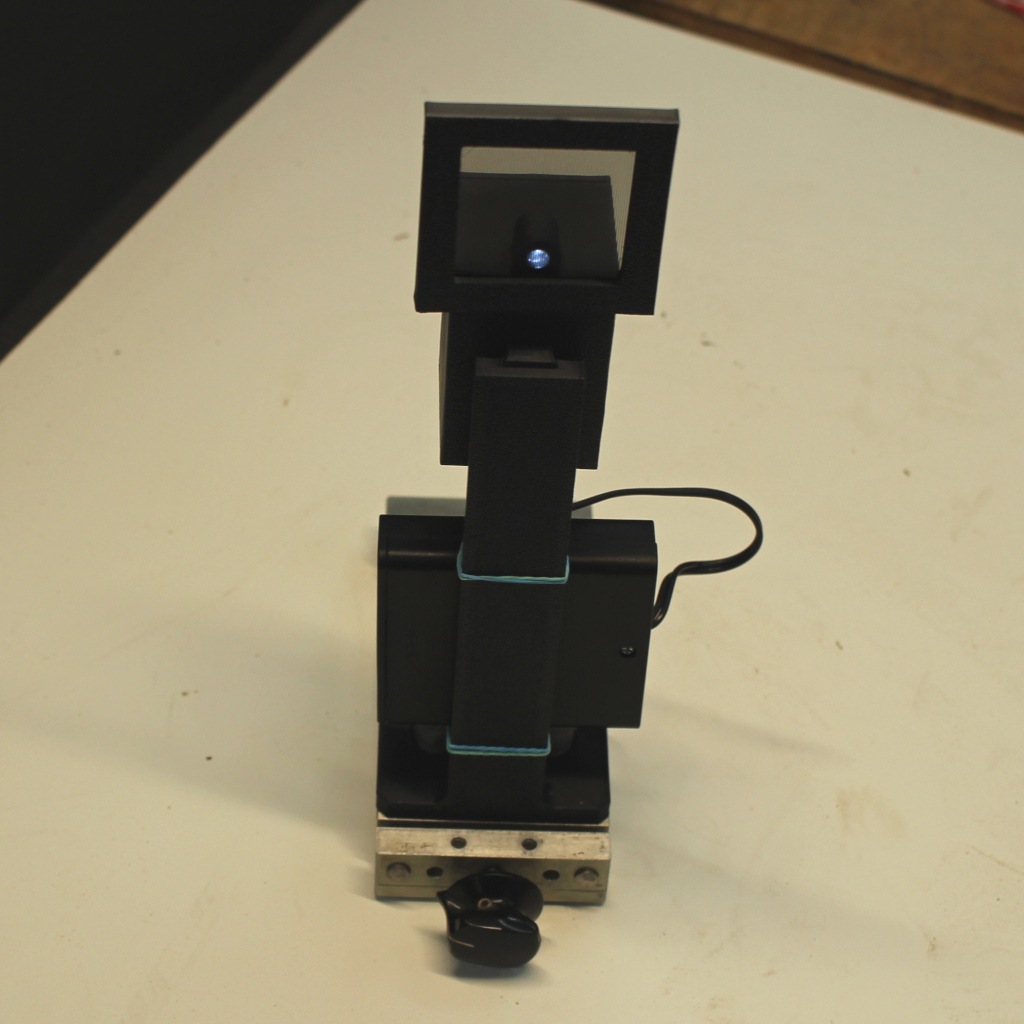
Here is the front (from the mirror) view of the tester. It's made from black PLA plastic, designed using OnShape and printed on my cheap Elegoo Neptune 3 Pro printer. It consists of three major parts: a post with a dovetail that screws to the base, a box which holds the led/power jack and a place to mount the grating, and a frame which clips over the front and holds the grating in place. It prints without any supports, and works pretty well.
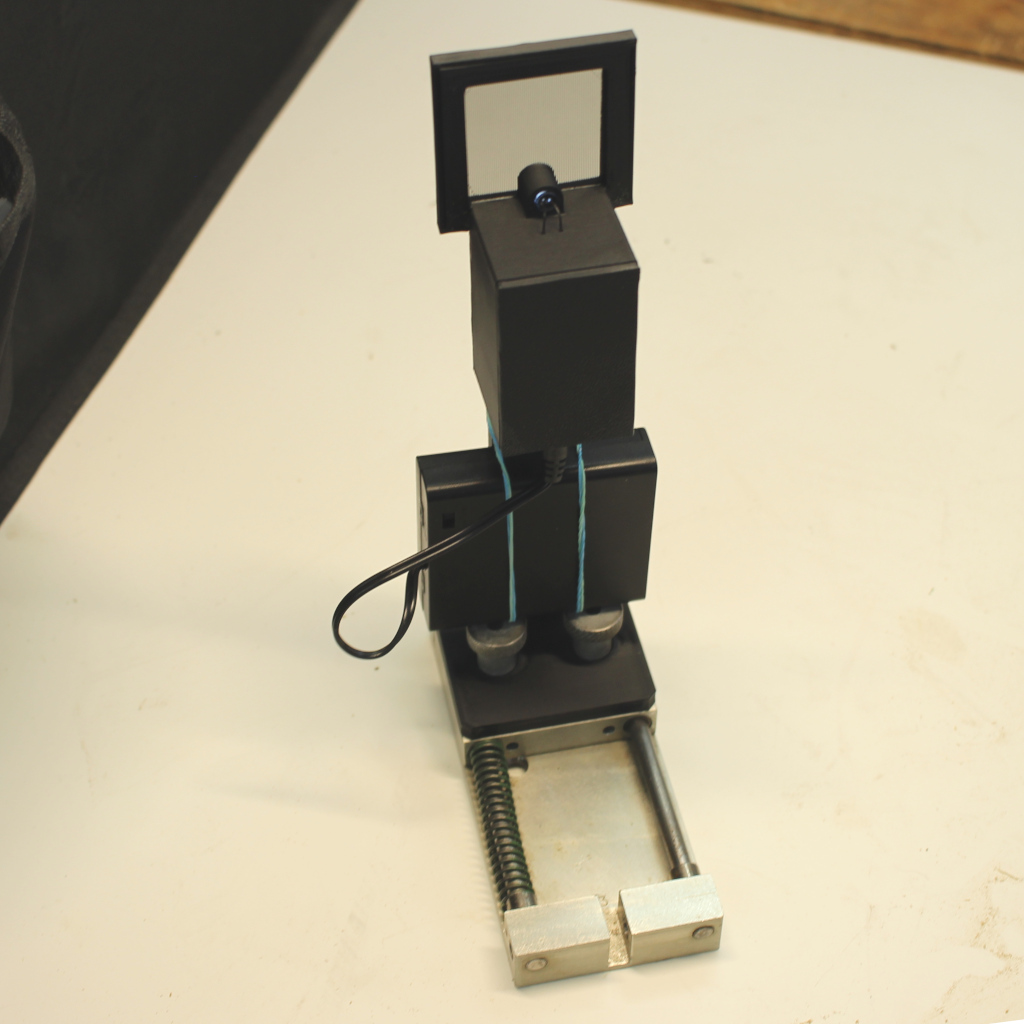
Here is the view from the back. For the base I'm using a simple 1D screw stage, which is totally overkill, but I'm giving this one to my student, and I figured if he could adapt it to make good use of it in making a knife edge tester later, that would be a good use of it.
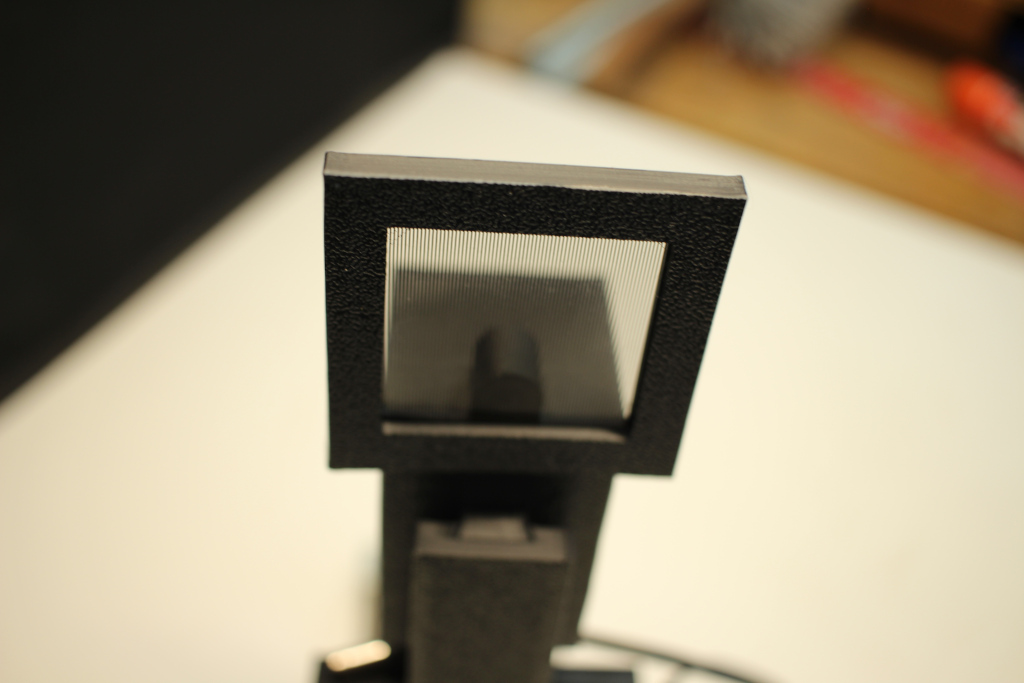
Above is a closeup of the grating, which you can see as the pattern of black and clear lines. There are 100 line pairs per inch, which is useful for most small to medium mirror testing applications.
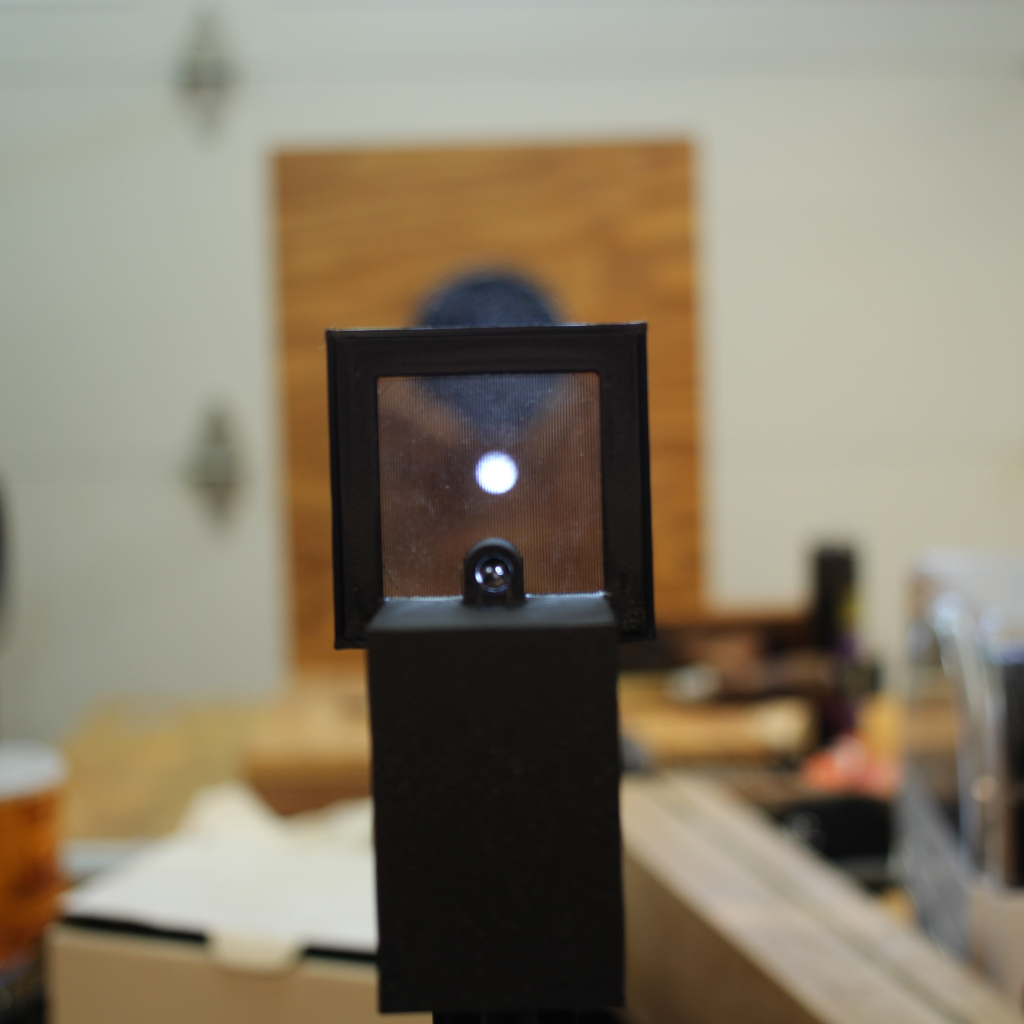
This is a view of how the setup works. I put an aluminized 6' f/5 primary that I got from a garage sale telescope on a test stand, about 5' away (the focal length is about 30"). Because it is coated, it you can see the very bright image of the led back on the grating. In a normal uncoated mirror, the reflection would only be about 5% as bright, and would be pretty comfortable (I think). I've experimented with simple brightness adjustment, and may do that in the future.
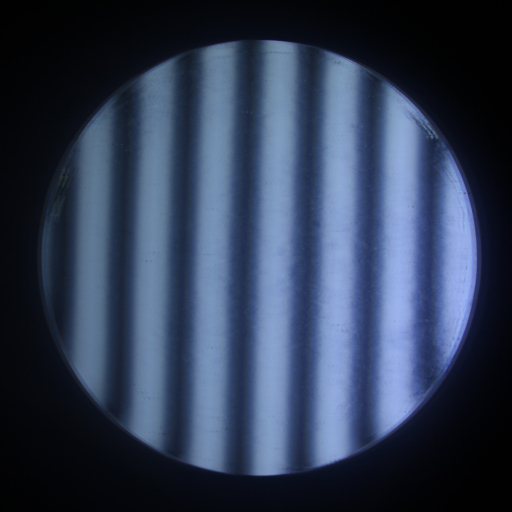
Here is a picture of what you see when you place your eye very near the grating and look at the mirror. This was taken with my Canon T5I and a telephoto to make the image quite large. The very nearly straight lines indicate that this mirror is basically spherical, which means it probably would be a pretty poor performer.
Anyway... this is what I'm up to today. Hope you all are enjoying your Wednesday.