First CNC Item, a personalized keychain
I've mentioned on various of my social media outlets that I've been putting together a Lowrider CNC v3, and this is an update that includes a milestone as well as some of the plans that I've got going forward.
I first began this project back in February or so of 2024. Back then, the most recent version of this project was V3 (more on this later). I had 3D printed most of the necessary parts, including several that were nearly 24 hour prints, and had them sitting in a box. I had sourced the necessary controller, steppers, and most of the associated hardware.
I was hoping to get this project up and running around the summer of 2024, but life intervened with an unexpected change, I had put the project on the shelf for a while.
Until this year. I had dusted off most of the parts, and an hour at a time, here and there, I got all the parts assembled. There really wasn't much left to do other than try it out.
But what to make? I decided to try making a simple keychain, personalized with the "brand" logo that I've been using on some of my woodworking projects. I converted this into a little Postscript program that drew the desired logo, and created this png file:

I then used ImageMagick's convert program to convert the png to an svg file. You may need to install the potrace
command for it to work, but it seemed to do a good job.
To generate the toolpaths (the G code necessary to drive the CNC machine) I used Estlcam, a free bit of software that allows you to setup toolpaths from the outlines in the SVG file. I actually created two different programs, one to do most of the cutting, and a second one that can drill the hole for the key ring. In theory, I could make them both part of a single G code, but that would require stopping, starting and probing after the bit change, and it seemed more straightforward to do it in two separate passes. I got some scraps of 6mm plastic (of undetermined nature) from Tap Plastic, and decided to give it a go.
I'll skip to the final bit. I cleaned the edges a bit with a little judicious heat from a blowtorch, but no other post processing has been done.
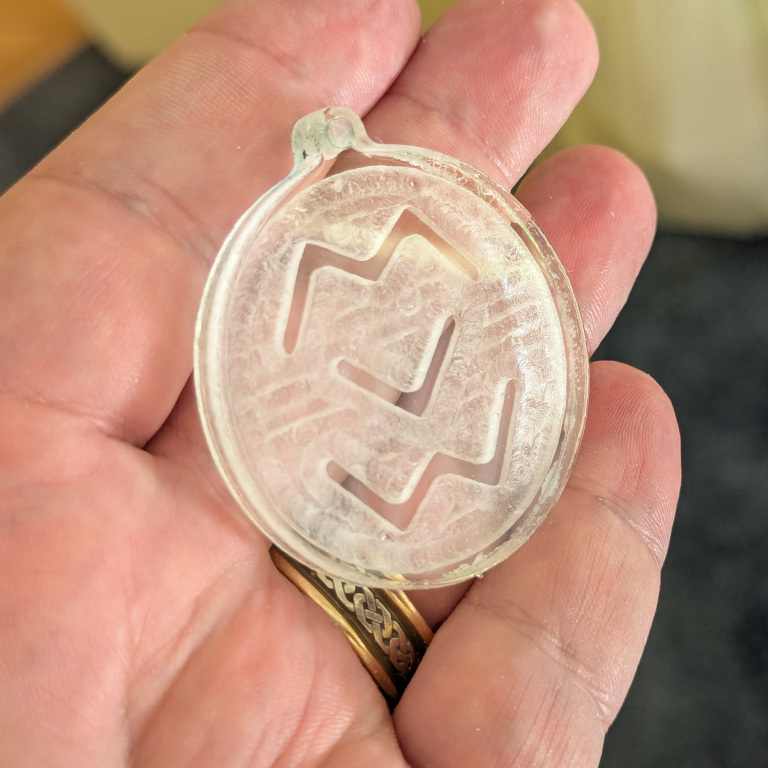
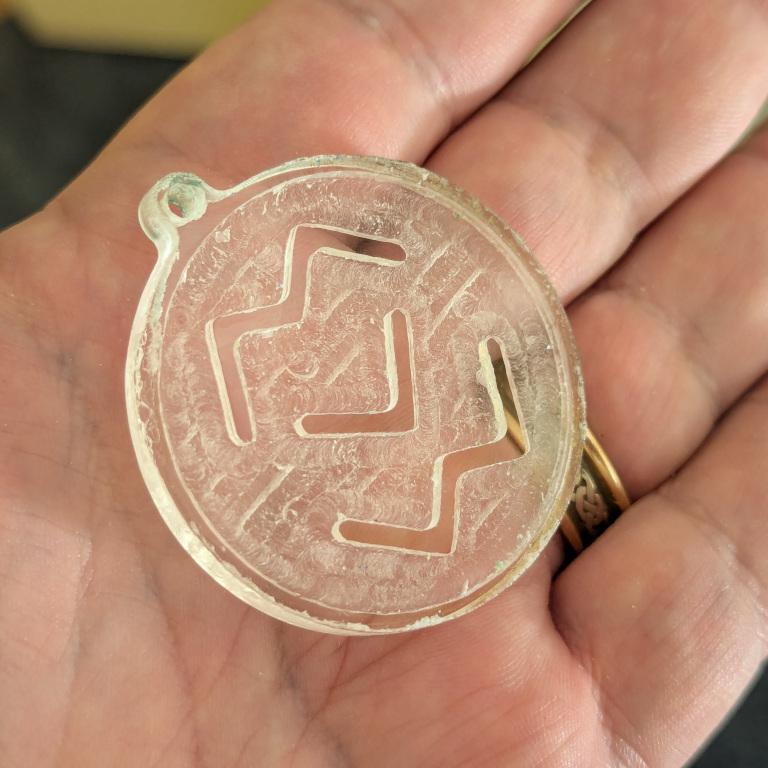
I'm not displeased. It's by no means perfect, but neither is it a total fail. Nothing (well, almost nothing) flew off and hit me in the face, and the physical artifact is a good representation of my design. But, there is clearly room for improvement.
- I didn't do any fine tuning of parameters. I am using a dirt cheap spiral upcut bit, 1/8" with two flutes. I used an 8mm/s feedrate, a 3mm/s pluge rate, and a 1mm depth of cut, along with a 45% stepover. None of that probably means much to you, but it means only slightly more to me. Notably, I didn't try to tune the RPMs of the Kobalt router that serves as the spindle: it was pegged at the maximum (6) setting.
- When I removed the bit, it was obviously melting some of the plastic. I suspect that this is at least partially the cause of some of the rather poor cut quality, particularly around the outside which was cut later in the program, which probably had more build up of the plastic on the bit. Some actual chipping occurred where the quality was especially bad.
- I probably should tune down the "stepover" and make some adjustments to the finishing passes (or, in fact, add a finishing pass, blush).
- During the cut, a bolt shook loose. I knew this was loose, but because of an oddity of the design of the central core of the machine, I have to disassemble a fair amount of the machine to fix it, and I was in too much of a hurry. Nothing catastrophic happened, but I suspect this meant that the router could have been vibrating more than it should, which can't have been good for the overall print quality.
Flame polishing the edge seemed to help quite a bit. I wonder whether I shouldn't flame polish the entire thing, but I've also thought of flooding the inner ground with some paint instead. I'm going to do some more research, and then perhaps try again (but only after I get the bolt replaced.)
Hopefully this weekend I'll work on creating an actual useful part to help stiffen up the CNC router, but that will require some additional squaring calibration. Stay tuned.
I've also begun to wonder whether I shouldn't upgrade this printer to the V4 hardware. A lot of the 3D prints need to be redone with new models, and I like some of the changes. I've started doing the necessary 3D prints already. I have no timetable for creating this second printer (or whether I should scavenge parts from this one) but it will be cool to have most of the parts ready if I decide to give it a whirl.
Happy Thursday, all!