Category Archives: Computer Science

An inexpensive, open source, two factor authentication USB token: the U2F Zero

If you are like me, you have lots of accounts, and lots of passwords.   Keeping track of them all is a bit of a pain, and it’s increasingly something that you just can’t do with your brain. Several of my accounts now refuse to allow you to use a password which I consider manageable for memorization. Even if I could memorize them, you can’t reuse them for multiple accounts, so each new account places additional labor. This means that you often forget passwords, that you often have to reset them (which is a pain) and which is no real panacea for security, since if someone has access to the device or email that you receive reset notices about, they can go ahead and change them as well.

I’ve no original thinking about this: simply google “problem with passwords” and you’ll get dozens of articles about issues surrounding password security.

Most places are no ameliorating some of the worst problems with two factor authentication. The idea is that in addition to knowing the login password, you need to do something else, such as provide a separate time based, one time password generated by your mobile phone. Perhaps the most widely used of these is Google Authenticator which is an application that can be run on your phone. Many mobile applications such as Google Mail, Facebook, and WordPress can be configured to use Google Authenticator.

And it’s not a bad solution. In fact, it’s the solution that I used on my blog and many other applications for quite some time.

But it is kind of a pain. When you log in you have to stop what you are doing, dig out your phone, and then select the account you are interested in, and then manually copy the number from the app to your website or whatever. I began to wonder if there was some other sort of two factor authentication that would be simpler.

Recent models of the iPhone and MacBook have fingerprint scanners builtin. In many situations to verify your identity, you just press your thumb onto the pad, and voila. It’s very convenient.

But I wanted a simpler solution for use on my laptop, which doesn’t have a fingerprint scanner.

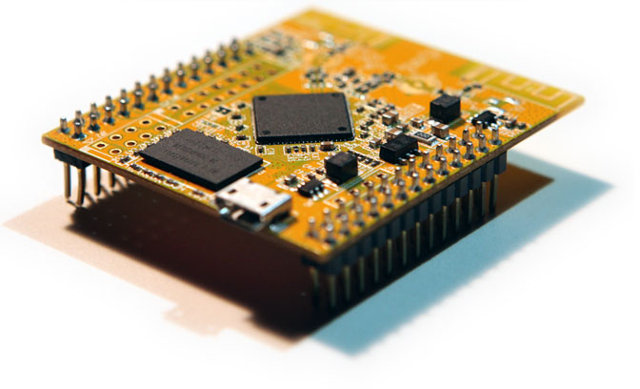
Enter the U2F Zero, a $9 USB fob you can order from Amazon.

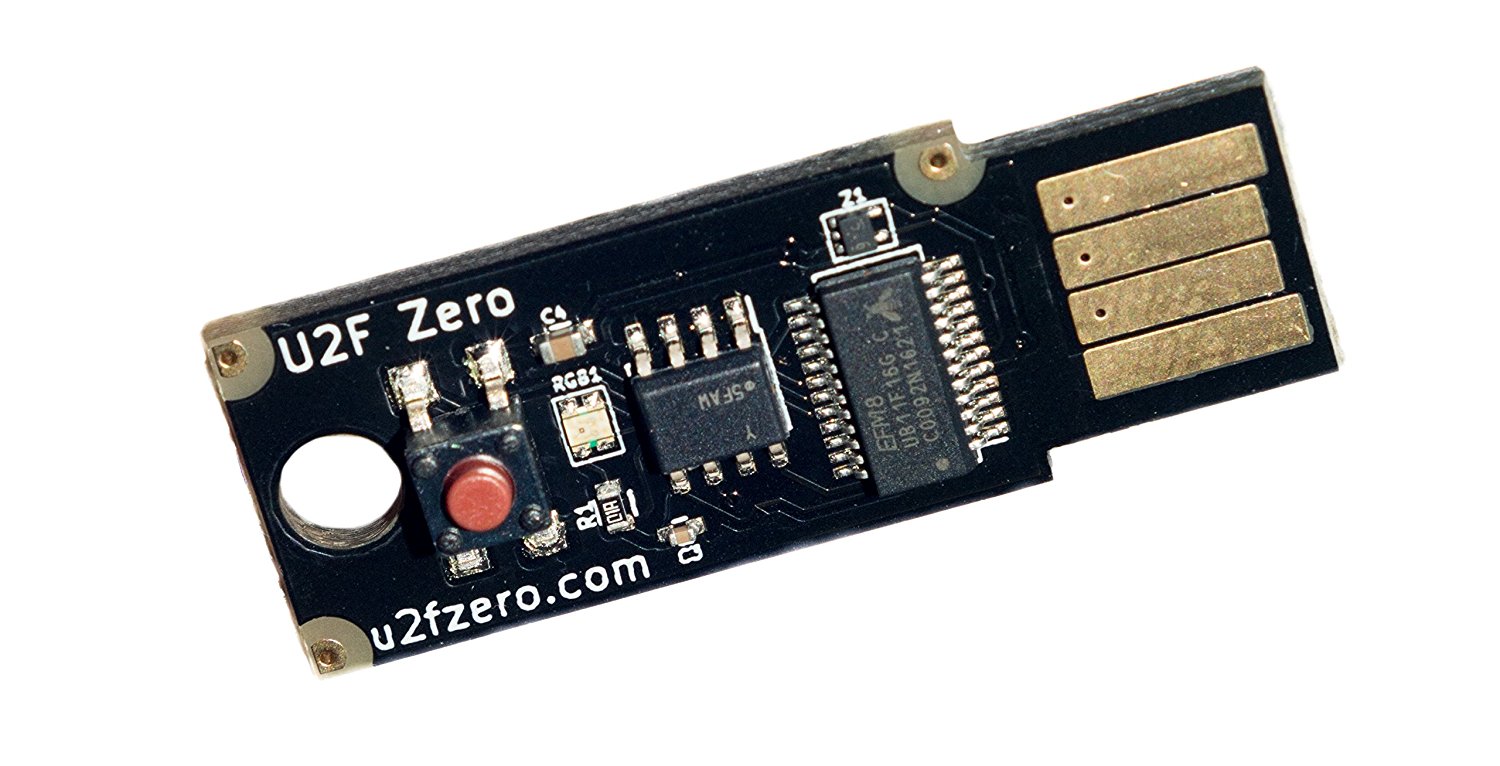
It is a bare bones little gadget: a naked PCB that implements the Universal 2nd Factor authentication standard. This particular one is open source and very inexpensive. You can get slightly more robust and commercially supported products from Yubico (and probably others, since it is an open standard).

The idea is that you enable U2F on a website like Facebook, which will then ask you to insert your key into a USB port and click the button. This registers this device. When you next try to login, it will ask you to reinsert your key and press the button. You don’t have to copy any numbers, just one button push and you are good to go.

I’ve only had my key for a few days, and the only application that I’ve really played with is WordPress (in fact, for the very blog that you are looking at). Here are some of my early observations:

  1. U2F needs to be supported by your browser. I use Chrome on virtually every machine I have, which is well supported on all the platforms I commonly use. I’ve tested it on Linux and Mac OS.
  2. To add two factor authentication to WordPress, you need to use a plugin. I used the Two Factor plugin, by George Stephanis. This adds some additional entry to the “User Profile” section of WordPress, and allows you to enable two factor authentication in a variety of ways (via email, google Authenticator, or U2F).
  3. If you use U2F, then your website must use HTTPS. This was initially what spawned my switch to HTTPS several days ago, as documented here.
  4. You can then register your new key for the user. I initially had some difficulty with this, and traced the problem to a permissions problem in Linux. You need to make sure that the udevfs recognizes the key appropriately. You can find the directions here on github. (The key itself shipped with no documentation.)
  5. And, it works.

By no means have I done a security audit of the device. I have no real insight into how it works. It’s not clear to me how physically robust the device is, or whether it represents a significant improvement over just using Google Authenticator. I will continue to play with it for now. One of the things on my list is to implement a webserver of my own in Python that uses the U2F protocol as well. Eventually I’ll try it with other applications (github probably next) but will probably continue to use Google Authenticator for many others.

If you are interested in this topic, feel free to leave a comment or ask a question.

Addendum: The github page for the U2F Zero indicates that the CPU it uses is a “Universal Bee” which is made by Silicon Labs, which cost about $1.38 in quantity one, and are optimized for low power USB applications. It has 16K of flash memory, and 2K of RAM.

Ordered some ESP8266 boards in an Arduino form factor…

r2_1The ESP8266 is an amazing little processor: cheap and capable and (most interestingly) WiFi enabled. I have some of the older “nodemcu” boards that I got for about $7 each, but there are newer alternatives that include up to 4M of flash memory, and a variety of interesting form factors.

I noticed that WeMos was producing these boards which nominally have the Arduino Uno form factor. With a 15% discount coupon from banggood.com, I got three of them on order for under $16. I’ll let you know how they work out. I’m normally not a fan of the classic Arduino shape, but I do have a number of 3d printed cases and bumpers that can be used, which makes them relatively easy to mount and wire up.

If you want to program the ESP8266, you might try using platformio, which makes it easy to use both the native SDK as well as a simpler Arduino based framework. It also supports a number of other embedded architectures, including the Arduino, but allows you to use your own editor and the like to build and organize your code. Worth looking at.

KenKen puzzle solver…

Lately, my lunch hours have been spent working on the NYT Crossword with my lunch companion Tom. While I find that the Thursday crosswords are often beyond my ability to do in the allotted time, between the two of us, more often than not we manage to plow through them. Slowly over time, we’ve begun to solve them slightly quicker, so I’ve branched out to doing the KenKen puzzles.

For those of you who haven’t seen these before, you can learn about them on their official website here. The 4×4 ones are usually pretty easy, but the last couple days have done some 6×6 puzzles have been shockingly hard. So much so, that today I got to this state on today’s puzzle:

IMG_1128

Yes, I was using pen. And I made a mistake, although I can’t see what I was thinking when I did. And because I made a mistake, I couldn’t spot it, and I was hung up. The “4” in first column was wrong. I knew it could not be a 6 or 1, or a 3, or a 4, but for some reason I thought that the final column couldn’t be 4 and 3, but..

Never mind, it doesn’t matter what the mistake was.

By the end up twenty minutes I was annoyed, knew I had made a mistake, but decided to give into the urge to write a program to solve it. How long could it take?

Well, the answer was about 27 minutes.

This program doesn’t have any interface or flexibility, everything is hard coded. Basically it uses backtracking and fills in each square in order from bottom left to top right, and as the top most, right most square of each outlined area is finished, it checks to make sure that the sums/differences/whatever for the filled in region sum to the right values. I didn’t know how I was going to encode those constraints, so I just ended up writing a function that computes the proper constraint. This is not really the right way to do it: it’s error prone and requires recompilation of the code to change the puzzle. But it does work fairly well, once you type the expressions in correctly.

Once I got those straightened out, it blats out the solution in less than 1 millisecond on my desktop.

+---+---+---+---+---+---+
| 6 | 1 | 5 | 2 | 4 | 3 |
+---+---+---+---+---+---+
| 2 | 6 | 1 | 3 | 5 | 4 |
+---+---+---+---+---+---+
| 1 | 4 | 6 | 5 | 3 | 2 |
+---+---+---+---+---+---+
| 3 | 2 | 4 | 6 | 1 | 5 |
+---+---+---+---+---+---+
| 5 | 3 | 2 | 4 | 6 | 1 |
+---+---+---+---+---+---+
| 4 | 5 | 3 | 1 | 2 | 6 |
+---+---+---+---+---+---+

1 solutions found

It points out that the 4 should have been a 2 (IDIOT!) and then it all works out.

The code is 178 lines long, but is not particularly pretty/short/adaptable. Some day, I’ll have to tidy it up and make a better version.

But in case people find this stuff interesting, here it is. Remember: 27 minutes to write.

[sourcecode lang=”cpp”]
include <stdio.h>
#include <stdlib.h>
#include <string.h>

/*
* kenken.c
*
* A program inspired by a particular tough 6×6 puzzle that appeared
* on Thursday, May 11, 2016, which Tom Duff and I could not appear to
* get the answer to during our lunch hour. I thought that it was possible
* that I could write a program to solve the puzzle in less than an hour.
*
* Hence, this code.
*
*/

int total = 0 ;

#define DIM (6)

typedef struct t_puzzle_state {
int sq[DIM][DIM] ;
int r[DIM] ; // bitflag for values left in rows…
int c[DIM] ; // bitflag for values available in columns
} PuzzleState ;

void
PrintPuzzleState(PuzzleState *p)
{
int i, j ;

printf("+") ;
for(j=0; j<DIM; j++)
printf("—+") ;
printf("\n") ;

for (i=0; i<DIM; i++) {
printf("|") ;
for (j=0; j<DIM; j++) {

if (p->sq[DIM-1-i][j])
printf(" %1d |", p->sq[DIM-1-i][j]) ;
else
printf(" |") ;
}
printf("\n+") ;
for(j=0; j<DIM; j++)
printf("—+") ;
printf("\n") ;
}
printf("\n") ;
}

void
InitializePuzzleState(PuzzleState *p)
{
int i, j ;

memset((void *) p, 0, sizeof(*p)) ;

for (i=0; i<DIM; i++) {
for (j=1; j<=DIM; j++) {
p->r[i] |= (1<<j) ;
p->c[i] |= (1<<j) ;
}
}
}

void
HardcodePuzzleState(PuzzleState *p, int r, int c, int val)
{
p->sq[r][c] = val ;
p->r[r] &= ~(1<<val) ;
p->c[c] &= ~(1<<val) ;
}

#define SQUARE(i, j) ((i)*DIM+(j))
#define ABS(x) ((x)<0?(-(x)):(x))

int
ConstraintSatisfied(PuzzleState *p, int i, int j)
{
switch (SQUARE(i,j)) {
case SQUARE(0,1):
return ABS(p->sq[0][0] – p->sq[0][1]) == 1 ;
case SQUARE(0,2):
return p->sq[0][2] == 3 ;
case SQUARE(1, 3):
return (p->sq[0][3]+p->sq[1][3]) == 5 ;
case SQUARE(1, 4):
return (p->sq[0][4] * p->sq[0][5] * p->sq[1][4]) == 72 ;
case SQUARE(2, 2):
if (p->sq[2][2] == 2 * p->sq[1][2])
return 1 ;
if (p->sq[1][2] == 2 * p->sq[2][2])
return 1 ;
return 0 ;
case SQUARE(2, 4):
return ABS(p->sq[2][4] – p->sq[2][3]) == 5 ;
case SQUARE(3, 1):
if (p->sq[3][1] == 2 * p->sq[2][1])
return 1 ;
if (p->sq[2][1] == 2 * p->sq[3][1])
return 1 ;
return 0 ;
case SQUARE(3, 5):
return (p->sq[3][5]+p->sq[2][5]+p->sq[1][5]) == 8 ;
case SQUARE(4, 2):
return ABS(p->sq[4][2] – p->sq[4][1]) == 5 ;
case SQUARE(4, 3):
return p->sq[4][3] == 3 ;
case SQUARE(4, 4):
return (p->sq[4][4]+p->sq[3][2]+p->sq[3][3]+p->sq[3][4]) == 19 ;
case SQUARE(5, 1):
return (p->sq[4][0]*p->sq[5][0]*p->sq[5][1]) == 12 ;
case SQUARE(5, 4):
return (p->sq[5][2]+p->sq[5][3]+p->sq[5][4]) == 11 ;
case SQUARE(5, 5):
return (p->sq[5][5]+p->sq[4][5]) == 7 ;
default:
return 1 ;
}

return 1 ;
}

void
SolvePuzzleState(PuzzleState *p, int i, int j)
{
int v ;

if (i >= DIM) {
PrintPuzzleState(p) ;
total ++ ;
return ;
}

int pval = p->r[i] & p->c[j] ;

for (v=1; v<=DIM; v++) {
if ((pval & (1<<v)) == 0)
continue ;
// Try to place v in sq[i][j] ;
p->sq[i][j] = v ;

if (ConstraintSatisfied(p, i, j)) {
p->r[i] &= ~(1<<v) ;
p->c[j] &= ~(1<<v) ;

int ni, nj ;
nj = j + 1 ;
if (nj < DIM) {
ni = i ;
} else {
ni = i + 1 ;
nj = 0 ;
}

SolvePuzzleState(p, ni, nj) ;

p->r[i] |= (1<<v) ;
p->c[j] |= (1<<v) ;
}
}
p->sq[i][j] = 0 ;
}

main()
{
PuzzleState p ;
InitializePuzzleState(&p) ;
// HardcodePuzzleState(&p, 0, 2, 3) ;
// HardcodePuzzleState(&p, 4, 3, 3) ;

SolvePuzzleState(&p, 0, 0) ;
fprintf(stderr, "%d solutions found\n", total) ;
}
[/sourcecode]

More on Caxton Foster’s Blue Architecture…

Okay, it’s been a long time since I wrote anything here. Not really a lot dramatic going on in life, I just have been spending my free time writing for Quora rather than my own blog. But I still am nerding out from time to time. Last night I dusted off an old project of mine and carried it a bit further…

I had written a short post before about a simulator I wrote for Caxton Foster’s “Blue” computer architecture described in his book Computer Architecture. I have the third edition published in 1985. The “Blue” architecture is ridiculously simple: only sixteen instructions, 4096 words of memory, and only one addressing mode. If you click back to my previous post, you’ll see a complete behavioral simulator for it, written in less than an hour.

Somehow this came back up, and I was suddenly intrigued by the idea of trying to write a simple program for it, just to test my ideas about how awful such a machine would be. Ultimately, my goal is to write a simple program that can compute the value of pi to around 100 decimal places. Such a program seems doable, but it’s not a complete cakewalk. But to achieve this, I thought it might be fun to write a simple assembler.

So, I shook the cobwebs that have covered the bits of my brain that understood yacc/lex/bison/flex and wrote a simple assembler for the architecture. It totals only about 250 lines of code, but can handle symbolic labels and all the instructions. It took me about two hours of wall clock time, with my attention split between programming and watching the latest episode of Grimm.

I doubt the assembler is of any real interest, but eventually I’ll get the code onto github.

I then sat down this morning, and wrote this simple program to take the signed value at the memory location VALUE and print it as a signed decimal number. It prints the sign then five digits, with leading zeros if necessary. I didn’t bother to comment
the code, but here it is…

[sourcecode lang=”text”]
PRINTVALUE:
LDA VALUE
JMA NEG
LDA PLUS
OUT
POS:
LDA S0
STA TMP0
SRJ DODIGIT
LDA S1
STA TMP0
SRJ DODIGIT
LDA S2
STA TMP0
SRJ DODIGIT
LDA S3
STA TMP0
SRJ DODIGIT
LDA S4
STA TMP0
SRJ DODIGIT
HLT

DODIGIT:
IOR JMPBIT
STA RETURN
LDA ZERO
STA DIGIT
LOOP: LDA VALUE
ADD TMP0
JMA DONE
STA VALUE
LDA DIGIT
ADD ONE
STA DIGIT
JMP LOOP
DONE:
LDA DIGIT
ADD FE
OUT
RETURN:
JMP 0

NEG:
LDA MINUS
OUT
LDA VALUE
XOR ONES
ADD ONE
STA VALUE
JMP POS

VALUE: .WORD 12323
TMP0: .WORD 0
DIGIT: .WORD 0
S0: .WORD -10000
S1: .WORD -1000
S2: .WORD -100
S3: .WORD -10
S4: .WORD -1
ZERO: .WORD 0
ONE: .WORD 1
ONES: .WORD $FFFF
JMPBIT: .WORD $A000
MINUS: .STRING "-"
PLUS: .STRING "+"
FE: .WORD 48
[/sourcecode]

The assembler spits out a series of 16 bit words which can be loaded into my
simulator…

[sourcecode lang=”text”]
0x602B, 0x9024, 0x6038, 0xC000, 0x602E, 0x702C, 0x8014, 0x602F,
0x702C, 0x8014, 0x6030, 0x702C, 0x8014, 0x6031, 0x702C, 0x8014,
0x6032, 0x702C, 0x8014, 0x0000, 0x4036, 0x7023, 0x6033, 0x702D,
0x602B, 0x102C, 0x9020, 0x702B, 0x602D, 0x1034, 0x702D, 0xA018,
0x602D, 0x1039, 0xC000, 0xA000, 0x6037, 0xC000, 0x602B, 0x2035,
0x1034, 0x702B, 0xA004, 0x3023, 0x0000, 0x0000, 0xD8F0, 0xFC18,
0xFF9C, 0xFFF6, 0xFFFF, 0x0000, 0x0001, 0xFFFF, 0xA000, 0x002D,
0x002B, 0x0030,
[/sourcecode]

The data above gets simply compiled into my simulator and runs.

Screen Shot 2016-03-26 at 10.57.16 AM

Okay, so what’s fun to note about this?

There is only a single register, the accumulator. You spend a LOT of time loading things, modifying the value, and storing them back into main memory. There is no “immediate mode”, so you have to create memory locations to store common values like “1” and “0”. DODIGIT is a subroutine, which is called by the SRJ instruction. SRJ puts the PC into the accumulator, and then jumps to the specified address. To “return”, you OR in the bits to the accumulator to form a JMP instruction, and then store that at the end of your subroutine. There is no call stack. Although not demonstrated particularly here, the processor does not implement indexing or indirection. There is also no real condition registers such as CARRY or OVERFLOW, so implementing multi-precision arithmetic might be a challenge.

Foster’s book also details additions to this architecture, eventually becoming INDIGO, an architecture which is rather similar to a PDP-8.

Sure, if you are going to really learn computer archtictures, Patterson and Hennessy is probably a better path, but there is something like of pleasing in this archaic trip down memory lane. My pi computing program will percolate in my brain for a bit, and will find implementation on some other evening.

Addendum: Hackaday recently posted about Al Williams’ FPGA implementation of an architecture which is based upon Foster’s Blue machine. I believe he made a number of changes that make it more practical, but it might be worth looking at. He wrote a monitor, which seems to use opcodes which aren’t compatible with mine.

Addendum2: Pondering it some more throughout the day, it seems difficult to implement my idea of a pi computing program for this virtual machine. All of the algorithms that I can think of require 32 bit numbers, and the Blue architecture simply lacks the capabilities needed to implement it. It also is pretty weak on conditional statements: the only condition that you can branch on is the sign bit of the accumulator.

On calculators, Space Invaders and Binary Coded Decimal Arithmetic…

A couple days ago, one of my Twitter or Facebook friends (sadly, I forgot who, comment if it was you, and I’ll give you credit) pointed out this awesome page:

Reversing Sinclair’s amazing 1974 calculator hack – half the ROM of the HP-35

It documented an interesting calculator made by Sinclair in the 1970s. It is an awesome hack that was used to create a full scientific calculator with logarithms and trigonometric functions out of an inexpensive chip from TI which could (only barely) do add, subtract, multiply and divide. The page’s author, Ken Shirriff, wrote a nifty little simulator for the calculator that runs in the browser. Very cute. It got me thinking about the bizarre little chip that was at the center of this device.

I’m kind of back in an emulator kick. I recently had dusted off my code that I had started for emulating the 8080 processor. I had originally wanted to implement a version of CP/M, but I remembered that the 1978 game Space Invaders was also based upon the 8080. It wasn’t hard to find a ROM file for it, and with a little bit of hacking, research and debugging, I had my own version of Space Invaders written in C and using SDL2, running on my Mac laptop.

Screen Shot 2015-09-16 at 12.46.01 PM

Fun stuff.  The sound is a little crude: most of the sound in the original game was generated by a series of discrete circuits which you can find on this page archived via the Wayback Machine. I briefly played around with simulating some of the sounds using LTSpice based upon these circuits (it appears to work fairly well), but I haven’t got that fully integrated into my simulator yet. For now, it just queues up some recorded sounds and plays them at the appropriate time. Everything is currently working except for the classic “thump… thump…” of their marching. I’ll get that working sometime soon.

Anyway, back to calculators. One thing on Ken’s page kind of made me think: he mentioned that the HP-35 had taken two years, twenty engineers, and a million dollars to develop. Mind you, the HP-35 was pretty revolutionary for its time. But I thought to myself “isn’t a calculator an easy hobby project now?”

After all, I had assembled a KIM-Uno, Oscar’s awesome little $10 board that emulates the KIM-1 microcomputer:

In fact, the KIM-Uno implements a floating point calculator as well. It’s brains are just an ordinary Arduino Pro Mini wired on the back. Arduino Pro Minis can be had for less than $3 from China. Could I make a fun little calculator using that as the basis?

My mind is obviously skipping around a lot at this point.

Of course, a bit more googling revealed that someone had done something very similar using the MSP430 chips from (appropriately enough, also manufactured by Texas Instruments). Check out the build thread here.. It’s pretty nifty, and uses a coin cell to drive it, as well as some very classic looking “bubble LED displays”, which you can get from Sparkfun. Pretty cool.

Anyway…

For fun, I thought it might be fun to write some routines to do binary coded decimal arithmetic. My last real experience with it was on the 6502 decades ago, and I had never done anything very sophisticated with it. I understood the basic ideas, but I needed some refresher, and was wondering what kind of bit twiddling hacks could be used to implement the basic operations. Luckily, I stumbled onto Douglas Jones’ page on implementing BCD arithmetic, which is just what the doctor ordered. He pointed out some cool tricks and wrinkles associated with various bits of padding and the like. I thought I’d code up a simple set of routines that stored 8 BCD digits in a standard 32 bit integer. His page didn’t include multiplication or division. Multiplication was simple enough to do (at least in this slightly crazy “repeated addition” way) but I’ll have to work a bit harder to make division work. I’m not sure I really know the proper way to handle overflow and the sign bits (my multiplication currently multiplies two 8 digit numbers, and only returns the low 8 digits of the result). But.. it seems to work.

And since I haven’t been posting stuff to my blog lately, this is an attempt to get back to it.

Without further ado, here is some code:

[sourcecode lang=”C”]
/*
* A simple implementation of the ideas/algorithms in
* http://homepage.cs.uiowa.edu/~jones/bcd/bcd.html
*
* Written with the idea of potentially doing a simple calculator that
* uses BCD arithmetic.
*/

#include <stdio.h>
#include <stdint.h>
#include <inttypes.h>

typedef uint32_t bcd8 ; /* 8 digits packed bcd */

int
valid(bcd8 a)
{
bcd8 t1, t2, t3, t4 ;
t1 = a + 0x06666666 ;
t2 = a ^ 0x06666666 ;
t3 = t1 ^ t2 ;
t4 = t3 & 0x111111110 ;
return t4 ? 0 : 1 ;
}

bcd8
add(bcd8 a, bcd8 b)
{
bcd8 t1, t2, t3, t4, t5, t6 ;

t1 = a + 0x06666666 ;
t2 = t1 + b ;
t3 = t1 ^ b ;
t4 = t2 ^ t3 ;
t5 = ~t4 & 0x11111110 ;
t6 = (t5 >> 2) | (t5 >> 3) ;
return t2 – t6 ;
}

bcd8
tencomp(bcd8 a)
{
bcd8 t1 ;

t1 = 0xF9999999 – a ;
return add(t1, 0x00000001) ;
}

bcd8
sub(bcd8 a, bcd8 b)
{
return add(a, tencomp(b)) ;
}

bcd8
mult(bcd8 a, bcd8 b)
{
bcd8 result = 0 ;
bcd8 tmp = a ;
bcd8 digit ;
int i, j ;

for (i=0; i<8; i++) {

digit = b & 0xF ;
b >>= 4 ;

for (j=0; j<digit; j++)
result = add(result, tmp) ;

tmp <<= 4 ;
}
return result ;
}

int
main(int argc, char *argv[])
{
bcd8 t = 0x00009134 ;
bcd8 u = 0x00005147 ;
bcd8 r ;

r = mult(t, u) ;
printf("%X * %X = %X\n", t, u, r) ;
}
[/sourcecode]

I’ll have to play around with this some more. It shouldn’t be hard to move code like this to run on the Arduino Pro Mini, and drive 3 bubble displays (yielding 11 digits plus a sign bit) of precision. And I may not use this 8 digits packed into 32 bit format: since I want 12 digits, maybe packing only 4 digits into a 32 bit word would work out better.

Anyway, it’s all kind of fun to think about the clanking clockwork that lived inside these primitive machines.

I’ll try to post more often soon.

One dimensional cellular automata code in Python..

Inspired by the KnitYak Kickstarter, I thought I would code up a simple Python program that could generate the same sort of patterns that are used in the scarves in the video. If you want to learn more about the mathematical theory of these cellular automata, google for keywords like “1D” “cellular automata” and “steve wolfram”. Without much further explanation, here is the code:

[sourcecode lang=”python”]
#!/usr/bin/env python

# __
# ___ __ __ _ _ _ / _|
# (_-</ _/ _` | ‘_| _|
# /__/\__\__,_|_| |_|
#
# Inspired by the KnitYak Kickstarter, which offers
# mathematical scarves whose patterns are algorithmically
# generated, I thought it would be good to dust off my old
# knowledge and generate the same sort of patterns using
# Python. The patterns are simply printed using ASCII,
# but the code could be adapted to output in other forms
# easily.
#
# Written by Mark VandeWettering
#

import sys
import random

WIDTH=79 # How wide is the pattern?

w = WIDTH * [0] # create the current generation
nw = WIDTH * [0] # and the next generation
w[WIDTH/2] = 1 # populate with a single one

# or alternatively, you can populate it with a random
# initial configuration. If you want to start with
# just a single one, comment the next two lines out.

#for i in range(WIDTH):
# w[i] = random.randint(0, 1)

# How wide is the neighborhood of cells that are
# examined? The traditional Wolfram 1D cellular
# automata uses a neighborhood of 3…

NEIGHBORHOOD=3

# rtab is space for the rule table. It maps all
# numbers from [0, 2**NEIGHBORHOOD) to either a 0 or 1.
rtab = (2**NEIGHBORHOOD) * [0]

# The "rule" is a number which is used to populate
# rtab. The number is in the range [0, 2**(2**NEIGHBORHOOD))
# Many rules generate uninteresting patterns, but some
# like 30 generate interesting, aperiodic patterns.
rule = 30

# This fills in the table…
for i in range(2**NEIGHBORHOOD):
if ((2**i) & rule) != 0:
rtab[i] = 1

def dump(r):
for x in r:
if x == 1:
sys.stdout.write(‘X’)
else:
sys.stdout.write(‘ ‘)
sys.stdout.write(‘\n’)

# and generates 100 lines…

for y in range(100):
dump(w)
for x in range(WIDTH):
sum = 0
for d in range(NEIGHBORHOOD):
sum = sum + (2**d) * w[(x+d+WIDTH – NEIGHBORHOOD/2) % WIDTH]
nw[x] = rtab[sum]
w, nw = nw, w
[/sourcecode]

The pattern this generates with these settings follows. Try adjusting rule to other numbers up to 255 to generate other patterns. Lots will be boring, but some will be pretty interesting.

                                                                               
                                       X                                       
                                      XXX                                      
                                     X  XX                                     
                                    XXXX XX                                    
                                   X   X  XX                                   
                                  XXX XXXX XX                                  
                                 X  X    X  XX                                 
                                XXXXXX  XXXX XX                                
                               X     XXX   X  XX                               
                              XXX   X  XX XXXX XX                              
                             X  XX XXXX X    X  XX                             
                            XXXX X    X XX  XXXX XX                            
                           X   X XX  XX  XXX   X  XX                           
                          XXX XX  XXX XXX  XX XXXX XX                          
                         X  X  XXX  X   XXX X    X  XX                         
                        XXXXXXX  XXXXX X  X XX  XXXX XX                        
                       X      XXX    X XXXX  XXX   X  XX                       
                      XXX    X  XX  XX    XXX  XX XXXX XX                      
                     X  XX  XXXX XXX XX  X  XXX X    X  XX                     
                    XXXX XXX   X   X  XXXXXX  X XX  XXXX XX                    
                   X   X   XX XXX XXXX     XXXX  XXX   X  XX                   
                  XXX XXX X X   X    XX   X   XXX  XX XXXX XX                  
                 X  X   X X XX XXX  X XX XXX X  XXX X    X  XX                 
                XXXXXX XX X  X   XXXX  X   X XXX  X XX  XXXX XX                
               X     X  X XXXXX X   XXXXX XX   XXXX  XXX   X  XX               
              XXX   XXXXX     X XX X    X  XX X   XXX  XX XXXX XX              
             X  XX X    XX   XX  X XX  XXXX X XX X  XXX X    X  XX             
            XXXX X XX  X XX X XXXX  XXX   X X  X XXX  X XX  XXXX XX            
           X   X X  XXXX  X X    XXX  XX XX XXXX   XXXX  XXX   X  XX           
          XXX XX XXX   XXXX XX  X  XXX X  X    XX X   XXX  XX XXXX XX          
         X  X  X   XX X   X  XXXXXX  X XXXXX  X X XX X  XXX X    X  XX         
        XXXXXXXXX X X XX XXXX     XXXX     XXXX X  X XXX  X XX  XXXX XX        
       X        X X X  X    XX   X   XX   X   X XXXX   XXXX  XXX   X  XX       
      XXX      XX X XXXXX  X XX XXX X XX XXX XX    XX X   XXX  XX XXXX XX      
     X  XX    X X X     XXXX  X   X X  X   X  XX  X X XX X  XXX X    X  XX     
    XXXX XX  XX X XX   X   XXXXX XX XXXXX XXXX XXXX X  X XXX  X XX  XXXX XX    
   X   X  XXX X X  XX XXX X    X  X     X    X    X XXXX   XXXX  XXX   X  XX   
  XXX XXXX  X X XXX X   X XX  XXXXXX   XXX  XXX  XX    XX X   XXX  XX XXXX XX  
 X  X    XXXX X   X XX XX  XXX     XX X  XXX  XXX XX  X X XX X  XXX X    X  XX 
XXXXXX  X   X XX XX  X  XXX  XX   X X XXX  XXX  X  XXXX X  X XXX  X XX  XXXX XX
     XXXXX XX  X  XXXXXX  XXX XX XX X   XXX  XXXXXX   X XXXX   XXXX  XXX   X   
    X    X  XXXXXX     XXX  X  X  X XX X  XXX     XX XX    XX X   XXX  XX XXX  
   XXX  XXXX     XX   X  XXXXXXXXXX  X XXX  XX   X X  XX  X X XX X  XXX X   XX 
  X  XXX   XX   X XX XXXX         XXXX   XXX XX XX XXX XXXX X  X XXX  X XX X XX
XXXXX  XX X XX XX  X    XX       X   XX X  X  X  X   X    X XXXX   XXXX  X X  X
    XXX X X  X  XXXXX  X XX     XXX X X XXXXXXXXXXX XXX  XX    XX X   XXXX XXX 
   X  X X XXXXXX    XXXX  XX   X  X X X           X   XXX XX  X X XX X   X   XX
X XXXXX X      XX  X   XXX XX XXXXX X XX         XXX X  X  XXXX X  X XX XXX X X
X     X XX    X XXXXX X  X  X     X X  XX       X  X XXXXXX   X XXXX  X   X X  
XX   XX  XX  XX     X XXXXXXXX   XX XXX XX     XXXXX      XX XX    XXXXX XX XXX
 XX X XXX XXX XX   XX        XX X X   X  XX   X    XX    X X  XX  X    X  X    
X X X   X   X  XX X XX      X X X XX XXXX XX XXX  X XX  XX XXX XXXXX  XXXXXX   
X X XX XXX XXXX X X  XX    XX X X  X    X  X   XXXX  XXX X   X     XXX     XX X
X X  X   X    X X XXX XX  X X X XXXXX  XXXXXX X   XXX  X XX XXX   X  XX   X X  
X XXXXX XXX  XX X   X  XXXX X X     XXX     X XX X  XXXX  X   XX XXXX XX XX XXX
X     X   XXX X XX XXXX   X X XX   X  XX   XX  X XXX   XXXXX X X    X  X  X    
XX   XXX X  X X  X    XX XX X  XX XXXX XX X XXXX   XX X    X X XX  XXXXXXXXX  X
 XX X  X XXXX XXXXX  X X  X XXX X    X  X X    XX X X XX  XX X  XXX        XXX 
X X XXXX    X     XXXX XXXX   X XX  XXXXX XX  X X X X  XXX X XXX  XX      X  XX
X X    XX  XXX   X   X    XX XX  XXX    X  XXXX X X XXX  X X   XXX XX    XXXX  
X XX  X XXX  XX XXX XXX  X X  XXX  XX  XXXX   X X X   XXXX XX X  X  XX  X   XXX
X  XXXX   XXX X   X   XXXX XXX  XXX XXX   XX XX X XX X   X  X XXXXXX XXXXX X   
XXX   XX X  X XX XXX X   X   XXX  X   XX X X  X X  X XX XXXXX      X     X XX X
  XX X X XXXX  X   X XX XXX X  XXXXX X X X XXXX XXXX  X     XX    XXX   XX  X  
 X X X X    XXXXX XX  X   X XXX    X X X X    X    XXXXX   X XX  X  XX X XXXXX 
XX X X XX  X    X  XXXXX XX   XX  XX X X XX  XXX  X    XX XX  XXXXXX X X     XX
 X X X  XXXXX  XXXX    X  XX X XXX X X X  XXX  XXXXX  X X  XXX     X X XX   X  
XX X XXX    XXX   XX  XXXX X X   X X X XXX  XXX    XXXX XXX  XX   XX X  XX XXX 
 X X   XX  X  XX X XXX   X X XX XX X X   XXX  XX  X   X   XXX XX X X XXX X   X 
XX XX X XXXXXX X X   XX XX X  X  X X XX X  XXX XXXXX XXX X  X  X X X   X XX XXX
 X  X X      X X XX X X  X XXXXXXX X  X XXX  X     X   X XXXXXXX X XX XX  X    
XXXXX XX    XX X  X X XXXX       X XXXX   XXXXX   XXX XX       X X  X  XXXXX   
    X  XX  X X XXXX X    XX     XX    XX X    XX X  X  XX     XX XXXXXX    XX X
X  XXXX XXXX X    X XX  X XX   X XX  X X XX  X X XXXXXX XX   X X      XX  X X X
XXX   X    X XX  XX  XXXX  XX XX  XXXX X  XXXX X      X  XX XX XX    X XXXX X  
  XX XXX  XX  XXX XXX   XXX X  XXX   X XXX   X XX    XXXX X  X  XX  XX    X XXX
XX X   XXX XXX  X   XX X  X XXX  XX XX   XX XX  XX  X   X XXXXXX XXX XX  XX   X
 X XX X  X   XXXXX X X XXXX   XXX X  XX X X  XXX XXXXX XX      X   X  XXX XX X 
XX  X XXXXX X    X X X    XX X  X XXX X X XXX  X     X  XX    XXX XXXX  X  X XX
 XXXX     X XX  XX X XX  X X XXXX   X X X   XXXXX   XXXX XX  X  X    XXXXXXX   
X   XX   XX  XXX X X  XXXX X    XX XX X XX X    XX X   X  XXXXXXXX  X      XX  
XX X XX X XXX  X X XXX   X XX  X X  X X  X XX  X X XX XXXX       XXXXX    X XXX
 X X  X X   XXXX X   XX XX  XXXX XXXX XXXX  XXXX X  X    XX     X    XX  XX    
XX XXXX XX X   X XX X X  XXX   X    X    XXX   X XXXXX  X XX   XXX  X XXX XX   
 X    X  X XX XX  X X XXX  XX XXX  XXX  X  XX XX     XXXX  XX X  XXXX   X  XX X
 XX  XXXXX  X  XXXX X   XXX X   XXX  XXXXXX X  XX   X   XXX X XXX   XX XXXX X X
  XXX    XXXXXX   X XX X  X XX X  XXX     X XXX XX XXX X  X X   XX X X    X X X
XX  XX  X     XX XX  X XXXX  X XXX  XX   XX   X  X   X XXXX XX X X X XX  XX X X
 XXX XXXXX   X X  XXXX    XXXX   XXX XX X XX XXXXXX XX    X  X X X X  XXX X X  
X  X     XX XX XXX   XX  X   XX X  X  X X  X      X  XX  XXXXX X X XXX  X X XX 
XXXXX   X X  X   XX X XXXXX X X XXXXXXX XXXXX    XXXX XXX    X X X   XXXX X  X 
    XX XX XXXXX X X X     X X X       X     XX  X   X   XX  XX X XX X   X XXXX 
   X X  X     X X X XX   XX X XX     XXX   X XXXXX XXX X XXX X X  X XX XX    XX
X XX XXXXX   XX X X  XX X X X  XX   X  XX XX     X   X X   X X XXXX  X  XX  X X
X  X     XX X X X XXX X X X XXX XX XXXX X  XX   XXX XX XX XX X    XXXXXX XXXX  
XXXXX   X X X X X   X X X X   X  X    X XXX XX X  X  X  X  X XX  X     X    XXX
    XX XX X X X XX XX X X XX XXXXXX  XX   X  X XXXXXXXXXXXXX  XXXXX   XXX  X   
   X X  X X X X  X  X X X  X      XXX XX XXXXX             XXX    XX X  XXXXX  
  XX XXXX X X XXXXXXX X XXXXX    X  X  X     XX           X  XX  X X XXX    XX

I will experiment with larger rules: the space of possible behaviors with a neighborhood of 5 is quite a bit larger (there are 2**32 possible rules instead of just 256).

Replacing the LCD Panel in a Samsung 303C Chromebook…

In what quite possibly might be the most boring video ever produced, I recorded myself changing the LCD panel out of my Chromebook. It’s 17 minutes of riveting youtube goodness. Skip down to the bottom if you want to watch.

But here’s the story if you’d rather just read a paragraph. My wife bought me this little Samsung 303C Chromebook a while ago, and unlike the netbook that I had years before, I actually found this gadget to be pretty useful. For those who may not know about Chromebooks, they run ChromeOS, an operating system designed by Google to mostly run web applications. You can read more about it, but essentially it’s an OS designed to run a browser and web applications. I use it mostly to do web browsing, email, writing (using Google Docs), Netflix, and running ssh to access other machines on my network. For that, it’s great: it has long battery life, is lightweight, and is cheap (list price is $200 or so). I have taken it when traveling instead of a tablet when I may need to get some writing done, and when bringing a full laptop would be more cumbersome.

Sadly, a few days ago I realized that I had somehow managed to crack the LCD screen on it. I tend to be pretty casual with the thing, so I probably kicked it around while it was on the floor or something. I was kind of bummed. But a little quick googling revealed that I could get a replacement screen from Amazon for about $39 with free shipping courtesy of Amazon Prime. I ordered it on Tuesday night, and got it Thursday.

The replacement is very, very simple: I suspect having done it once I could probably do it in less than five minutes. The procedure is basically to turn off the unit, pop off the bezel (just use your fingers), and remove four screws that hold the screen in place. Then, you have to disconnect the ribbon connector, which I found to be a little unobvious, and results in a boring middle part of this video, where I am trying to understand exactly how to release the catch. I was overly cautious, and wanted to make sure I knew what I was doing, so I stopped and rewatched another video, which didn’t help a lot. In the end, I realized what I was staring at: there is a C shaped hasp which goes around the outside of the connector on the board, and had a plastic tab which was hidden under a layer of tape above. Once I figured that out, I used a small screwdriver to lift the edge, and disconnected the ribbon cable. After that, it was entirely easy: just reverse the process, attach the cable, secure the four screws again, pop the bezel on, and voila! Screen works again.

At the very end of the video, you can hear me muttering a little bit about the “black line”. When I reinstalled it, it looks a little like the active area of the screen is a little offset: I see a black gap at the top, and the active lines of the screen at the very bottom are very close (or even hidden a little) by the bezel. I was wondering if perhaps I should have secured the panel with the alternate set of screw holes. Rewatching the video, it appears that I used the same set that the original did, but I might still disassemble it to adjust this and see if it makes the result better.

In any case, it was a quick and easy fix, and I’m glad my trusty little Chromebook is back and running.

Regarding production: I filmed it all with my GoPro Hero 3 (white). I apologize a bit for the audio, I’m picking up a bit of noise, and didn’t have time to fix it. I assembled the two clips using an FFMPEG script that I have used before, with one addition: I realized that I typed my login password on camera, thought that might be a bad idea, so I figured out how to blur out the image at that time. Fun! I might make a new article about that later, when I develop some more interesting examples.

Hope this helps someone in the future!

A Big Bin Full O’ Development Boards at BrainWagon Labs…

I have an odd obsession with small, relatively cheap hardware development boards. Over the last few years, I’ve acquired a bunch of them, from Arduino to Raspberry Pi to BeagleBone Black. I thought it might be nice to just do a short video showing what I have around. So I did. Here’s a little 25 minute video demoing what I’ve got lying around.

Here’s a bunch of links to some of the boards I mentioned:

  • Arduino, the classic board. Based upon the ATMEGA328, an 8 bit processor, 32K of flash, 20Mhz. Great user community.
  • Beagle Bone Black Very cool Linux based machine.
  • Raspberry Pi Perhaps my favorite board, I don’t have the version 2 board yet, but the version B+ boards are really nice. I particularly like the Pi Camera boards you can use with them.
  • WRTNode A very cool, very cheap Linux box, with WiFi. Runs OpenWRT, a stripped down version of Linux, but still cool.
  • Wild Fire board A very nifty little board by Wicked Devices, who supplied me with a couple. During the video, I mentioned that I thought these boards were a bit expensive, but checking their website, I see them selling for about $49. If you need an Arduino compatible board with some extra punch, it’s a great little board.
  • ESP8266 The tiniest and cheapest board that I had. Often used as simple serial->WiFi chips, they are actually quite powerful and can be reprogrammed. This lua based firmware is a cool example.

Another bit of programmable hardware: the WRTnode

I’ve got a weak spot for cheap, programmable hardware. In my junk drawer I’ve got a collection of Arduinos, Parallax Propellor boards, a couple of STM32 based ARM boards, and several Beagle Bone Blacks and Raspberry Pis. Today, another entry arrived: the WRTnode.

I’ve only had it out of the box for a few hours, and a little bit of tinkering, but here are my initial impressions.

WRTnodeA few basics first: it’s a small, cheap Linux computer. Nominally, the list price is supposed to be $25, but I ordered mine via the Amazon store and paid a bit of a premium: it cost $35, but shipped in two days via Amazon Prime. It comes in a small plastic box the size of an Altoids tin, and includes a little USB cable that allows you to chain an extra USB device to it, as well as provide power. I plugged mine into a little D-Link USB hub I had lying around. Seems to work fine.

In terms of capability, it falls somewhere between the Arduino and a Raspberry Pi. The processor is actually not ARM based, it’s an MTK MT7620N MIPS processor that runs at 580Mhz. It has a 512Mbit DDR2 RAM and 128Mbit of SPI flash ROM. This is quite a bit less than the Raspberry Pi, but it does have one cool added feature: it’s got a 300Mbit wireless networking chip on board which can do 802.11n. It also can handle USB host mode. Basically, you can think of this as the brains to a fairly reasonable wireless router. It’s a very small board, only 45mm x 50mm, and includes 23 GPIO pins, as well as JTAG and SPI.

Because of it’s rather limited memory, it can’t run full Debian. Instead, it runs the OpenWRT distribution, a small distribution which is often used on tiny embedded boxes that serve as routers. It runs BusyBox, has the tiny shell “ash”, as well as the LuCI web based configuration interface, which is based upon the uhttpd webserver.

Setting it up was pretty darned easy: I plugged the supplied USB cable into it, and the other end into my powered hub. A small blue LED comes on, and about 20 seconds later, a new wireless access point was visible called WRTnode9DDB. If you attach to that network, you are asked for a network password, which defaults to 12345678, and then you can telnet to the device, which defaults to IP address 192.168.8.1. You can login as root with no password. If you run passwd you can enter a new password, and then you can use ssh to connect to it.

Screen Shot 2015-01-02 at 9.14.47 PM

Nifty! If you cat /proc/cpuinfo you can get information about the processor:

system type		: Ralink MT7620N ver:2 eco:6
machine			: WRTNODE
processor		: 0
cpu model		: MIPS 24KEc V5.0
BogoMIPS		: 398.13
wait instruction	: yes
microsecond timers	: yes
tlb_entries		: 32
extra interrupt vector	: yes
hardware watchpoint	: yes, count: 4, address/irw mask: [0x0ffc, 0x0ffc, 0x0ffb, 0x0ffb]
isa			: mips1 mips2 mips32r1 mips32r2
ASEs implemented	: mips16 dsp
shadow register sets	: 1
kscratch registers	: 0
core			: 0
VCED exceptions		: not available
VCEI exceptions		: not available

and ditto for cat /proc/meminfo:

MemTotal:          61852 kB
MemFree:           22516 kB
Buffers:            4828 kB
Cached:            17928 kB
SwapCached:            0 kB
Active:            14292 kB
Inactive:          10744 kB
Active(anon):       3772 kB
Inactive(anon):       76 kB
Active(file):      10520 kB
Inactive(file):    10668 kB
Unevictable:           0 kB
Mlocked:               0 kB
SwapTotal:             0 kB
SwapFree:              0 kB
Dirty:                 0 kB
Writeback:             0 kB
AnonPages:          2296 kB
Mapped:             1960 kB
Shmem:              1568 kB
Slab:               6028 kB
SReclaimable:       1784 kB
SUnreclaim:         4244 kB
KernelStack:         296 kB
PageTables:          292 kB
NFS_Unstable:          0 kB
Bounce:                0 kB
WritebackTmp:          0 kB
CommitLimit:       30924 kB
Committed_AS:       6948 kB
VmallocTotal:    1048372 kB
VmallocUsed:        2204 kB
VmallocChunk:    1032516 kB

OpenWRT isn’t as full featured as some Linux distributions, but it’s not bad. It includes ssh, Python and Lua. It’s got vi. It runs its own small package manager called opkg, which has a pretty good selection of precompiled packages available for install (although its good to be careful, you don’t have an infinite amount of space). Scanning the list, it’s got installation packages for lighttpd, Asterix, and a bunch of other goodies.

I haven’t had a lot of time to mess with it, but I’m fairly impressed so far. I have a feeling I’m going to miss having a C compiler/make setup on the board, but it looks to be pretty simple to cross compile to it from my main Linux box. I have already rebuilt the distribution, and will probably try flashing it sometime soon.

If you are in the market for a little machine with features like this (esp. with WiFi), it might be worth it.

A pair of geeky Advent calendars…

Advent is the season observed in many Christian traditions that is a time of expectant waiting and preparation for Christmas. When I was young, we’d have an Advent calendar, which counted down the days to Christmas, and would gift us with a little chocolate or candy each day.

While I am no longer religious, the idea is kind of cool: to take a little time out of each day and enjoy a tasty treat of some sort, and think of the upcoming holiday. A couple of cool examples have crossed my desk…

I like to experiment with embedded controllers, machine emulation and operating systems, so I am of course familiar with QEMU, but in case you are not: QEMU is a generic and open source machine emulator and virtualizer. It allows you simulate machines and run code written for one machine (say, an ARM board) on your PC using virtual hardware peripherals. It also serve as a “virtualizer”, which basically means that if you have an x86 Linux box, you can run a different x86 operating system on the same hardware, at very nearly native performance. In short, it’s pretty awesome.

If you like this kind of thing, you should check o ut The QEMU Advent Calendar 2014. It presents a new QEMU disk image each day until Christmas, enabling you to play with new operating systems, programming languages and graphical goodies. For instance, Day 6 is a tiny image that generates Julia sets.

Screenshot-QEMU

Other days allow you to boot ancient versions of Slackware Linux, run an Atari ST emulator inside QEMU, and even play Zork. Awesome.

But even greater than that is the offering by Alan, VK2ZA7. Back in 2011, he did a series of 24 Youtube videos that each described a small electronic circuit that he tinkered together during the Christmas season. Many of them had to do with generating small bits of test equipment or illustrate some cool little circuits. Ones that I liked were his LED based transmitter/receiver:

and this nice little crystal radio, very traditional, with a cobweb style coil wound with Litz wire, but with a polyvaricon variable capacitor instead of the traditional 365pf variable cap.

What’s awesome is that after a hiatus of a couple years, Alan is back in 2014 with new projects. Very, very cool.

I particularly liked this one on building variable capacitors (a laser cutter would be helpful). I hadn’t seen this kind of geometry in one before, and Alan’s patter is very interesting.

A particularly useful little bit of tech for us radio tinkerers:

I’ll be checking back each day until Christmas. Thanks Alan!

Probabalistic Models of Cognition

This week began with a visit from Pat Hanrahan, currently a professor at Stanford and formerly at Princeton, where I was lucky enough to meet him. He came by to talk about probabilistic programming languages, which are an interesting topic that he and his students have made some interesting progress in solving difficult problems. I don’t have much to say about it, except that it seemed very cool in a way which I’ve come to expect from Pat: he has a tendency to find interesting cross disciplinary connections and exploit them in ways that seem remarkable. I haven’t had much time this week to think about his stuff more, but he did mention this website which gives examples of probabilistic computation and cognition, which seemed pretty cool. I’m mostly bookmarking it for later consumption.

Visual Cryptography

I read an interesting article the other day. I’ll skip to the end to show you the result. Check out this pair of binary images:

img1

img2

Not too fascinating, huh? If you print both images out on transparency though, and stack them together, you’ll get this…

both

Hopefully that worked (with my limited CSS skills, I don’t think I got it exactly right). I couldn’t get the CSS exactly right, so the above image is really just the pairwise minimum of both images above. But how I accomplish this miracle? My own simple python implementation of the ideas cribbed from this page. Script to come later.

Deconstructing the Classic Atari Game: Star Raiders

Gasp, I know. It’s been some time since I posted here. A combination of life and work events have conspired to sap me of my usual exuberant energy for the nerdy, geeky pointless topics that I usually like to post about here. But nerdy, geeky, pointless endeavors do continue (even if at a reduced pace) so I thought I’d post about one here that I’ve killed a few hours on.

I have fallen back into thinking about retrocomputing, not so much out of a sense of nostalgia, but because I was trying to understand the complex path that connected a 12 year old boy growing up in Oregon to the one who now exists. I think in no small part, I can draw it back to this game:

atari011

The classic 1979 Atari game Star Raiders. I’m pretty sure it was the second cartridge I bought for my Atari 400, right after Atari BASIC. Within it’s 8K boundaries, a first person space simulation was created. Not the boring, type “LRS” to get long range scan respresented in crude ASCII charts, but instead a visceral battle against the Zylon menace.

As much as I liked the game (and have played it a few times in the last few days, it still pretty much holds up) it also inspired me back then to learn how such highly interactive, real time games could be written. I got a copy of De Re Atari, and worked on learning about machine language programming, and how to manipulate POKEY and ANTIC to do my bidding. I used to say that the Atari was the last computer that I understood completely. Perhaps that was a little bit of bragging, combined with the humble realization that modern computers were far more of a black box than I felt I could understand.

But in the last couple of weeks, I thought to myself, “there must be some good programming hidden away in that 8K.” The scientist in me recognizes beauty not just in the final form of the organism, but in its constituent parts. So, I decided to see if I could take the raw ROM image of Star Raiders, and turn it back into an annotated chunk of source code. In theory, you could use this to make changes (I hesitate to say “fixes”, because it’s so brilliant) but really, it was just so I can learn something about how it works.

Luckily for me, modern tools have made this much simpler. I have a Linux box far more powerful than any computer I could have dreamed of back in the day, and retrocomputing pioneers have traveled this path already, and left tools that I could use along the way. I decided to use cc65, a freeware C compiler suite that can generate code for a variety of classic 6502 based systems. It includes da65, a disassembler that will take an “info” file which describes where the code starts and some machine specific labels, and then tries to disassemble the ROM back into assembly code. It more of less seems to default to the idea that the ROM is entirely code, and only inserts “.byte” assembly instructions when it can’t find a valid instruction at a particular location. By beginning at the known jump address, you can follow code and find areas where data instructions access tables and the like, and then use the .info file to describe block those out, slowly converging to more or less legible code. For instance, the decoded code that starts the cartridge looks like this:

; ----------------------------------------------------------------------------
CARTBOOT:
        lda     #$00                            ; A14A A9 00                    ..
        sta     SKCTL                           ; A14C 8D 0F D2                 ...
        sta     $66                             ; A14F 85 66                    .f
        sta     $62                             ; A151 85 62                    .b
        sta     $63                             ; A153 85 63                    .c
        lda     #$03                            ; A155 A9 03                    ..
        sta     SKCTL                           ; A157 8D 0F D2                 ...
LA15A:  ldy     #$2F                            ; A15A A0 2F                    ./
LA15C:  lda     #$FF                            ; A15C A9 FF                    ..
LA15E:  sty     $65                             ; A15E 84 65                    .e
        sta     $64                             ; A160 85 64                    .d
        lda     #$00                            ; A162 A9 00                    ..
        tax                                     ; A164 AA                       .
LA165:  sta     HPOSP0,x                        ; A165 9D 00 D0                 ...
        sta     DMACTL,x                        ; A168 9D 00 D4                 ...
        cpx     #$0F                            ; A16B E0 0F                    ..
        bcs     LA172                           ; A16D B0 03                    ..
        sta     AUDF1,x                         ; A16F 9D 00 D2                 ...
LA172:  sta     PORTA,x                         ; A172 9D 00 D3                 ...
        sta     a:$67,x                         ; A175 9D 67 00                 .g.
        inx                                     ; A178 E8                       .
        bne     LA165                           ; A179 D0 EA                    ..
        dex                                     ; A17B CA                       .
        txs                                     ; A17C 9A                       .
        cld                                     ; A17D D8                       .
        lda     #$02                            ; A17E A9 02                    ..
        jsr     LAE0F  

Seems like typical “begin the program” kind of stuff, the loop around LA165 is basically zeroing out a lot of I/O ports which control player missile graphic and audio, as well as lots of zero page memory starting around address $67. Not too exciting, but it gets you started.

A bit of poking (and review of old Atari programming manuals) made me realize that the system sets up the player missile graphics to be based from address zero. This means that the buffers for the player 0 will start at $400, for player 1 at $500, etc… Some further poking indicates that the display list (the list of ANTIC instructions that builds the display) begins at $280. I located a couple of data tables that contained a list of strings used in the game (with the first character in each having the high bit set). I located a fragment of a display list in ROM. I wrote a python program to generate a graphical version of each instruction (1s displayed as X’s, 0s as spaces) to see if I could locate some of the bit patterns from the game. This revealed that some font characters were defined starting right at the beginning of the ROM (mapped to address $A00) as well as the bit patterns for the TIE fighters, asteroids, etc…) in a variety of sizes:

B9B0:  X X
    :
    :X      X
    :X      X
    :X      X
    :X      X
    :X XXXX X
    :XXXXXXXX
B9B8:XXXXXXXX
    :X XXXX Xh
    :X      X
    :X      X
    :X      X
    :X      X
    :X     X
    :X     X
B9C0:X XXX X
    :XXXXXXX
    :XXXXXXX
    :X XXX X
    :X     X
    :X     X

That was helpful. But then progress began to slow a bit, and I wondered what other tools I could use. Back when I was teaching myself Atari 2600 programming, I found the Stella simulator to be absolutely key: it had an awesome single step debugger that I used to work out many a difficult chunk of code. Without any real research, I settled on using the atari800 simulator from sourceforge. A bit of digging uncovered that hitting F8 dropped you into a monitor. Not as sophisticated as the Stella one, but still quite helpful. For instance, if you type “DLIST”, you can get the currently active display list. During the “attract mode” of the game, you can break and find that the current display list is:

0280: 2x 8 BLANK
0282: LMS 1000 MODE D
0285: 10x MODE D
028F: 4 BLANK
0290: LMS 0D1F MODE 6
0293: LMS 12A8 MODE D
0296: 81x MODE D
02E7: JVB 0280

This is pretty helpful (although it’s probably gobblety-gook to most readers). Reading from top to bottom, it says that the display has 16 scanlines which are blank, then starts rendering with mode D (which is a 160 pixel resolution, 4 color mode, where each dot is 2 scanlines high). The LMS indicates that the graphics memory will start at $1000. There are a few more lines like that, then some blank lines followed by a mode 6 line (which is a 20 character display, 8 scanlines high). Then some more lines of Mode D (resetting the memory buffer to the appropriate address). The mode 6 line draws characters from the buffer beginning at $0D1F, which I had not identified in code anywhere. That presented a clue to me, enabling me to spot other useful chunks of code.

I’ll keep plodding away at this, it is kind of like working on a crossword puzzle. Each little bit you uncover allows you to understand more. Stay tuned.

An IBM 1403 font…

A few days ago, I was playing around with my Raspberry Pi, trying to get a new, freshly compiled version of the TOPS-10 7.03 monitor running. I was having some difficulty with it, as it appears that a bug had crept into the code that simulates the DZ11 serial ports as telnet connections, and I could no longer login from “remote” terminals. While I was grumbling about that patiently awaiting a fix to appear on the simh github server, I started thinking about other computers. (Long time readers may remember that I suffer from occasional bits of technological nostalgia, having previously written an emulator for the PDP-1 so I could play SpaceWar! and written all sorts of fun code for the Atari 2600.)

So, I started looking into the IBM 1401.

Recently, the Computer History Museum completed a restoration project to bring an IBM 1401 back from the dead. Actually, they have now have two. Each weighs about 4 tons, and the 1401 was quite possibly the most plentiful computer back in 1964 when I was born.

It’s a really odd machine. You can read more about it here. It was mostly implemented using diode-transistor logic (now you know where my recent poking at DTL logic came from). It had core memory, with up to 16Kbytes! The first machines where announced in 1959, and construction ceased in 1971 as the IBM/360 architectures became dominant.

But all this is really an aside. I was thinking about my DEC experience, and started thinking about the line printers we had back then. Unlike the quiet woosh of today’s laser printers, these where heavy, loud, mechanical monstrosities, but they were fast. They could spew out a printed sheet of green bar paper in about six seconds, and if you had lots of form feeds, could eject 75 inches of paper each second. I remember seeing someone do that at the University of Oregon (probably on a DEC LP20) and you could visibly see the stack of fanfold beneath the printer drain away).

I suspect that the printer hooked to our DEC-1091 at the University of Oregon in the early 1980’s might have been an LP20, but I got hooked on researching the technology with some judicious googling, and found references to the IBM 1403 printer, which was commonly paired with the IBM 1401. I ran across this page about the IBM 1401 restoration, which included the following example print sample:

1403Font-

I liked it. So, on Twitter, I idly mentioned that I wondered if anyone had created an IBM 1403 inspired font.

And it turned out that a hacker friend of mine with diverse interests, Jeff Kellem (@composerjk) heard my call. Among his interests and talents is typography and font design. Jeff took some print samples and started working on a 1403 inspired font. While he’s not ready to release yet, the preliminary results look awesome:

sample-text-listing2-12pt-clip-perspective-small

What is even cooler is that Jeff wrote up some notes on his blog about how he did it, as well as some additional inspiring links about the 1401 restoration project. Great stuff, and thanks to Jeff!

Tiny-Tim: A DTL computer (in progress)

Previously, I had linked to Rory Mangles’ experiments with relay based computers. He had an incredible build of a relay logic computer called Tiny-8 which used paper as program mamory, inked with a pattern which could be read by photo sensors to sequence the control logic in his computer. I thought it was amazing. But surfing back to his website, he appears to now by working Tiny Tim, a diode-transistor logic (DTL) computer, made from discrete 2N3904 transistors and Schottky diodes. Sadly, there isn’t much actual build here yet (this update is six months old) but there is some good information, and I hope that he’ll pick up the project again.

Here is a link to his video of a simple flip flop: