Okay, I never have been much of a woodworker, and haven’t done anything significant in a decade or so. But as I’m trying to clean my garage workshop and get things tidy and in order, I have decided that it would be both cost effective and fun to construct some crude workshop furniture. I got myself a Kreg pocket hole jig and a new miter saw over the Christmas holiday, and decided to go ahead and try to make a rolling cart that I could use to store some items like my combination disk/belt sander and vacuum cleaner for dust collection, as well as possibly provide some additional mobile work surface.
Skipping to the end, a short day in the garage yielded this cart:
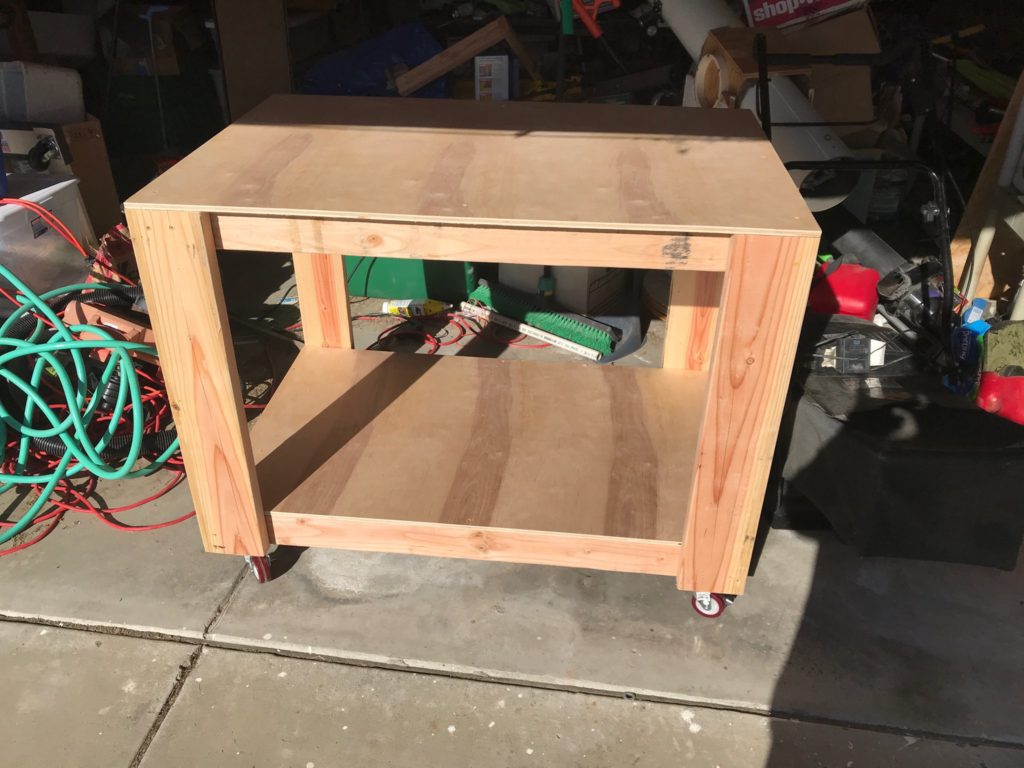
I’m generally happy with it, but I did have a few notes/criticisms about the general construction that I’m going to keep in mind for future construction projects.
- I went to home depot to buy four 2x4s and 2 2x6s to form the frame and risers. They didn’t seem to have dried lumber in 2×6 form, so I built this out of green Douglas fir. The lumber was fairly straight, but the moisture content was probably somewhere north of 18%. I could have let it dry out over time, or gone in search of dry lumber somewhere else, but I was impatient, and decided that using green lumber would probably be fine. Indeed, I think it will be fine, given the crudity of my carpentry skills.
- The frames were assembled with pocket screws, which I seemed to have mixed results with. I think in at least one case, I stripped a screw by over tightening. Perhaps I should get a better drill with a proper torque clutch.
- The rest of the frame was screwed together with 2 1/4″ deck screws with a star drive. This worked rather well. I didn’t drill pilot holes. I will next time, I think in at least one case where I screwed one in near the end, I got some splitting.
- I used 3″ locking casters from Harbor Freight, which worked well. I fastened them down with the same #10 2 1/4″ deck screws, but with a #10 washer to help center them. I did predrill those holes, and managed to snap a drill bit off doing one. Note to self: get some better drill bits.
- I made the table taller than the original design, and noted that the top had a bit of flex front to back. After the table dries out a bit more, I’ll probably screw a board across both sides, or maybe some thin sheet plywood to stiffen it up more. It’s plenty strong for storage, but if you were going to use it as a platform for power tools, the vibration may not be good.
- For quickness/expedience, it’s held together with just screws: I didn’t glue any of the joints. That ultimately limits the strength and rigidity. If I get a small table saw, I’d probably rip them more square and put some half lap joints in, and do a proper gluing job. But for now, it’s fine.
Anyway, the plans are available on the Kreg website. The only modification I made was to make it a bit taller to match the height of my other bench and to match the casters that I had on hand. It was a good refresher project, and the first time I used pocket screws. I’ve got some other projects in mind, so stay tuned.