I’ve slowly been trying to do some woodworking projects. I have very little skill and experience. In the past, I had (barely) enough skill to put together some simple Dobsonian telescopes out of plywood, using mostly a handheld router and a jigsaw, but they weren’t actually very accurately made (especially compared to the tolerances the optics were made, which measured in millionths of an inch).
While I had a hand held router (a big, rather heavy one) I didn’t have it set up for use as a router table. A few weeks ago, I took a 20% off coupon and bought a new little 1 3/4 HP router with a “table” for around $80. It is frankly not that great: a little hard to adjust the bit height, but I’ve only done a few test cuts with it. I thought that I’d like to have a stand to put it on so it would be at a convenient height. On top of my bench, it would be too high, and on the floor, well, let’s just say as I’m getting older getting up and down off the floor in my garage isn’t the most fun in the universe.
So, I thought I’d build a stand for it so that the top of the bench would match the 36″ height of my (very successful) rolling bench that I built a couple of months ago. I didn’t bother drawing any complicated plans at first. My idea was to basically cut 8 pieces of 2x4s to a 20″ length, and then rip cut the curved edges off each leg so they would be 1 1/2″ x 3″. I’d then join two of them into an L shaped bracket in each corner with glue and screws, cut rails to stretch between them and then fasten them together using a pair of Kreg pocket screws at each end.
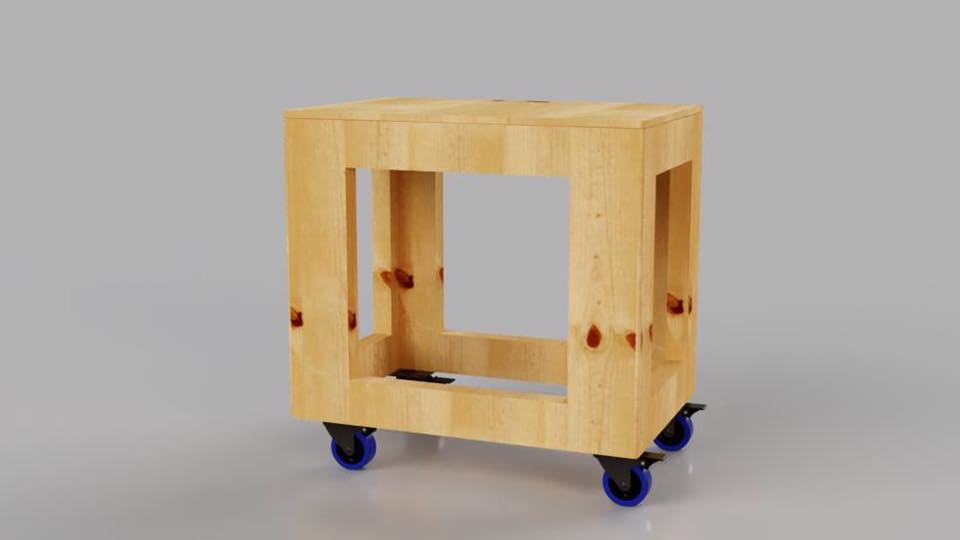
This is a little bit of a skill building exercise, since I have relatively little experience with my new little DeWalt table saw. The ripped 2x4s weren’t as flat as they would have been if I had a proper jointer and thickness planer, but they did come out more square than they would have otherwise. About halfway through the build, I had a problem I couldn’t visualize, so I ended up making a model of the bench in Fusion 360. I didn’t do the complete model (it lacks the bottom shelf and a couple of braces) but it did show the overall dimensions and helped me clarify some of my thinking.
I knew I wanted to have some rollers on the bottom (optimizing my space around moving stuff seems like a good strategy) and I was going to use up some 1/2″ plywood for the top. I also wanted to cut a shelf to go in the inside. On my rolling table, I made part of the lip just the 3/4″ edge so I could clamp things to the edge of the bench, but since this will basically be a dedicated stand for the router, I just decided to leave the 3″ thick top frame around all edges. Originally, my plan was to cut the top oversize and trim it to exact dimensions with a flush trim bit, but in the end I decided to just leave the 3/8″ overhang around all four sides because it seems nice, and doesn’t harm anything.
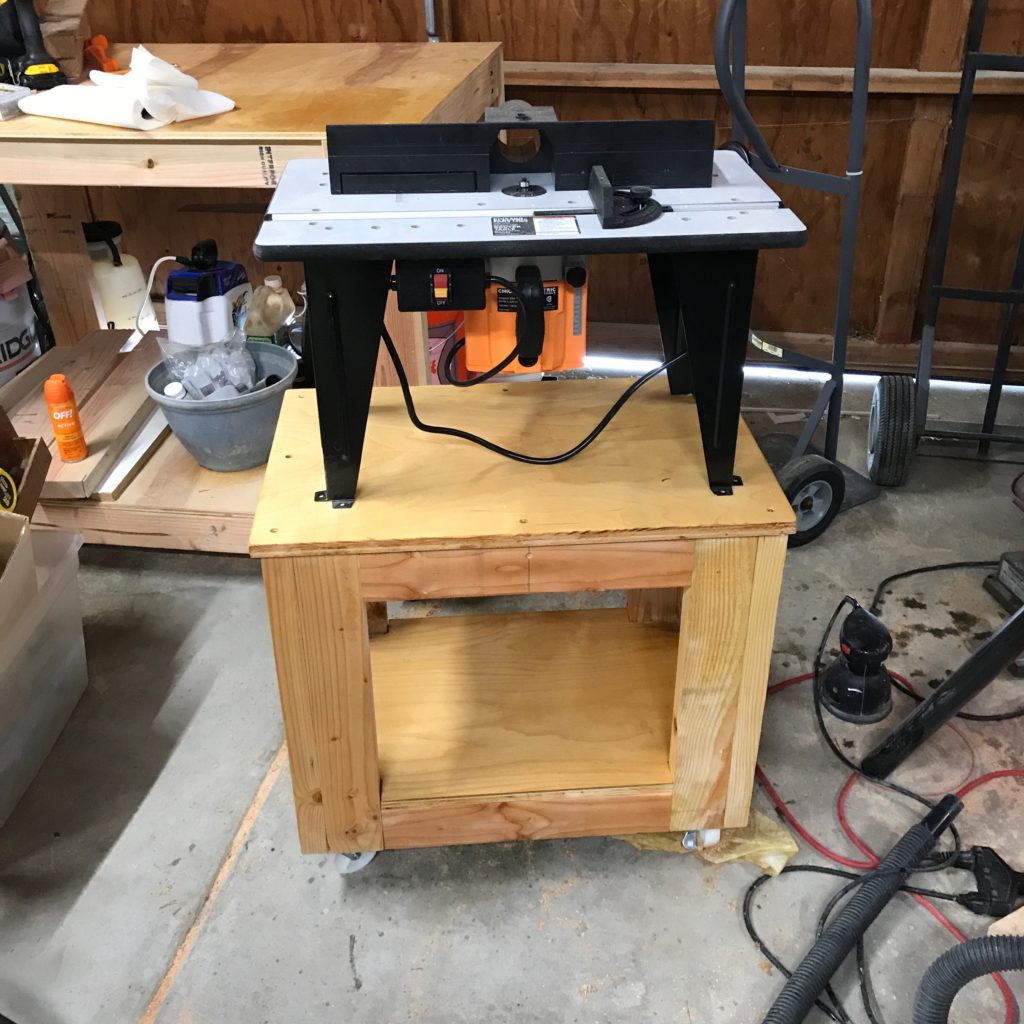
Anyway, this morning I finished the construction. I still need to get the hardware to bolt the table down to the top, but here’s what it looks like:
Here are some general thoughts from the build…
- It’s pretty square, but not absolutely right. I tried to use my small machinist square and my large carpenter’s square on every joint, and it’s close. Much closer than probably any carpentry I’ve ever done, and given that I’m using construction grade lumber, perhaps that is as good as I could hope for.
- The dimensions were a bit hard to wrap my head around. I ended up using 3/4″ plywood for the top, so it’s was going to be 1/4″ taller than my other bench, but in the end it turned out more like 1/2″. Similarly, when notching the shelf out for the bottom, it turned out to be slightly off in a couple of areas, making for a loose joint on one side and a tighter joint on the other. Frown. Oh well. In the end, it was tight enough that I didn’t even bother screwing it in place.
- I broke a bit off while drilling a countersink hole. The tool steel crappy countersink/drill combos I bought at Harbor Freight are single fluted and made from tool steel, and generate a lot of heat while drilling. I wasn’t paying attention, and snapped one.
- I wasn’t paying attention with two Kreg Screws and over tightened them, which drove them out the back. I need a lighter touch on the impact driver.
- Don’t balance your can of boiled linseed oil on top of what you are working on. I dumped a bunch of it on myself when I knocked it over, and that’s why the front in the picture looks unfinished: I had to clean up a mess and tossed my sweatshirt into the wash with a lot of soap.
- The only joint I did which wasn’t close to flat was one of the bottom ones underneath a caster. A few seconds with the belt sander flattened it.
- I think design wise if i did it again, I’d raise the bottom rails up about 3″. This makes the shelf higher, and easier to get to, and the extra space makes it easier to roll over stuff on the floor. It would also avoid an odd routing problem with the Kreg screws intersecting the area where I’d bolt the casters in place.
- Having my assembly table was a god send. It made so much of the work more accurate and more relaxing.
- I need at least 2 more 36″ bar clamps.
Still, I had a lot of fun, and it looks great. The frame is way over engineered. The rollers are only rated for 110lbs each, but I’d trust the frame to hold well over 600 lbs or more. I only bought 2 2x4s to add to 2 more that I had, and used scrap plywood that has been in my garage for over a decade, so the total cost in materials was under $20, most of which were the casters.
Carmen wants me to design and build a potting table for our back patio, which will probably be our next project. Stay tuned for more woodworking.