As part of my attempt to get into woodworking and develop some actual skills, I have been keeping an eye out for what would best be described as “junky piles of rust” at garage and estate sales. I have been updating my twitter feed with pictures and short comments, but I thought it might be fun to include some of what’s been going on here, in a longer format, and in a way that is more permanent and findable once my twitter posts fade into the past.
First of all, about a month ago I found someone selling this old Delta jointer for a good price. It was dusty and dirty, but entirely functional. I’d been looking for a jointer for quite sometime, as I think a jointer and a planer will make all sorts of woodworking more productive and more enjoyable. This one may not look like much, but the bed and fence are actually just dirty and not very rusty, and the planer works, although I think the blades could use a bit of sharpening. The stand is fairly rusty though. I got one quote for having it sand blasted and powder coated, but might still just attack it with my angle grinder and a wire brush. I’m also not fond of the power switch situation. It is basically a wire loop on the rod you see in the back of this picture that flips a power switch. I think I’ll find a way to mount a safety switch with the big paddle “OFF” on the front of the stand so it is easier to turn off and on. It’s also quite heavy, so I might think about figuring out a way to move it around easier.

Last friday, I found a guy selling some Stanley planes, and went to take a trip. I wanted a No. 4 and a No. 5, but ended up coming away with two No. 4s, a No. 5, and a No. 6. They were in what I would call “fair” shape: with a fair amount of surface rust and staining, but with all the parts and no obvious breaks, pitting or damage.

I’ve only started to work on the first of them, the No. 4 on the top which from the looks appeared to be the older of the two No. 4s. A little reading on the web made me believe that it is a Stanley Type 19, made between 1948 and 1961. I disassembled the plane and had a look at the various parts. The sole was perhaps the most interesting part:

As you can see, the bottom was fairly rusty and stained. I thought about using my electrolysis setup to get rid of it, but it was already busy with another project (see below) so I got out some of my trusty Metal Rescue and set it soaking. Four hours later, I pulled it and and gave it a light scrub with a Scotch Bright Pad. The results were really impressive:

There is still a little light staining, but the surface is overall very smooth. The blade and chip breaker had a small amount of rust which was also completely gone after the soak. I still have to clean and polish the nuts and bolts. I did try some Brasso on one of them, which looks like it worked just fine:

I should have the parts all reassembled and ready for sharpening soon. Then it will be onto one of the others. The bottom of the No. 5 is particularly bad, and may have some actual pitting. I’m excited to see how it will turn out.
I passed another garage sale and picked up a rusty Crescent wrench (like, actually made by Crescent) for $.50, along with a rusty chisel. I figured I could practice my sharpening skills on the cheap chisel.
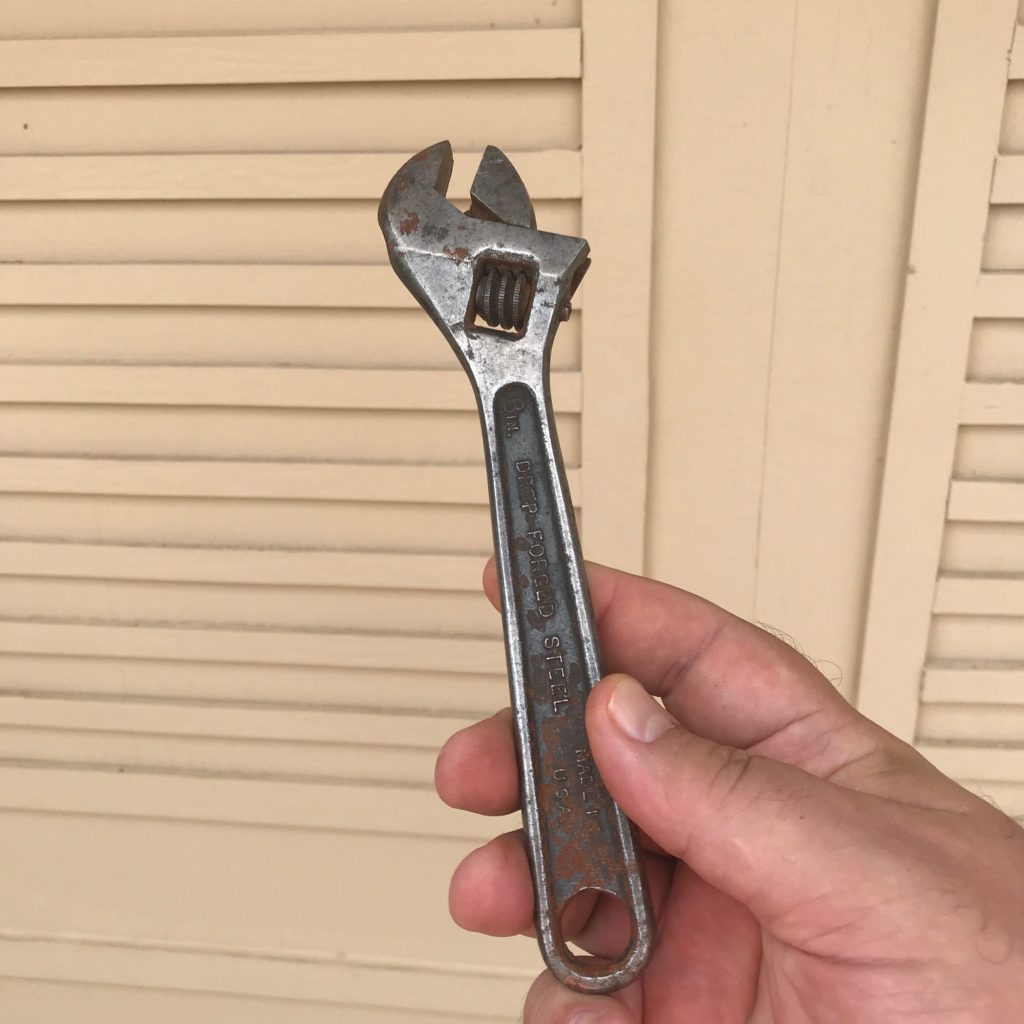
There was only mild rust and some pitting on the wrench, but as a bonus it was frozen and wouldn’t move. I thought I’d give a shot at trying to use electrolysis to both get rid of the rust and see if it would free the mechanism. About fifteen minutes into the treatment, I saw small blobs of grease floating to the top of the bath, and four hours later, the top of the bath was the orange rusty scum that I’ve come to expect. I pulled the wrench out, and all the orange rust was gone, but there was still some scaling, and the black oxide was pretty hard to scrub off. And it was still frozen. So I let it go for another four hours, without much change. I ended up putting a couple drops of 3 in 1 penetrating oil on it, letting it sit for ten minutes, then giving the thumbwheel a couple of gentle taps with punch and a hammer. It yielded fairly quickly, and running it back and forth a couple of times it began to work pretty well. A screw holds the thumbwheel in place. I found a good fitting screwdriver and tried to get it to back out so I could remove the jaw, but it wasn’t cooperating. I left a couple more drops of penetrating oil on it, and an hour later, it came out easily. The jaw, screw, and thumbwheel separated from the main body, as well as a small brass wire ring (a washer?) that I wasn’t expected. I took a wire brush and some degreaser and cleaned these parts, and then let them soak for a bit in some Metal Rescue. I’ll get these back assembled shortly.
Restoring broken tools to working condition makes me feel virtuous. It’s also pretty fun.
Anyway, that’s all the “rust” related activities for the week. Once I get the No. 4 reassembled, I’ll show some more pictures here.