So, I’ve had a minimal AREDN network running at my house for the past few week or so, and it is working well. To recap where I stand today, I have three different pieces of RF hardware:
- a Mikrotik hAP ac lite, which looks like a small router or network switch. This is widely described as a “Swiss army knife”, since it is incredibly versatile. It can itself act as an AREDN node on either 2.4Ghz or 5.8Ghz, but it is even more useful when it is used in combination with a separate RF node. It has four LAN and one WAN port, and works really well as a bridge between the conventional internet and the AREDN network. It can also operate as a conventional wireless access point. Right now in fact, I am connected to both the AREDN network and the Internet through my Mikrotik . Works very well.
- a TP-LINK CPE-210, which is a node which is designed to be placed outdoors. The CPE-210 operates on the 2.4Ghz band, and includes an antenna with a 65 degree output. It is designed to be powered over the Ethernet cable using a power injector which comes with the unit. In theory, the Mikrotik can also serve power to POE devices, but I haven’t tested that yet. But I do have the CPE210 plugged into the Mikrotik device. They don’t communicate with each other over wireless, they use DTD (device to device) communication over the Ethernet cable.
- a GL.iNet GLUSB150, which is my “satellite” RF node. It’s currently in my garage, attached to an Ubuntu Linux box. It uses the AREDN mesh to talk to the TP-LINK (over a stunning 30 feet or so distance). The Linux box sees the GLUSB150 as an ethernet, and requests an IP address from the GLUSB150. Then, you can easily access services like HTTP and FTP from the attached machine.
Pretty nifty.
Over the last few days, I have begun to think about what it would take to turn this setup into a portable network node. The basic requirements that I had would be:
- Make the node solar powered. My experiments with radio powered beacons last year mean that I have a 25w and a 100w solar panel which I could use for the project, as well as solar charge controllers and a 7.2Ah SLA battery (not very big, but affordable).
- Include a small Raspberry-Pi like computer to provide additional network services.
I actually was set on using a Raspberry Pi, but as I dug around my box of development boards, I encountered a Beaglebone Black that I had not used in quite some time (when I booted it, I discovered that the Linux it was running bore a date of around 2013). I decided to revamp my knowledge of it, which could be a whole different story. In the end, I did something somewhat out of the normal mainstream: I loaded it with FreeBSD 12.1. I used to be an avid fan of FreeBSD, and found that one benefit was that FreeBSD had a much less bloated userland, and a minimal (but standard) installation didn’t include a ton of things I didn’t need. I used the binary pkg system to load just the few additional bits I wanted, and I was good to go.
I ended up attaching the Beaglebone Black to my Mikrotik as well, mimicking what I think the final portable node would need. And it works great. I created a very basic webpage which was served using the “one line Python webserver” command python3 -m http.server 8081 which puts a webserver on port 8081. I also enabled a simple FTP daemon (not sure why, but hey).
So now I’ve begun to think about how I want to package up the equipment into a tidy and reasonably portable setup. I created a small stand that would make it easier to place and aim the CPE210, and then started to wonder about what voltages I would need and what the power requirements would be.

The easiest thing would be if I could power everything from the 12V battery directly, but of course life is seldom that straightforward. To prevent cable losses, POE devices are typically powered by higher voltages, 24 or even 48 volts.
The Mikrotik hAP is actually pretty forgiving. It’s input jack can apparently take anything between 11 and 57 volts. It will also provide this voltage onto one of the Ethernet ports to power an additional POE device.
The TP-LINK CPE210 is a bit fussier, requiring power to come over the POE cable, and be between 16V and 27V. This means that we can’t just tap a 12V battery to power it. But we probably could simply use a boost regulator like this one from Banggood (don’t have one handy, but pondering it), use it to provide the input to the DC jack of the Mikrotik, and as they say “Bob’s your uncle.”
The Beaglebone Black specifies a good 5V, 2A power supply, although says that a 1.2A supply (6W) power supply is supposed to be adequate if you don’t have power hungry “hats” (add on boards) or USB peripherals, which I don’t.
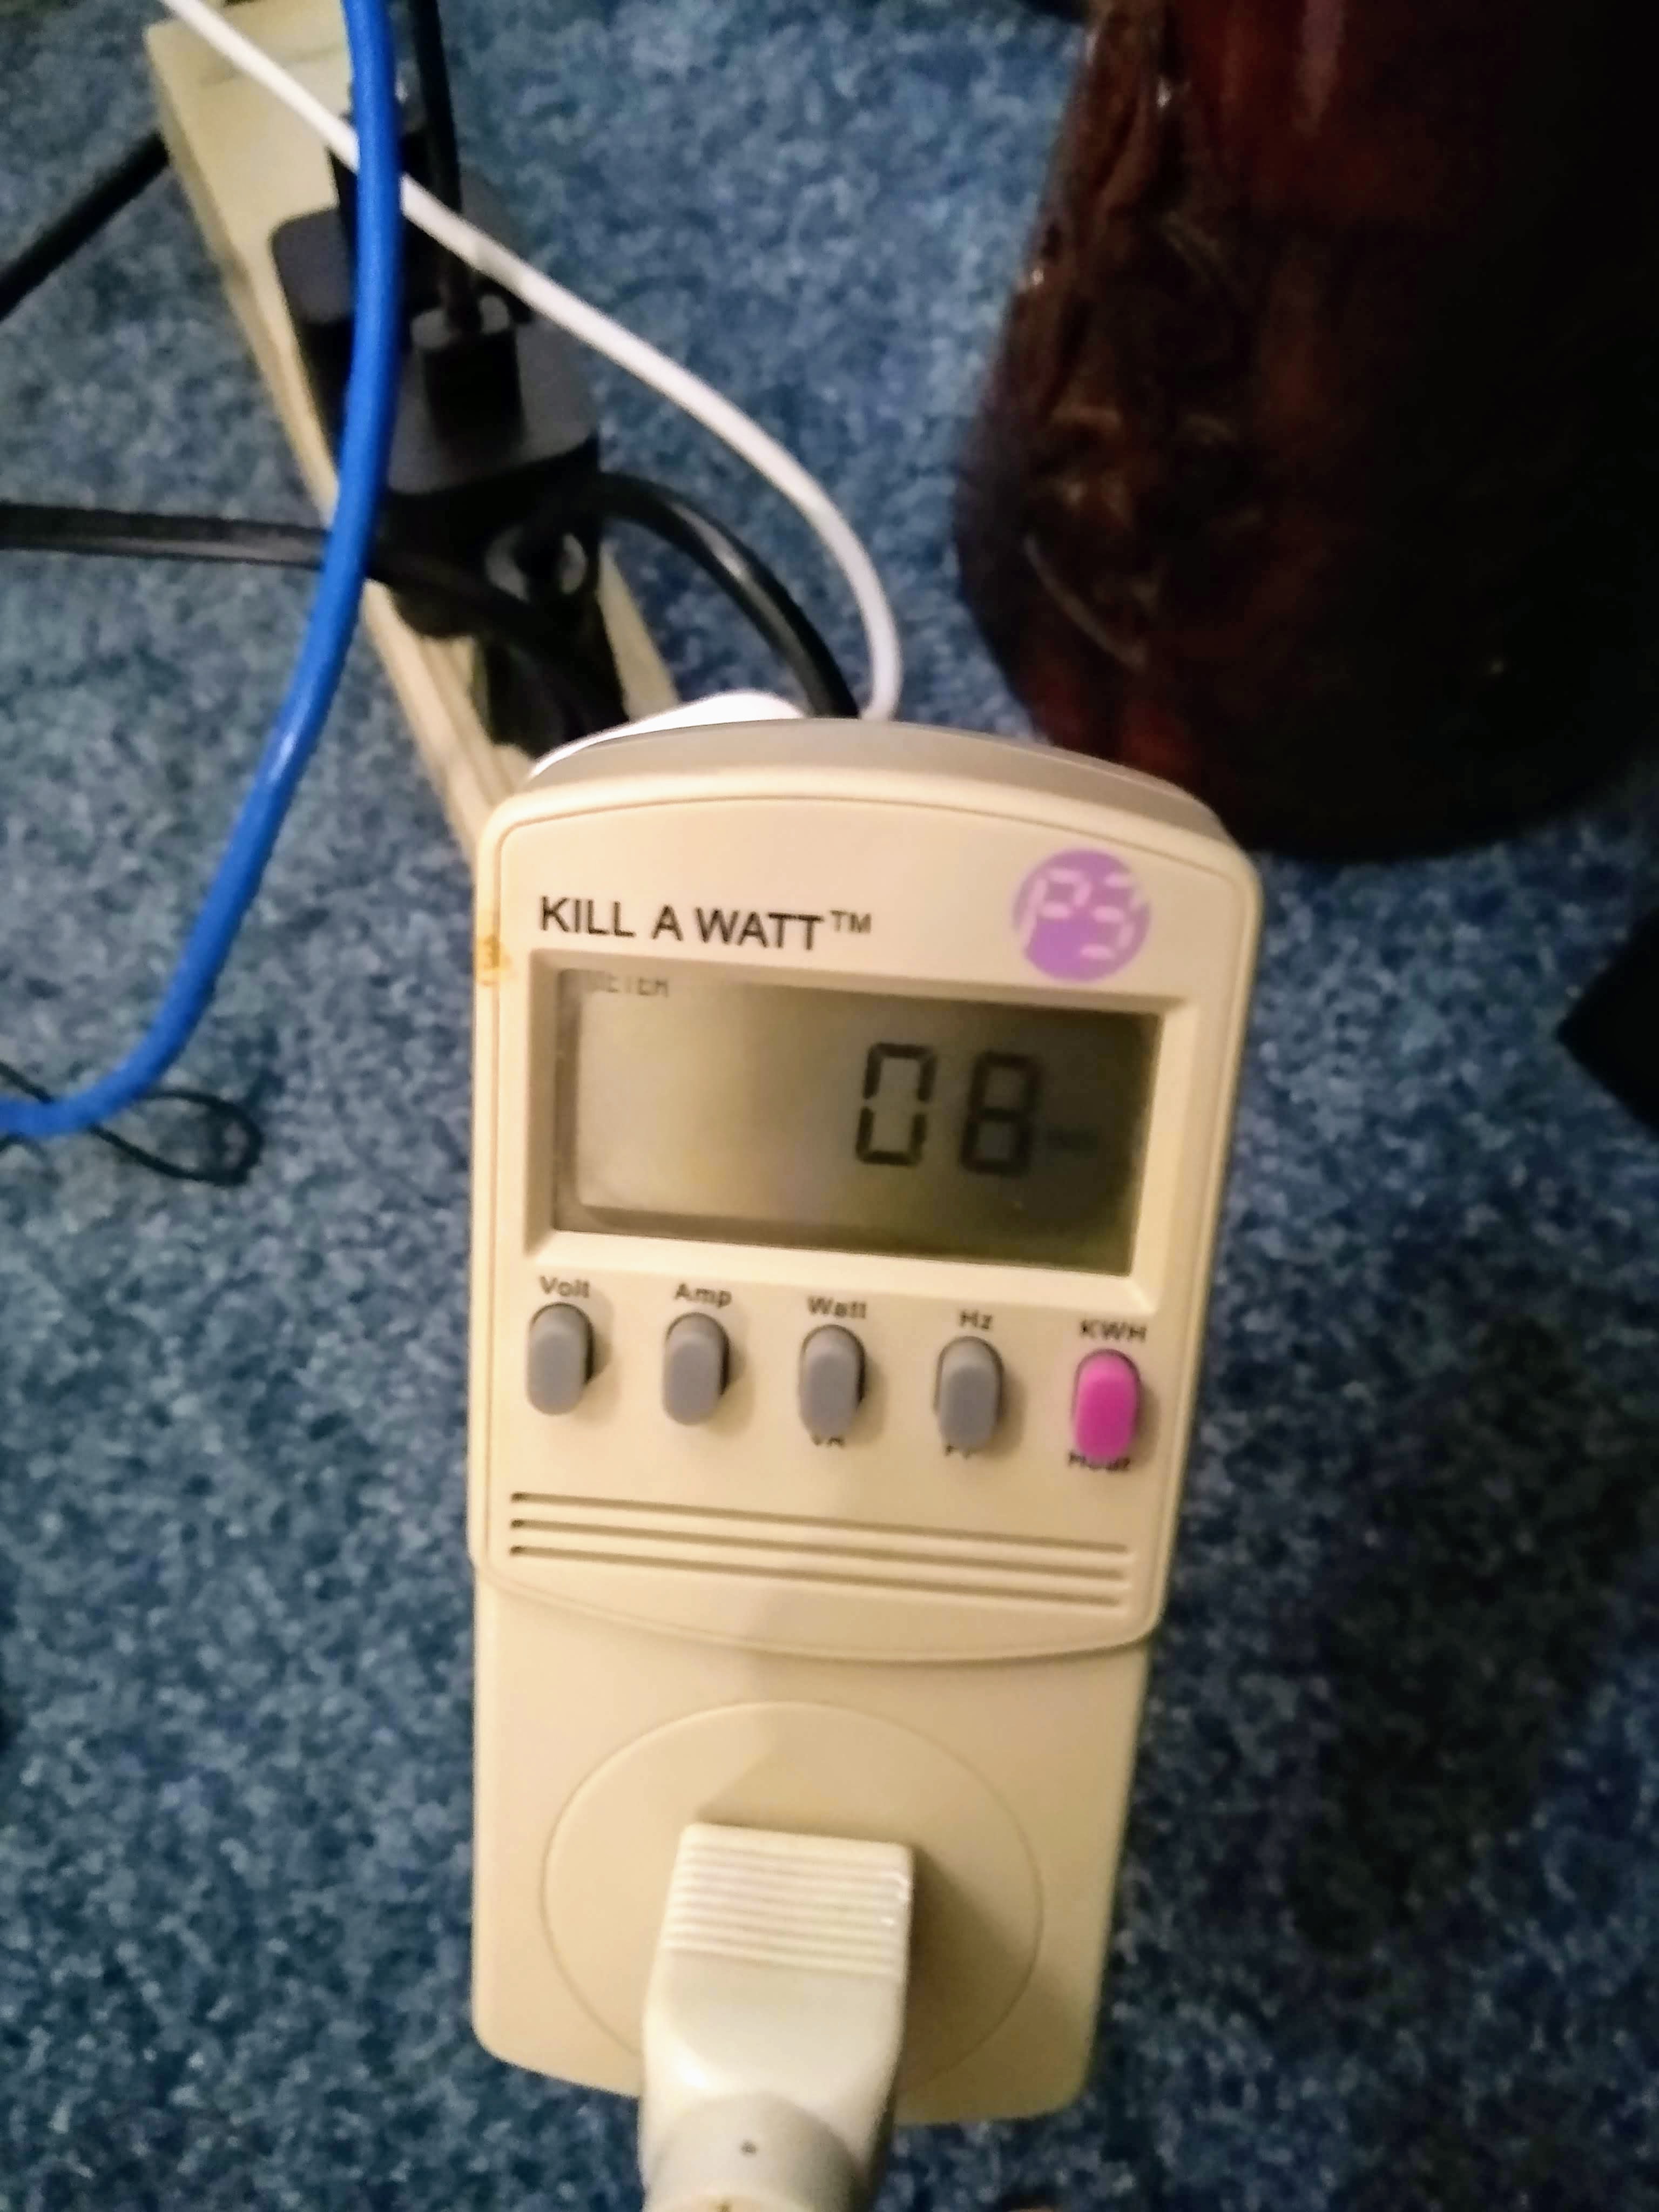
I dug out a little Kill A Watt P3 power meter that I had lying around, and plugged in the three different AC power plugs into a power strip, and monitored the power overnight. In 14 hours, it drew about .11 KWh, which maps down to about 7.85 W, which matches the 8W that it also listed as its instantaneous power reading here.
This was somewhat better than I expected, considering losses from the various AC power plugs as well. But if we assume that value is roughly correct, it means a few things:
- In sunny conditions, using my much smaller and more portable 25W solar panel would be entirely reasonable for portable operations. The 100W solar panel would likely be reasonable in all but the cloudiest conditions.
- The 7.2Ah cell I have should easily provide 8 hours or more of operating time.
I think the next steps are:
- source an appropriate boost converter and manufacture or buy pigtails to get it hooked up on battery power.
- I have some small current sensors (INA219) that I used previously in my beacon project. They speak the I2C protocol, which the Beaglebone supports. It should be straightforward to use them to do voltage and current measurements. Ideally, we’d monitor both the current and voltage from the solar panel, as well as measure the input and output power to the boost converter (to measure efficiency).
- Start figuring out the physical layout to make a simple, easy to deploy portable node.
It’s fun to tinker with.