3D printing an ink stamp, or “Welcome to Stampy Town, Population Five!”

Apologies to Hermes Conrad.
Further apologies to those who won’t get this Futurama quote.
During COVID, I spent some time in my shop doing more woodworking. At the time I was trying to figure out how I could sign the work that I did, mostly for fun rather than ego (my woodworking skills remain modest at best.) I had read a number of articles online where people designed logos using 3D printing, and had them printed in metal, which I thought was pretty cool. At the time I used OpenSCAD to design a simple logo of my initials, and sent it off to China for 3D printing. Several weeks later I got it back. It was one inch in diameter, and had a very simple version of my initials.
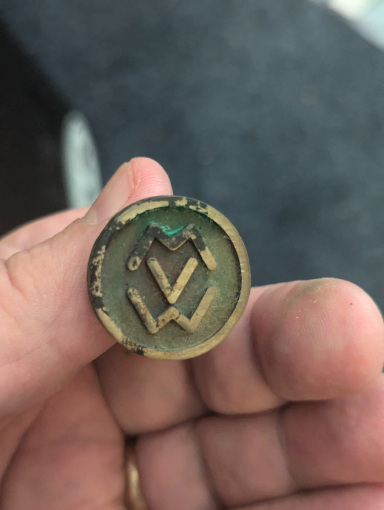
I had originally cast it with a post on the back, with the idea that I would use a die to cut a screw thread on it, and then I would make a holder for it. I found that the sintered metal that I chose didn’t hold the thread very well, so to use it I actually just hold it in some pliers and heat it with a torch. It takes a bit of practice to get the heat just right, but it has worked pretty well. I did find that sanding the front surface helped a bit, but the sharpness is good and I was overall pleased with it. I have thought about submitting a revised version with the screw thread modeled directly into the metal, but haven’t gotten back to doing that, and it is a pretty low priority.
But in the mean time, I seem to have lost the original OpenSCAD file that I used to generate the model. Yesterday I thought I should try to recreate it. Rather than using OpenSCAD again, I thought it would be better to use OnShape, which has become my go-to for designing objects for 3D printing. I began by inking the original metal stamp using an ink pad, and stamping it onto some paper and scanning it. I then loaded that as a reference into SCAD and used it to take some measurements and reconstruct the outlines. It took me about twenty minutes to come up with the model for it.
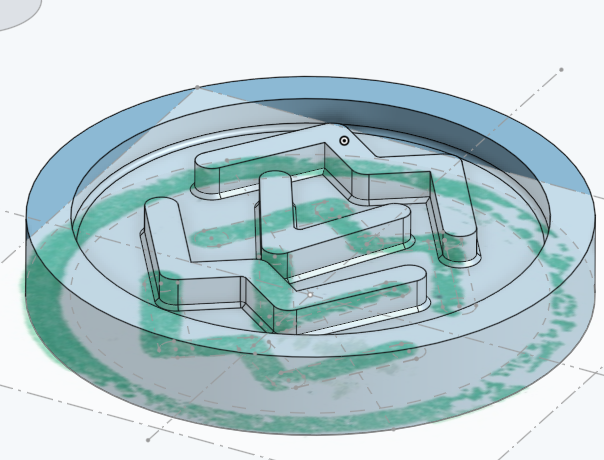
The new model is pretty close to the original, but includes a number of chamfers and fillets that were not part of the original. I went ahead and 3D printed the disk in the PLA I had loaded, and was pretty happy with the quality, even though I used 0.2mm layer height (the “fast” presets in Cura).
I had originally thought that I should print this in TPU, which would have been a more flexible filament, and therefore which I thought would more closely match the hard rubber that is commonly used for stamps. A little bit of reading suggested that PLA might be a better choice, as it is easier to get detail without stringing.
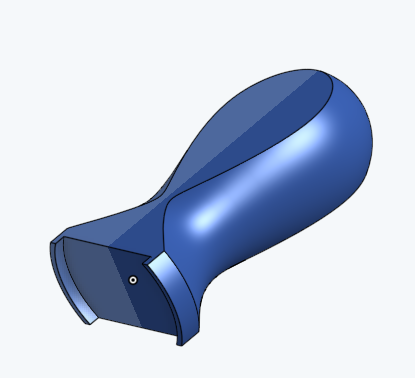
I needed a handle to help hold this disk. Since I had OnShape fired up, I went ahead and made a quick little handle that I could use that would hold the disk centered. This was the first time I had used sketched curve profiles and the like, and rather than making it as a full surface of revolution, I chose to flatten both sides. This has two purposes: it makes it easier to print without any supports, and it allows you to align and orient the stamp better to make sure its at the angle you desire.
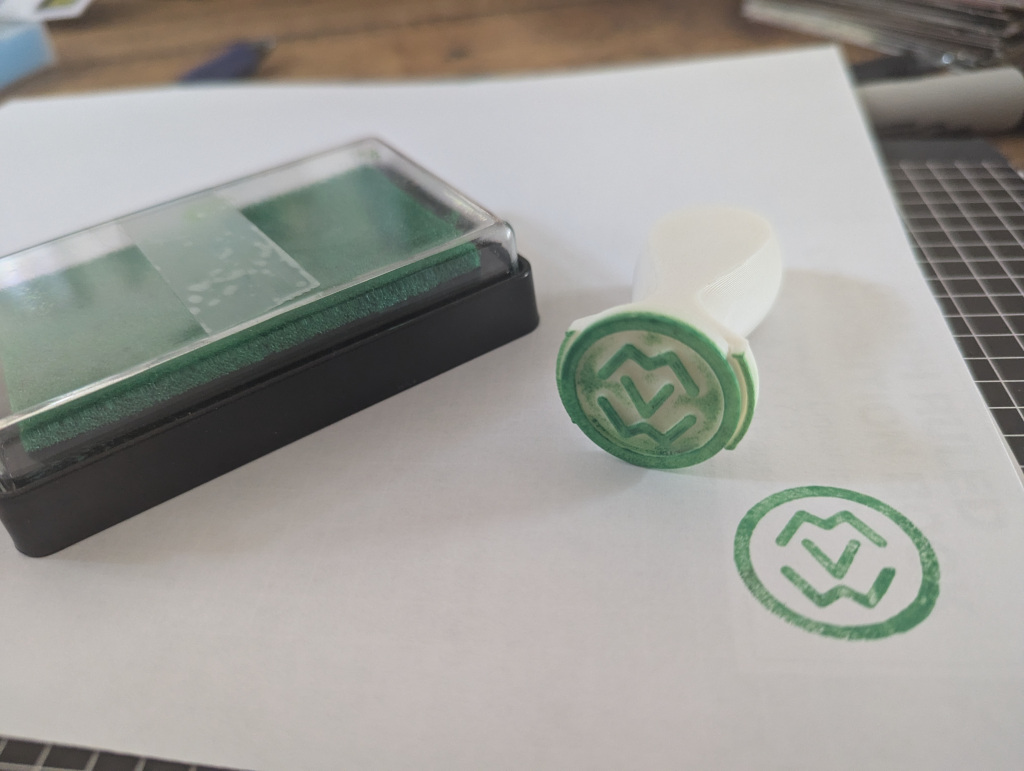
I printed this in the same PLA. I then took some cheap super glue and put the disk in place, trying to orient it the best I could. In version 2, I will probably print some registration bumps to align it even better, but this was a first test.

Initial attempts were pretty spotty, but I got some #220 sandpaper and gave it a bit of work to make it more level. I do wonder if maybe hitting it with some filler primer and then sanding it down might be a good approach, but a few minutes of work, and it improved to the point where I consider the effort a success.
It’s worth experimenting with, and (if you have a 3D printer) costs very nearly nothing. I’ve been thinking of experimenting more with using 3D printing to do other kinds of prints, but this is a good start.
Hope you all are having a good day!
I recall burning three or four weeks of a sabbatical getting Saccade.com on the air with Wordpress. So much tweaking…