Another 3D stamp: QR codes

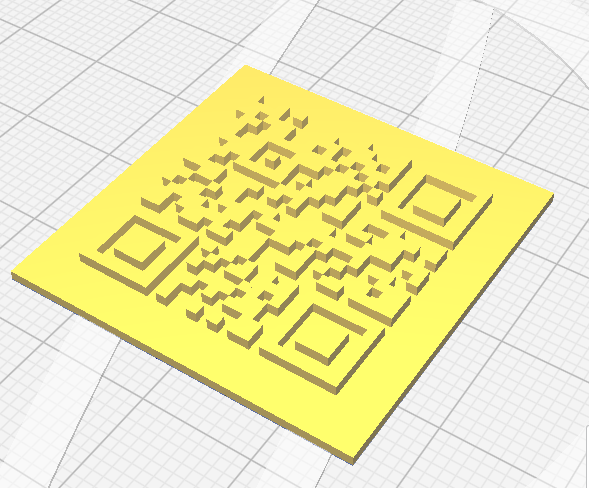
After tinkering with making a 3D stamp yesterday, I thought that maybe I would tinker together a stamp for the QR code that would send you to my resume-ish site mvandewettering.com. I had used the qrcode library in python to generate them before, but it wasn’t clear to me how to use that to generate a vector format that would merge well with my 3d printing workflow. In the end, I decided to just generate the image using the qrcode library, and then construct a series of rectangular prisms for every location which was dark. I thought it would be rather simpler to just write out the individual polygons in ASCII STL format directly. STL can only directly handle triangles, so I output 2 triangles per face, resulting in 12 triangles for each rectangular prism. The main code looks pretty straightforward.
with open("qrcode.stl", "w") as f:
    print("solid qrcode", file=f)
    for y in range(img._img.height):
        s = None
        for x in range(img._img.width):
            p = img._img.getpixel((x, y))
            if p == 0:
                if s is None:
                    s = x
            elif p == 255:
                if not s is None:
                    output_rect(s, x, y, y+1, f)
                    s = None
        if not s is None:
            output_rect(s, x, y, y+1, f)
    output_rect(0., img._img.width, 0., img._img.height, f, minz=-1, maxz=0)
    print("endsolid qrcode", file=f)
The output_rect code is tedious, but not especially complicated.
def output_rect(minx, maxx, miny, maxy, f, minz=0, maxz=1):
    print("facet normal 0 0 1", file=f)
    print("outer loop", file=f)
    print(f"vertex {minx} {miny} {maxz}", file=f)
    print(f"vertex {maxx} {miny} {maxz}", file=f)
    print(f"vertex {maxx} {maxy} {maxz}", file=f)
    print("endloop", file=f)
    print("endfacet", file=f)

    print("facet normal 0 0 1", file=f)
    print("outer loop", file=f)
    print(f"vertex {minx} {miny} {maxz}", file=f)
    print(f"vertex {maxx} {maxy} {maxz}", file=f)
    print(f"vertex {minx} {maxy} {maxz}", file=f)
    print("endloop", file=f)
    print("endfacet", file=f)

    # ... five more similar copies of the code to handle the other five faces
It took me a few trials to get the triangle ordering consistent and the normals specified. It’s not clear to me from any documentation that I had what “proper” means, but I found that specifying vertices in counter-clockwise order as viewed from the outside seemed to work well. Early versions confused CURA substantially, even when it loaded it properly. But eventually I got the following image, colored yellow which is apparently what CURA uses to indicate the model is “good”. I made sure to flip the image left to right so that I could use it as a stamp.

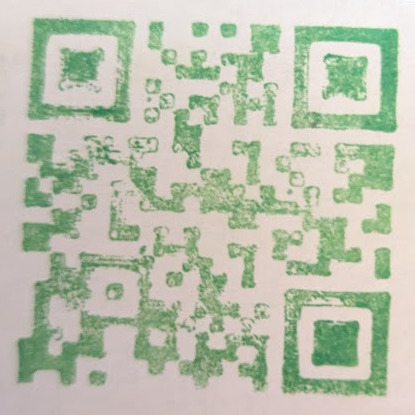
I sized it to about 1.5 inches, and printed it again in PLA. I gave it a light sand with 220 sandpaper. I haven’t printed a proper handle for this so I plunked it down on an ink pad and just pressed it into place.

Yeah, it isn’t quite good enough to actually work. I think a little additional sanding might help, as well as just getting a better inkpad. I am also wondering whether giving a small cylindrical deformation would make it easier to ink, as the pressure would be concentrated. I’ll tinker with this some more when I’ve had coffee. I suspect that benefitting from some other people’s experience in doing this would be good, so some youtube viewing is probably in my future. I also want to try using TPU instead of PLA to see how that would work as well.
I also could try to use a qrcode mode which is larger/has higher amounts of error correction. But I kind of want to keep this reasonably small to make it convenient and easy to use.
Hope you all are having a good day!
I recall burning three or four weeks of a sabbatical getting Saccade.com on the air with Wordpress. So much tweaking…