I recall burning three or four weeks of a sabbatical getting Saccade.com on the air with Wordpress. So much tweaking…
My Dust Collection “Cart”
I have been trying to do a bit more wood working in my garage, with the net result that a fine layer of sawdust is settling everywhere. I had started to use my aging Ridgid WD12000 4.5HP 12 gallon wet-dry vac attached to my table saw and my newly finished router table. But just using a vacuum on the outlet port isn’t optimal. The fine dust that these machine tools produce can easily clog vacuum filters. The obvious upgrade is to add a dust separator into the “system”. I did some research on the costs and benefits of using them. While there were some designs for a completely DIY designs, and many expensive “off the shelf” systems you could purchase, I settled on using a cheap, available cyclone based extractor called the Dust Stopper which I could get for about $40 from Home Depot. It is a little plastic “cap” that you can place on top of one of the ubiquitous 5 gallon buckets you can get from the big box stores. Air is sucked in the side, and swirls around, eventually settling into the bucket. The wet-dry vacuum pulls air from the center of the vortex, where it is much less dusty. This results in less dust in the vacuum, which prolongs the life of the filters and the vacuum.
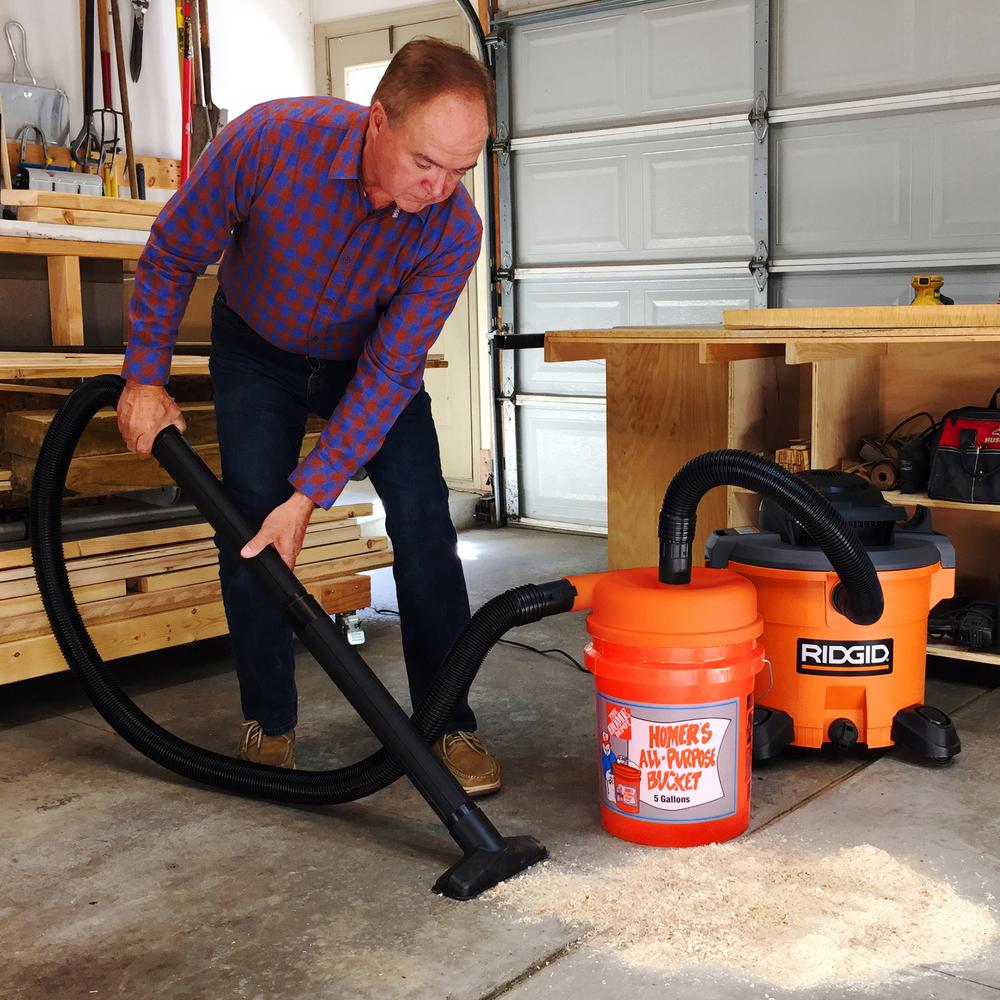
Here is a picture of what the system looks like, from Home Depot’s product page.

But there is a problem. As you tug the vacuum hose around, cleaning up or attaching it to one tool or another, it is just downright cumbersome. It’s easy to knock over the bucket, since it doesn’t have wheels. And even if you had a separate dolly for the 5 gallon bucket to sit atop, you’d be maneuvering two different items on rollers which were attached together with a stiff but flexible hose. Not fun.
The obvious solution would be to build some kind of cart to hold both items together. Youtuber Steve Ramsey was an early inspiration to me in my quest for woodworking competency, and he details both the problem and his (rather nice) simple solution.
But there were still some problems with his cart. He replaced his old, large shop vac with a smaller unit, but the footprint of the cart is still essentially 2x the footprint of the vacuum alone. My old WD12000 has a lot larger footprint, and would have a correspondingly larger cart. I liked his idea, and wondered if I could do better.
The obvious idea would be to mount them vertically, rather than horizontally. I found a number of very nice designs, some of which were very complicated and included all sorts of storage space and things like hose reels. I’d love to have such a cool cart, but I didn’t want this to be a project in itself. After all, my shop vac is quite old, and could easily give up the ghost any day. I’d hate to invest all that time and effort, only to have to rebuild the cart for a new vacuum.
So, I was looking for a simple solution when I stumbed upon this neat idea from John Builds It on YouTube.
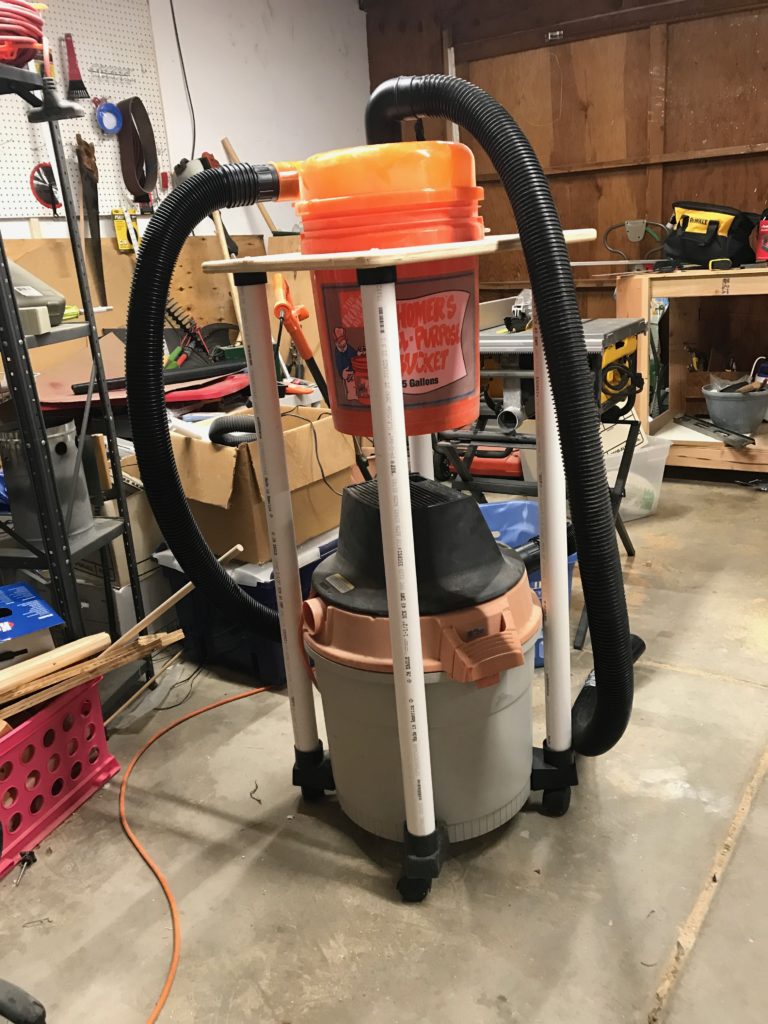
It uses a feature of these Ridgid shop vacs. They wheel around on four feet, each of which are topped by a cylinder that you can use to store the various wands and accessories. John basically used them to hold vertical legs, which then bolted into a platform with a hole cut in the top that the dust extraction bucket could sit in. The entire system rides on the original vacuum, which means that it has no more footprint than the original.

Watch John’s video for details of his (much better) build than mine. But here are some details from my own simpler build.
I did some quick measurements. It is about 24″ from the top of the feet to the top of my vacuum cleaner, and I thought it was about 12″ from the bottom of the bucket to the “lip” that will hold it in place. Because I didn’t measure all that carefully, I decided that I needed 4 pieces of 1.5″ schedule 40 PVC, which I said needed to be 38″ long. I also picked up 4 flat endcaps, and four 2″ to 1.5″ reducers similar to the ones specified by John. The idea was that the reducers would fit on the outside of the feet, and then the pipe would fit inside the reducer and rise up above the vacuum, ending in a cap which you then bolt to the platform which was cut from some scraps of 3/4″ plywood I had around. As John explains in his video, you can’t use 2″ PVC for the risers (which might have been a better fit) because the body of the vacuum tapers out slightly, and the verticals won’t be straight. But I discovered when I did a dry fit that the 1 1/2″ Schedule 40 PVC actually was a loose fit inside the cylinders that cap each foot, and was a better fit overall than the reducer was to the outside. I ended up returning the reducers, and just resting the pip inside the foot.
I cut a 19″ square piece of 3/4″ on my table saw, and marked four in the corners of a 14″ square (the measured spacing on the bottom of the vacuum) centered in the top, and bored it for some 1/4″ bolts. I then used my drill press to cut 1/4″ holes in the center of each of the black end caps. I then made a homebrew compass out of a scrap of wood, and marked the circle centered in the middle of the top. A little math showed that the radius was about 5 5/8″, for a diameter of 11.25″. I drew the circle, drilled a starter hole, and then cut out the center with my jig saw. I also rounded the corners, and then used my new router table to smooth over all the edges. I then bolted the endcaps to the top with some 1/4×20 screws that were about 1.5″ long, and held in pace with some stop nuts.
And that’s about it. PVC posts in the foot, caps hold the top of each post, and the bucket drops in. The only unforeseen issue (and additional expense) came when I realized that unlike John’s setup, I had built mine a little too high, so the 36″ section of hose that came with the Dust Stopper wasn’t long enough to reach. I ended up getting a new 7″ section (which is too long, but it’s what was available) and we were done. Actual time spent doing the work (as opposed to going to Home Depot Twice) was about an hour, and I’m slow.
I haven’t fixed the base of the risers into the feet yet. Friction holds them in reasonably well, but I will probably get a small self tapping screw to fasten them more permanently, or maybe just wrap the ends with tape to increase the friction a bit more. But it’s totally workable, and is easy to move around the workshop.
I’m pleased. I’ll be using it for the first time “in anger” tonight when I cut some pieces for a potting bench for my wife.
Comments
Comment from Mark VandeWettering
Time 4/25/2019 at 10:33 am
I can be reached at brainwagon@gmail.com.
Comment from Jim
Time 4/17/2019 at 12:24 am
Mark, do you have a contact email address? I do not see a “contact us” link and your QRZ address says it is no longer valid.
Jim