It is Monday morning, and I’m enjoying my coffee before heading off to work. All in all it was a pretty productive three day weekend, and I thought I write up a quick note about what I got accomplished.
First of all, I got some woodworking in the shop done. I finished constructing the mover dollies that I’m going to put under the shelves in my garage, and got one installed. They work great! When they are all done, I will be able to move, rearrange and more easily access and sort the contents of my shelves, which should help keep that part of the garage both compact and accessible.
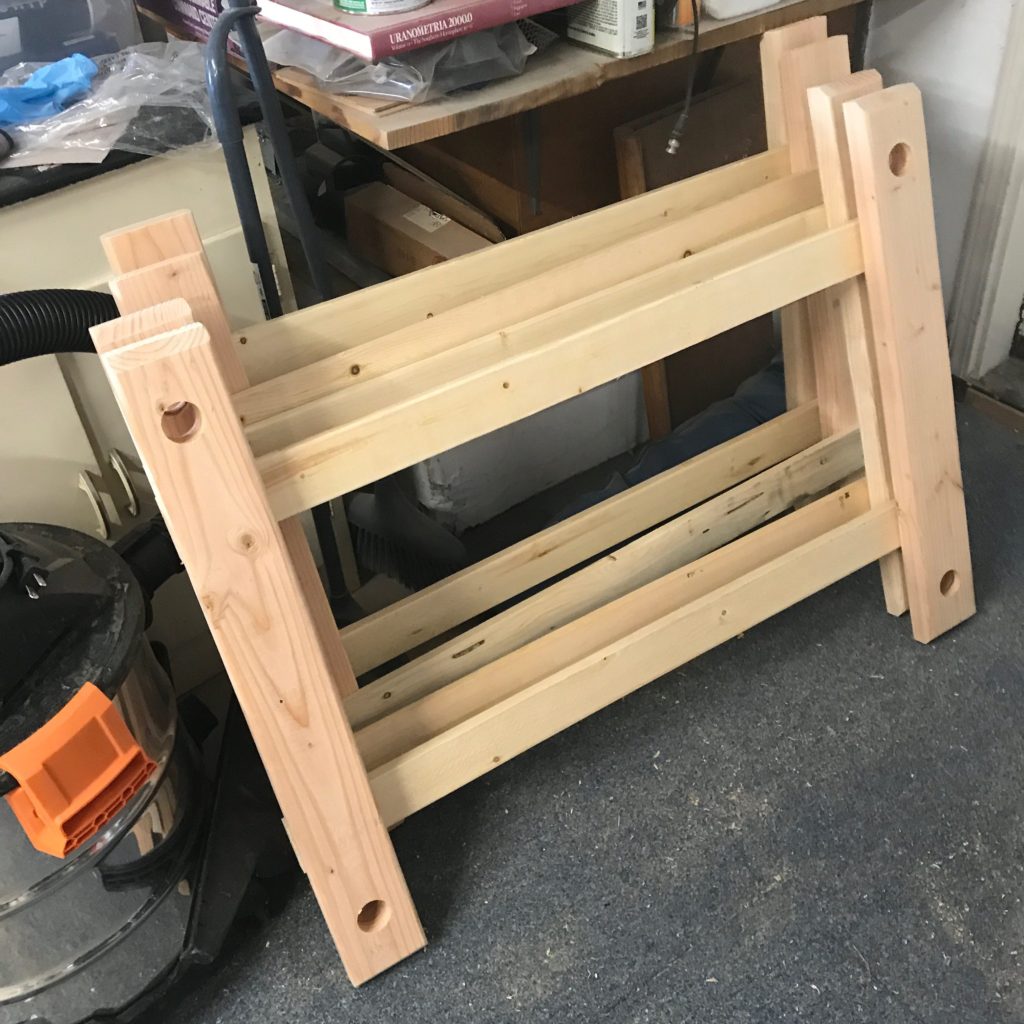
I don’t have any pictures of the completed frames, but here they are assembled, just minus finish and the casters. The bottom of each of the plastic shelving units has some protruding plastic pipe that normally a plastic molded foot attaches to. Now, they just drop into the holes in the dolly. I didn’t see any reason to permanently attach them: the fit is tight enough that simple friction and gravity should do the work. Carmen and I put some Thompson Water Seal on them so we could hose them off if they get dusty or dirty. I must admit I could have done a better job of that, but the wood is pretty marginal and we didn’t do a lot of work trying to sand them or get them ready for finish. Meh. It’s shop furniture.
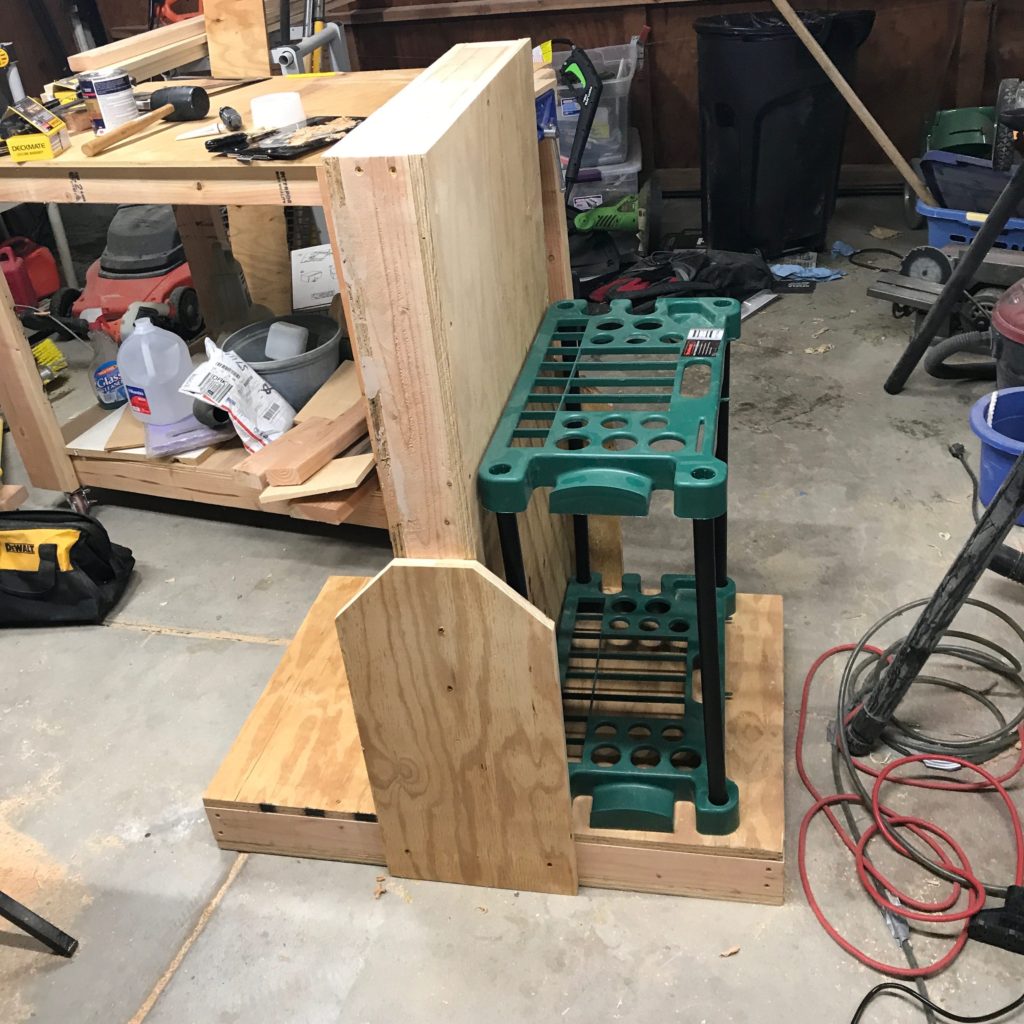
I also built another cart this weekend. This one was designed to hold all or most of of our lawn tools: rakes, shovels, and the like. We had a pair of the pictured green organizers, which were designed to be bolted to the wall. By themselves, they are too flimsy and have a poor center of balance, so you can’t really make them work as a stand alone holder. So, I designed and built this cart using a couple of 2x4s and basically a full sheet of some scrap CDX 3/4″ plywood that’s been sitting in my garage for the better part of two decades. The picture above shows the basic design. It needs some sanding, paint (Carmen is threatening to make it a bright color) and the casters mounted on the bottom. My original design was going to use the green racks on both sides of the center, but now I’m beginning to think that certain heavier tools like a grub how could be better handled by building a simple bin on one side. I think I’m going to hold off on installing the organizer on one side, and see how the cart overall works out. If I decide to build a bin on the back side, it will probably be about 60% of the height of the separator wall, and will likely just be a front frame with a couple of stretchers.
I’ll have to start designing projects before I start cutting.
Anyway, the last thing was I worked on was the rusty auger bits that I purchased at an estate sale last week.
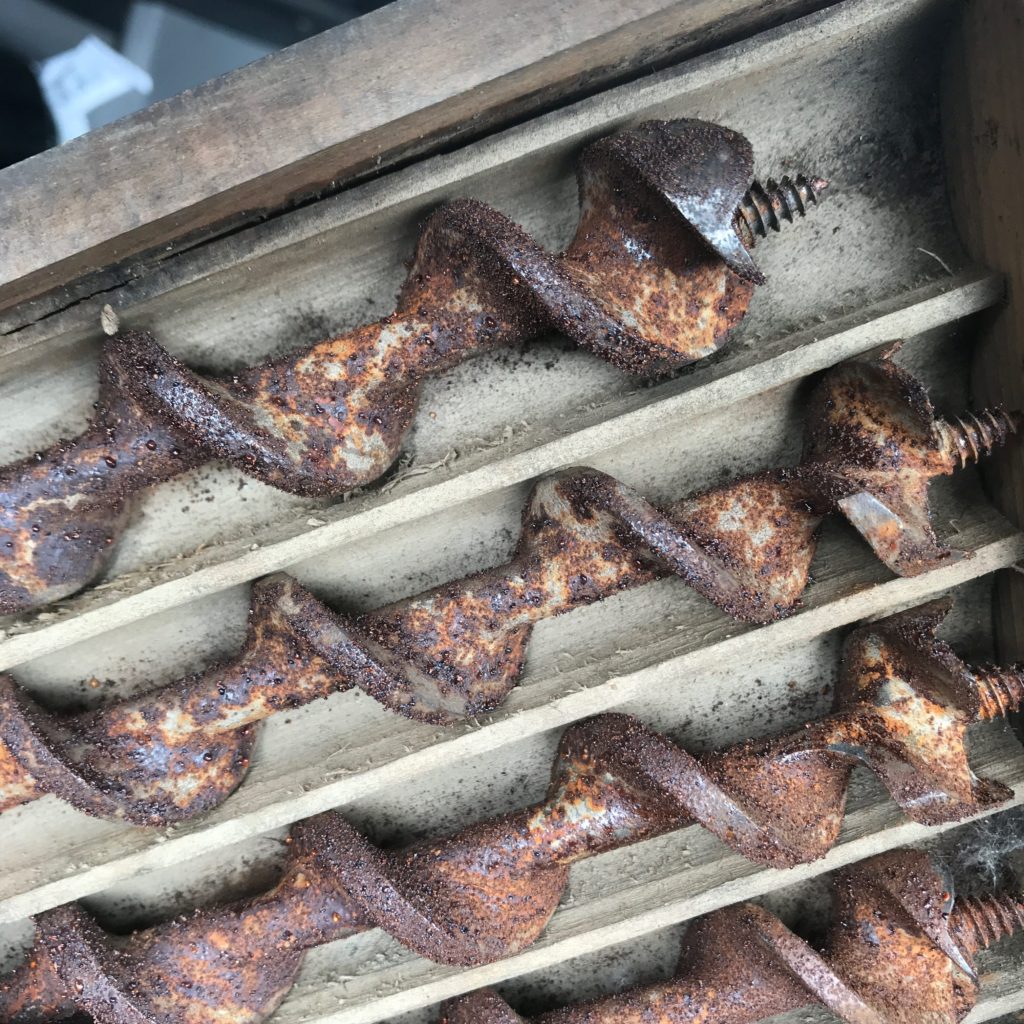
By way of example, here is a reminder of what they look like. These are the largest examples, and show the rust most clearly. There are a couple of things going on here: simple dirt, rust, and I think that they were probably also rubbed down with something like linseed oil which polymerized into a varnish like coating in spots. Yuck. I thought I’d run a couple of experiments to see if I could get them cleaned up.
I took a wire brush to a couple of the smaller specimens. It was pretty good at getting rid of the oily varnish layer and removed a lot of the surface scaly dirt and rust, but the overall look was still pretty rusty.
I’ve been watching YouTube videos, and a lot of them recommend a product called Evaporust for getting rid of surface rust. You basically just soak the piece in Evaporust, them scrub a bit with a pad afterwards, and.. voila. I went and bought a quart ($10) from a nearby auto parts store, found an old quart water bottle with a cap I could sacrifice to the gods of chemistry, and set it to work.
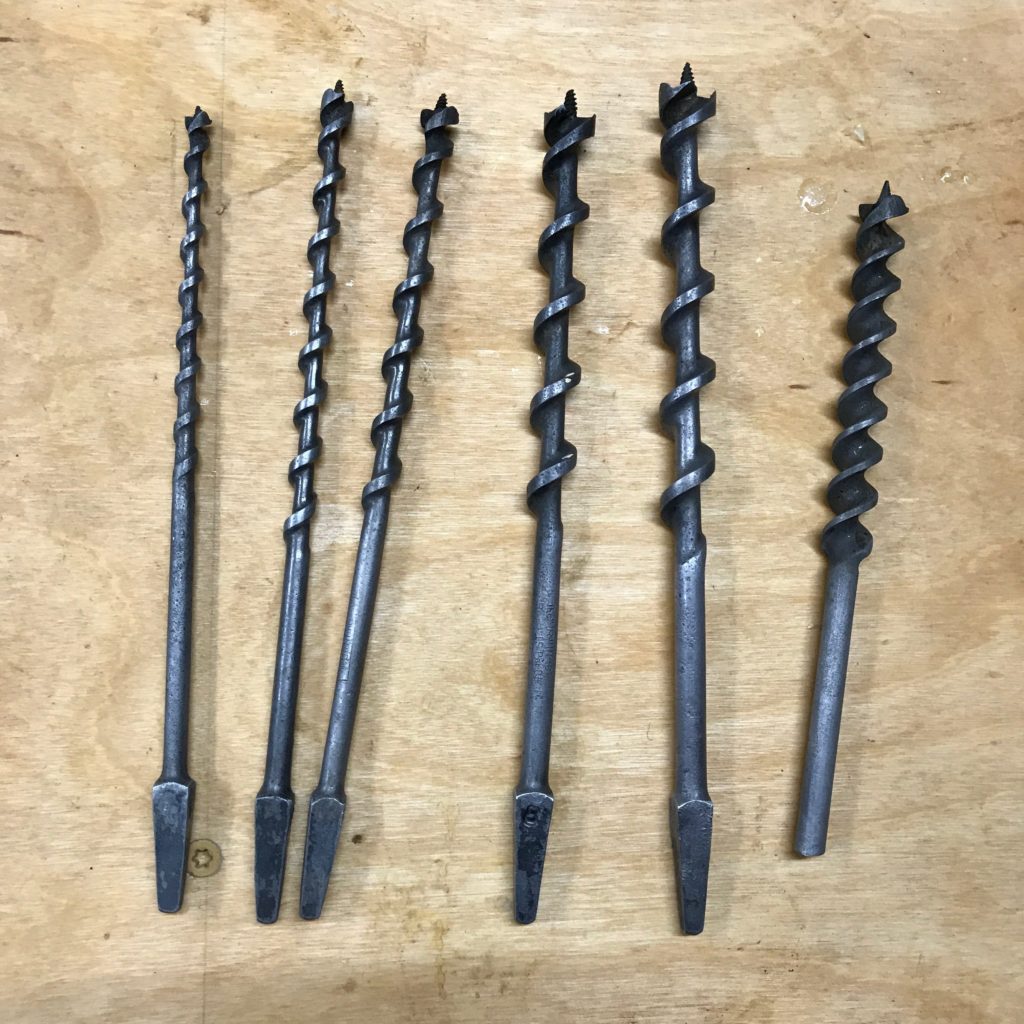
After eight hours of soaking I fished them out. Very nearly all traces of red rust is gone. The parts had a thin layer of black schmutz on them, which mostly came off with a little scrub from some green pads. I snapped the picture above after only the most cursory wipe down. A little additional polishing made them look very nice, if not entirely brand new.
Evaporust gets my thumbs up, except that it’s a little expensive. I will be testing another potentially cheaper method for removing rust, particularly for big parts: electrolysis.
Basically the idea is to submerge the part in a conductive solution, attaching the part to the negative side, and a sacrificial piece of iron or graphite to the positive side, and then apply a current. The advantage of this over Evaporust is that you can scale it up and submerge very large parts for much more modest costs.
I’ve very nearly got that setup, and will likely use some of the larger auger bits (perhaps the No. 16 bit, which is actually fairly bent) as my initial test. I’ll write up my results when I get them done.
Hope you all had a good weekend too!