Yesterday I wrote up my (successful and positive) results at using the commercial product Evaporust to remove rust from some of my smaller rusty auger bits that I got in a garage sale. Last night I got home late after a trivia competition, but decided to toss together a test for using electrolysis using bits and pieces that I had gathered in anticipation over the last week.
First, warnings. While I consider most of this stuff to be pretty safe, I am not an expert on electrolysis or the risks of doing so. You are encouraged to do your own research on the subject. Electrolysis will release small amounts of hydrogen gas which could be a fire hazard, and it does involve chemistry. Do your own research and stay safe!
First of all, the basics: you need a plastic (or non-conductive) container. I decided to use a clear plastic Steralite container that holds about 1 gallon. It’s small, but I wanted to start small, and it was large enough to hold a couple of small items without trouble.
Next, I needed an electrolyte. Water by itself is a poor conductor of electricity, and you need to change that. The electrolyte that seems universally used is sodium carbonate, or washing soda. This is different than sodium bicarbonate, which we know better as baking soda. I know I’ve seen washing soda at various places, but I’ll be damned if I could find a local place that carries it. As it turns out, according to the web you can convert baking soda into washing soda by heating it. I spread a fresh box of dollar store baking soda onto a glass dish and baked it at 400 degrees F for an hour. The overall texture didn’t change all that much, but it did appear less powdery. I’ve heard it described as “more like sand” which didn’t really match what I saw, but I decided to press forward anyway.
You’ll also need a piece of scrap iron to use as a sacrificial electrode. It’s going to acquire a bunch of rust and gunk in the process, so it doesn’t need to be pretty or nice. I was going to use a scrap of steel strap from my workshop, but then found that lots of people use rebar. For convenience, I stopped by Home Depot and picked up two 1ft lengths for about $1.25 each. One thing you should not use is stainless steel: the chrome in it is not something you want to screw with, it can form all kinds of toxic nastiness. I’ve seen people do this online, but DO NOT DO IT.
I needed some wire to hook it up. I had a scrap of Romex lying around, which has an uninsulated ground wire inside. I stripped it, and pulled two pieces about 18″ long. I wrapped some of the wire around the rebar, making a short loop that I could pass a piece of wood to suspend it in the solution. I did the same thing for my No. 16 auger bit.
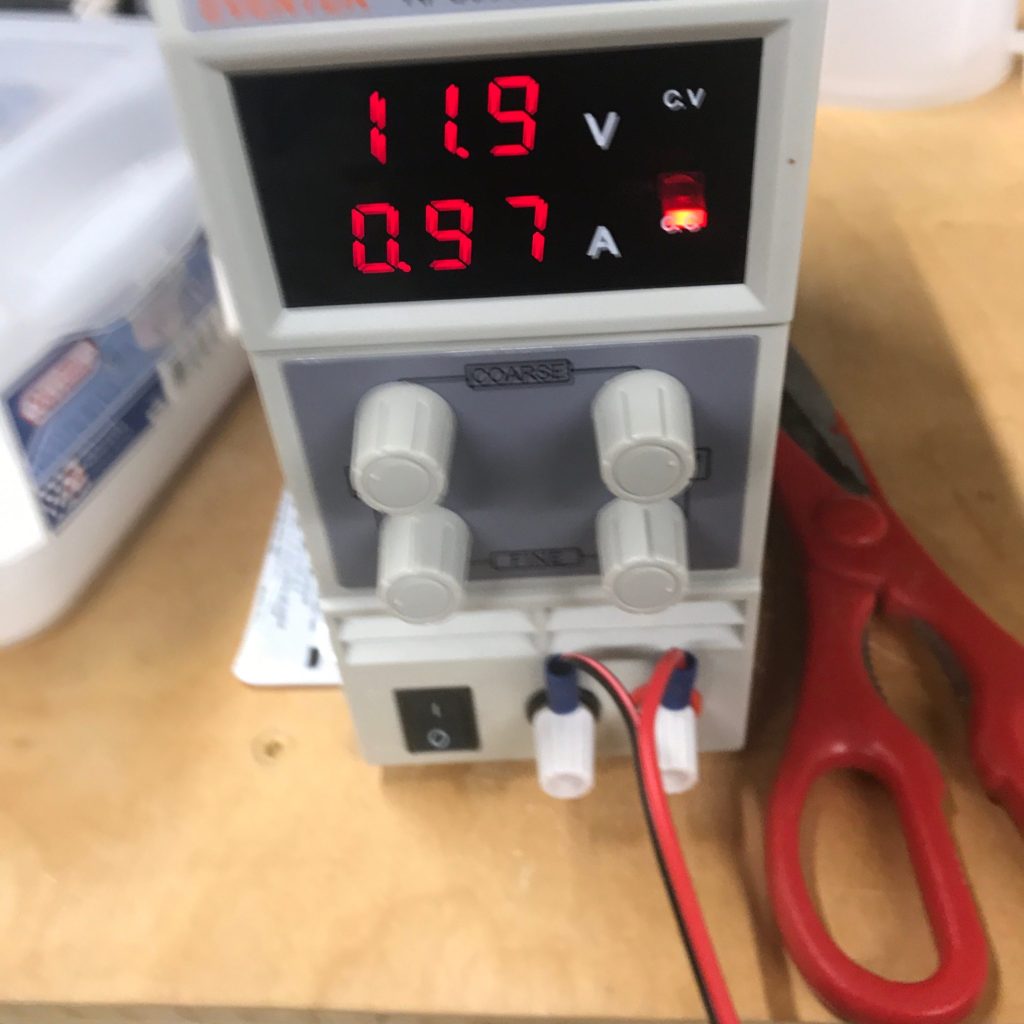
Oh, and you need a power supply. Lots of people use manual car battery chargers. I had picked one up from a garage sale a few months ago, but I decided that I could use this as an excuse to pick up a little bench top power supply that would allow me to supply it with carefully regulated power. There is probably no need for this, but it gave me an actual number I could stare at. I ended up buying this one from Amazon for around $50 by Eventek. Using a current limited supply gave me some small measure of safety: if I set the current limit low, if the piece and the scrap electrode did accidently come into contact, the current would be limited and I wouldn’t get a short circuit. (But still, don’t allow the two to come into contact.)
Once I got all this stuff together, it was pretty easy to setup. I wound the wire around the drill bit and rebar, forming a loop so that they would hang suspended in the middle of the container. I filled it with about 1 gallon of water, added 1 tablespoon of my homemade washing soda, hooked up the power supply (important: negative to the piece you are trying to de-rust, positive to the scrap, not the other way around) and set the current limit to be about 1 amp, and turned it on. It stabilized at around 12v, which is precisely what I wanted.
Immediately I could see bubbles forming around the length of the drill bit. Some cruft began to loosen, seemingly mostly from the rebar (at the bottom below, the drill bit is on the top.)
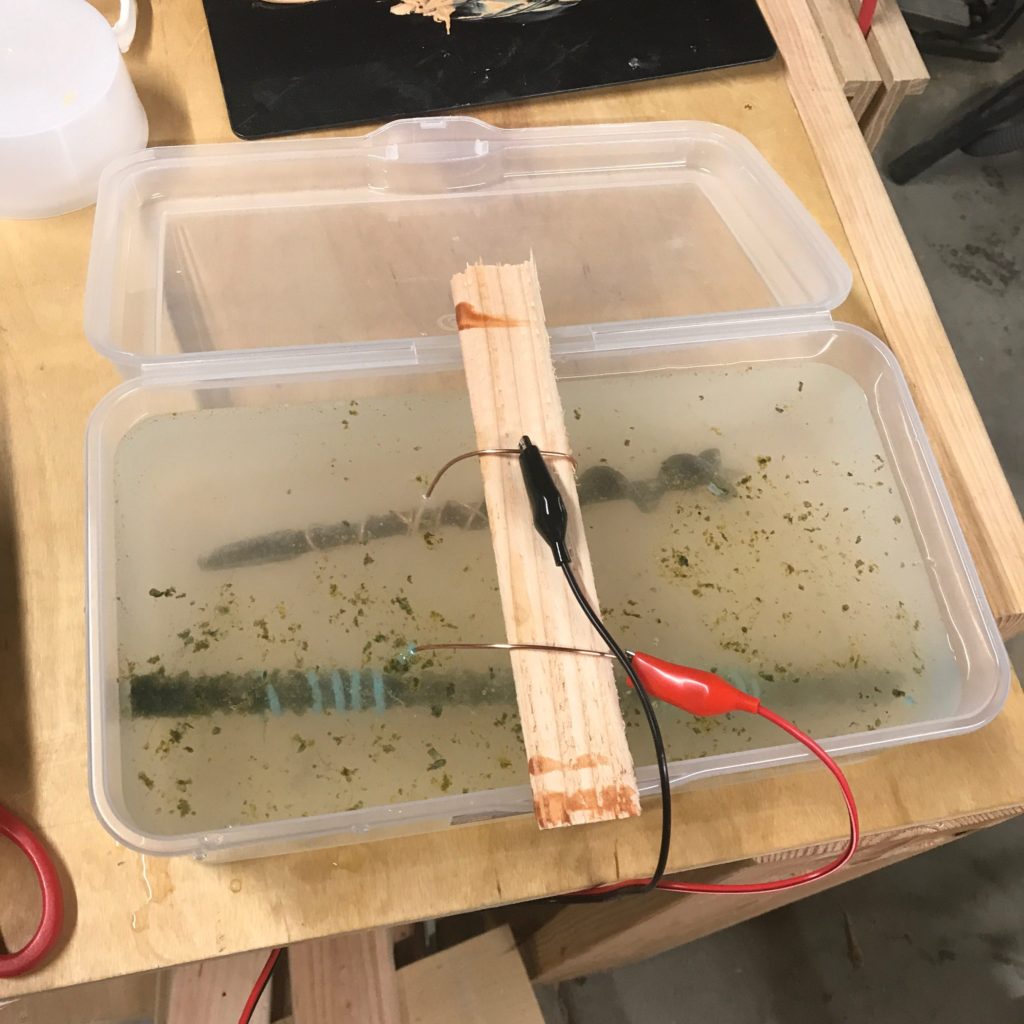
I snapped a quick video with my cell phone camera to help show the bubbling:
Seemed to be working, so I went back into the house and watched some TV. I came back out a couple of hours later, and was met with this rather disgusting looking sight.
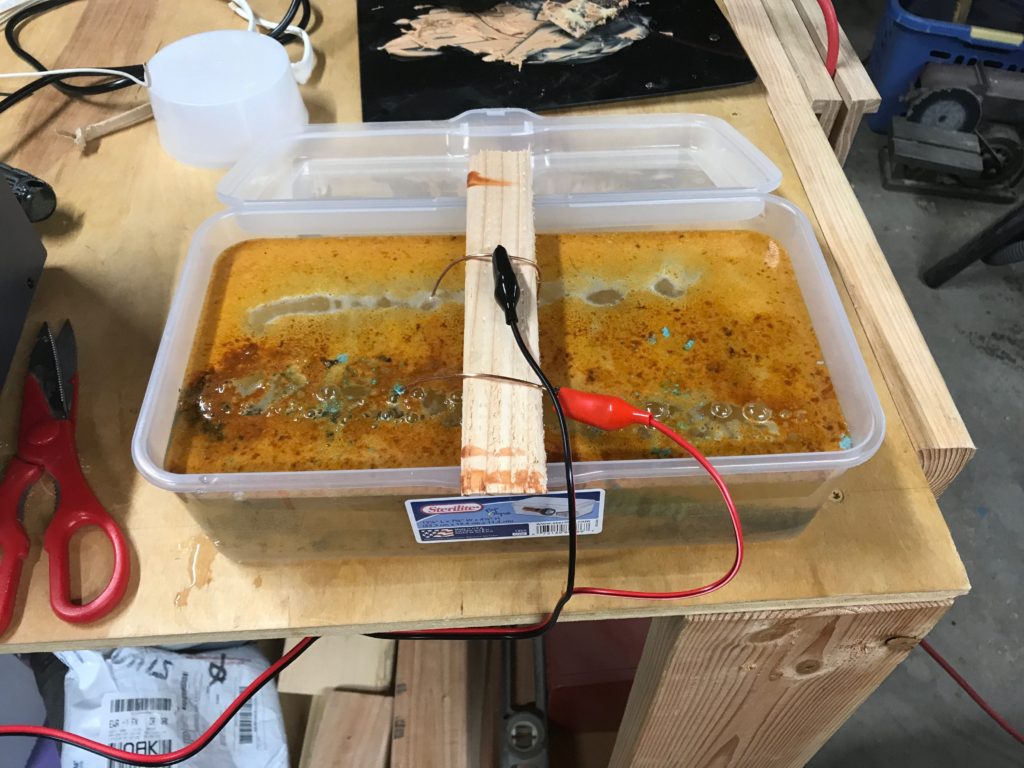
It looks worse than it is. I’m told that if you use graphite rods as your scrap electrodes, you won’t get this sludge, but it is mostly just rust. I decided at this point to reduce the current to just 0.5 amps and let it go overnight. This was from an overabundance of caution more than anything else. At just 0.5 amps, the voltage dropped to about 7v and the bubbling was less vigorous, and I left it until this morning.
Because of the reduced vigor in bubbling, a lot of this sludge had settled out and things appeared pretty calm. The auger bit seemed pretty black, so I thought I’d call this initial run done and fish it out. I unwrapped the wire, and then gave the drill bit a quick rinse. Much like my experiment with Evaporust, the bit seemed to be covered in a bit of black residue, but didn’t have any rust. I tried a bit of scrubbing with a green kitchen pad, and then briefly upgraded to a stiff wire brush to try to remove the remainder. I didn’t work on getting it perfect, just wanted to make sure it was clean. Here is a comparison shot of it compared to one of its rusty mates (the No. 14 from the same box).
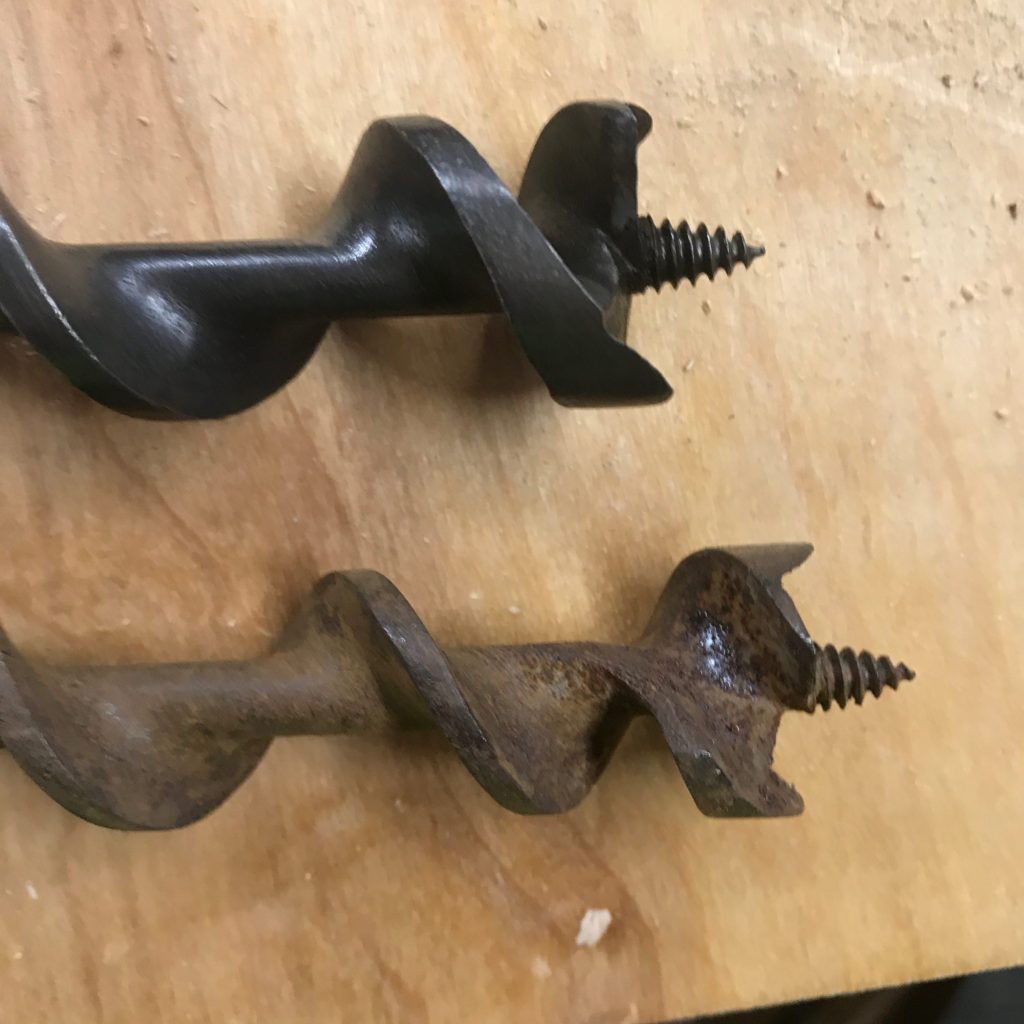
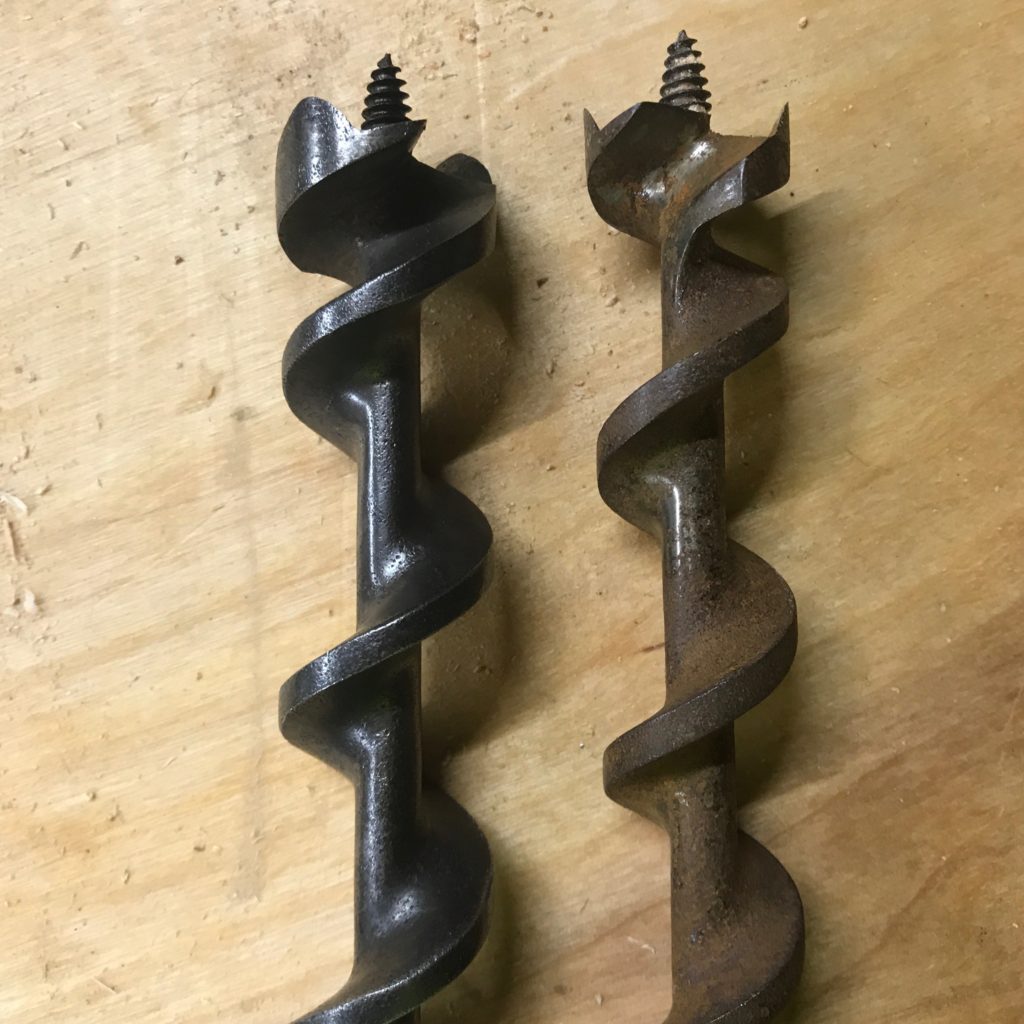
I suspect that with a bit more hand work (and a smaller wire brush) I could get most of the black off. The difference in texture between the two is quite startling: the treated bit is very smooth and doesn’t feel rough or porous.
Overall, I consider this a success! So much so, I took the other drill bit and set it going in the goop for the day. Eventually I’ll get all the bits processed.
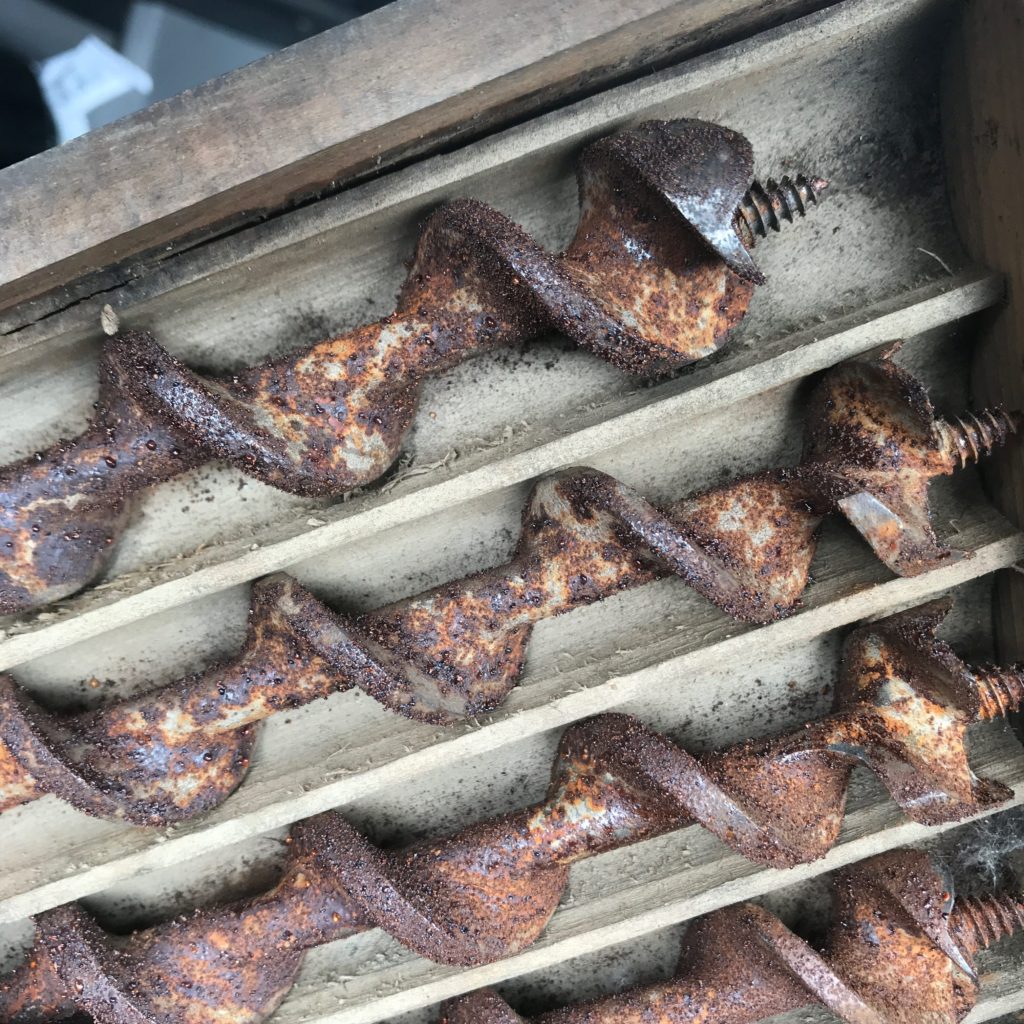
Given that these bits began their stay in my garage looking like this:
I am pretty happy with the overall results. Either Evaporust or electrolysis seems like an effective way to restore rusted old tools, I can recommend either. The nice thing about Evaporust is that it’s simple and straightforward: you just soak the part until its derusted. The nice thing about electrolysis is that it is probably less expensive to scale to large scale. I’m thinking of using it to restore some old handsaws that I have. Stay tuned.
Mark
Thanks for putting this together. The electrolysis worked great! I’ve got some items which I’ll probably try this out on but I procrastinate more than most so not today.
Hmm. I spray my stuff with penetrating oil. Home made 50/50 ATF and acetone. Works better than liquid wrench and way better than wd40 at loosening rust. And lots cheaper.