Category Archives: Astronomy

Another quick iPhone astrophotograph

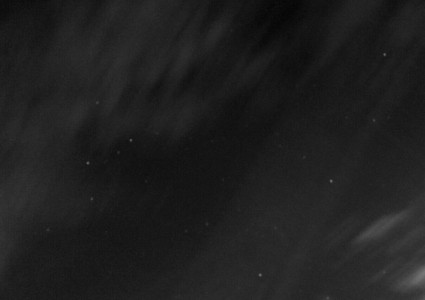
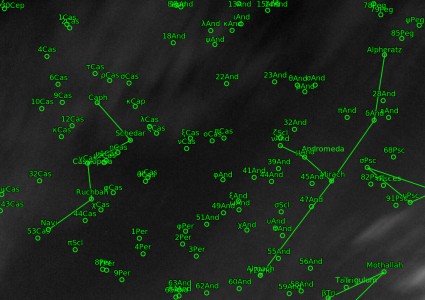
Got home around 11:00PM, and while there was a lot of high clouds, there was a break that revealed the stars of Cassiopeia and Andromeda which I snapped using NightCap Pro on my iPhone 6. The clouds did scatter a lot of light around, I mangled the image a bit using Gimp to make the stars stand out a bit more.

cass

Addendum: Astrometry.net did a pretty good job of identifying the field.

cass-map

Astrophotography with just my iPhone 6…

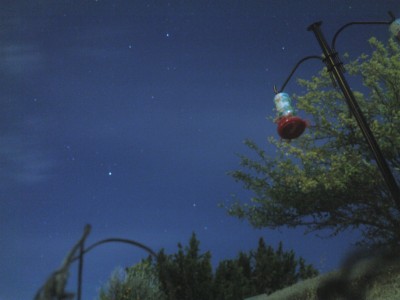
While I was dinking around with my binoculars during the eclipse last night, I decided to try to hunt for an application which would allow me to have better control over the exposures etc. on my iPhone. I found the program Manual, which gives SLR like controls (more on that some other time) but I also found out about NightCap Pro, a program that can be used to take star trail photos and long exposures. For a mere $1.99, I could not resist. I downloaded it, read over the manual, and wandered out into my backyard. I couldn’t immediately find my iPhone tripod, so I just rested it on a flower pot aimed roughly up the hill, and snapped this photo with a roughly 30 second exposure.

NightCap Pro-Photo

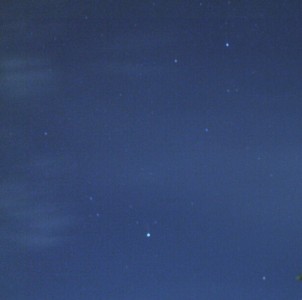
I was actually pretty impressed. You can see clearly a few stars, as well as the high clouds. The scattered light from my porch and the full moon was enough to clearly show the color of the foiliage as well as my humming bird feeder. I mulled for a moment about what constellation I was looking at, but then realized the bright star was Vega, and the stars above and to the left of it were Lyra. I cropped it down to eliminate the terrestrial landmarks. You can see that the star images are pretty soft and out of focus, I didn’t figure out how to lock the focus at infinity, I’ll try in the future.

fullsize-orig

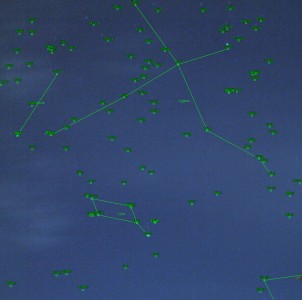
If you haven’t heard of astrometry.net, it is a cool website which allows you to upload star field pictures, and it will figure out where the stars were aiming, and then label the stars and constellations. When I handed it the cropped version, it confirmed my suspicion that it was Lyra, but also showed the stars in Cygnus that are above it.

fullsize

Great fun! The program can also take pictures of star trails and satellites. I’ll have to give that a try sometime soon. Stay tuned.

The lunar eclipse was just an excuse to haul out my binoculars…

Tonight was a total lunar eclipse…
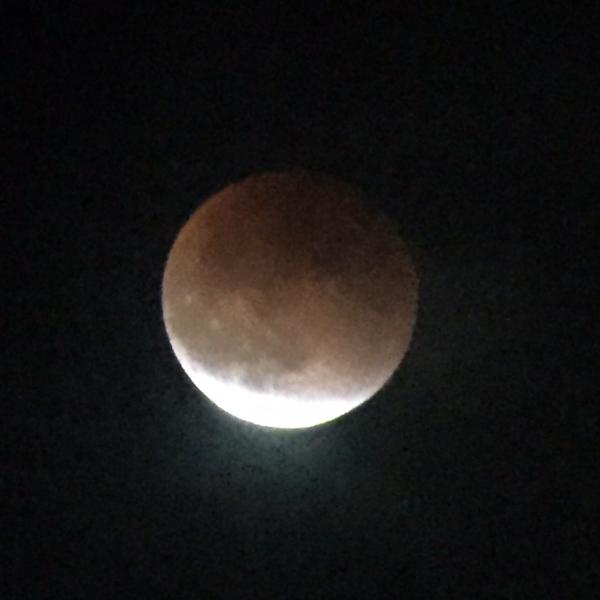
eclipse

Lunar eclipses are pretty, but not super rare. Tonight’s started before moonrise, and by the time I got out to snap a picture or two, totality was already over. More interesting perhaps than the eclipse was the optical gadget that I pulled out to have a look.

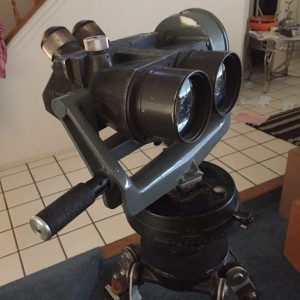
Over the years, I’ve acquired a bunch of optical gadgets at auctions and garage sales, and through my hobby of building telescopes. One of my best acquisitions were a pair of tripod mounted binoculars. I haven’t had them out in a few years, but the eclipse gave me an excuse.
IMG_0536

IMG_0538

IMG_0539

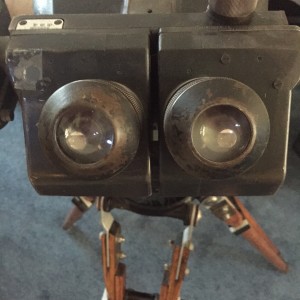
These are German WWII aircraft spotting binoculars, probably manufactured after 1942. I got them at an auction of optical gadgets from the estate of a Chabot Telescope Makers Club (whose name is shamefully escaping me at the moment). I do remember that Kevin Medlock was the auctioneer, and made sure that I didn’t get them too cheaply. I believe that he had a pair that he restored, and if memory serves, he replaced the eyepieces with better Erfle eyepieces (which he machined to fit in the original barrels) and had the objectives sputter coated.

Mine aren’t so cool, but they are in pretty good shape.

I know I looked up some details on them when I acquired them, but I am not certain I wrote anything down, so tonight I dug around trying to find more information about them.

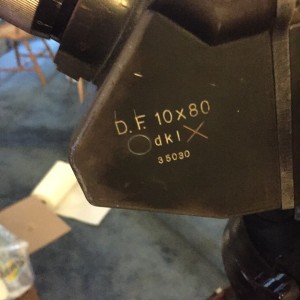
Looking at the markings is helpful. 10×80 is the specification of the binoculars, just like modern binoculars. 10×80 indicates that the objectives are 80mm, and they magnify 10x. D.F. stands for Doppelfernrohr (double telescope). The initials above the serial number are “dkl”, which indicates that they were made by Josef Schneider, Kreuznach. Binoculars of this type were manufactured by a number of different companies, all comparable in terms of their performance and quality.

A nicer pair (without the tripod and mount) were auctioned off at Bonhams for a lot more than I paid for them.

Here’s an article on restoring them.. He includes some great information about the type:

In 1936, Emil Busch AG of Rathenow won a contract to produce a 10x binocular for air observation for the German military. Leitz and Möller each produced competing prototypes, but the Busch model was chosen for its lighter weight (6.5 kg vs. 9.25kg for the Möller and 8.5kg for the Leitz) and greater field of view (131m at 1000m vs. 105m/113m for the Möller/Leitz models). Production began soon afterwards and continued through the war, when the Busch design was also produced by other firms in Germany and occupied Poland. The markings of the different factories are listed in the following section. All models have identical optical systems: 80mm cemented achromatic objectives with 280mm focal length, 70-deg eyepieces, 45-deg Schmidt roof prisms. Due to allied bombing, the 10x80s were primarily used for identifying attacking aircraft and directing the large 4m rangefinders, searchlights and cannons of the anti-aircraft batteries around German cities. They also proved useful on the battlefield, and a version with 20-deg inclined eyepieces was produced for use at sea. A single half of the 10×80 binocular served as Z.F. (Zielfernrohr) 10×80, a sight for the 8.8cm artillery.

Mine are missing a few parts: there is some sort of mounting block which is over the top, and mine is missing the filter wheel that is toggled from a (missing in my pair) knob to the left of the viewer. I’ve put a piece of Scotch tape over the empty hole to keep dust from getting inside. Mine are also missing

Thousands of these were made, and a lot of them are still kicking around. They are pretty awesome for doing astronomy. The tripod I have is made from a solid hardwood (oak, I suspect) and is super strong and stable. A lot of the ones I see on eBay and the like have been stripped of their original finish, and often are buffed to a comically shiny bare metal look. Yuck. I suppose since many are recovered from damaged condition, not much is loss, but mine are in pretty good shape, so I think I’ll try to keep them as original as I can.

Tonight’s picture was captured by just holding my iPhone to one of the eyepieces. The view through the eyepieces is quite a bit nicer, the low light makes the autofocus not function well, and you can see there is a lot of noise in the sensor.

Over the next few days, I might do a similar post about my microscope. Stay tuned.

Addendum: After totality had completely ended, I went out and took this shot. It was difficult to get the iPhone to set the exposure correctly, and I used the digital zoom feature to get it large. The result has a pretty good view of the larger features, but is kind of mushy and looks like it was painted, rather than photographed. Still, you can see the system of rays emanating from the crater Tycho. I wonder if there are camera applications for the iPhone that allow better adjustment of parameters. I may try again sometime soon.
Nifty telescope idea…

Since I stopped actively working on building telescopes, there have been numerous bits of technology that are now widely and cheaply available, and that can be used to implement new, interesting functionality. In particular I hadn’t considered that the same kind of sensors which are used to control quadcopters could be used to determine the position and orientation of a telescope tube. You could plunk the telescope down in any position, in any orientation, and it would be able to use the GPS, gyro, accelerometer and magnetometers to determine where the scope is, what time it is, and where it is pointed. While the overall accuracy might be a little low, it probably can point to within the low power field of a typical telescope.

I’m not the first to think of it. I got the idea from here.

I’ll leave this idea percolating in the back of my head. Worthy of experimentation.

Dusting off old Ronchi Testing Code…

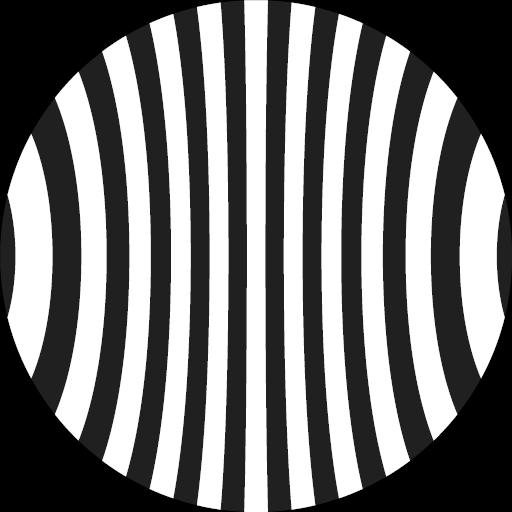
At the Chabot Telescope Maker’s workshop, we make a lot of use of the Ronchi test. It’s great for figuring out gross defects and problems with your mirror. Back in the day, I wrote a simple program to generate Ronchi patterns for a given parabolic mirror. Here are six Ronchi patterns generated by my code for a 12.5″ mirror, with a radius of curvature of 126 inches (same as my mirror in progress) and a gratings with 100 lines per inch. The images are offset by -0.3, -0.1, .1, .3, and .5 inches respectively.

12a

12b

12c

12d

12e

12f

Not bad. But I can think of a few different things I can do with this code:

  • First, it should be able to generate pictures for other conic surfaces than paraboloids. Being able to specify the conic constant would enable you to see hyperboloids and oblate spheroids.
  • I never actually verified the results against reference implementations, or if I did, I don’t remember doing so.
  • I should be able to specify deformations like turned edge or shortened inner zones.

When I get this working, I’ll post the code.

Gert’s 2015 Jupiter Campaign

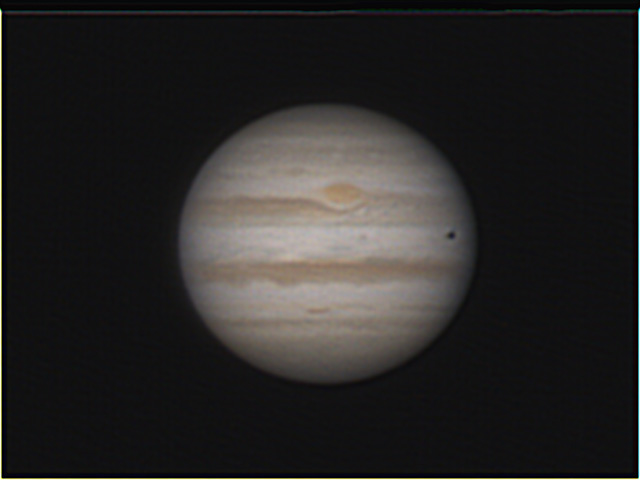
I forgot to mention my chat with Gert, another telescope making regular up at the Chabot Telescope Maker’s Workshop. He’s a skilled astrophotographer and all around interesting guy, and has embarked on a campaign to do some high quality imaging of Jupiter. You can see some of his results here. Pretty nifty stuff. I copied (without permission, hope that’s okay Gert) one of his nicer images below as a tease, but you should surf over to his website for many more awesome results.

Jup_20150225_17_062334_ps2

He also suggested that this $300 webcam was especially well suited for astronomical images. Given his great results, I think I should pay attention to his recommendations.

Perhaps some time in the future I’ll get to doing some of this video/webcam astronomy.

StarStack… Astrophotography with Cell Phones?

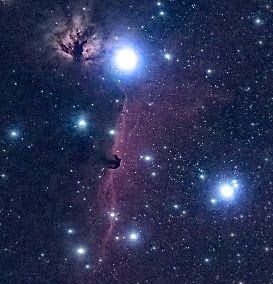
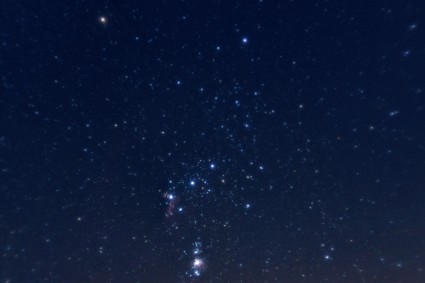
horseheadTom pointed me at this awesome article about an experiment run as part of the BBC programming Stargazing Live. Basically, they asked their viewers to go outside with their cell phones and take a picture of the night sky with their cell phones and upload the (almost entirely black) images to a website. They then used a process called “stacking” that basically aligned all the pixels and added them together. The net result was perhaps better than anyone has anyone had any expectation of getting. Very, very cool.


If you want to see the full image they constructed, click on the version below and you’ll get the resolution they achieved, including some views of the Great Nebula in Orion:

orion

And, as it happens, the kind of thing that I could easily do with the hardware and software that I have lying around. I’m putting this onn my list of experiments to run, maybe with my iPhone, but more likely with the Pi Camera (easier to automate).

Addendum: Glancing at my copy of the Uranometria 2000, my “goto” star atlas, it’s clear that the picture I linked above has all the stars in the Uranometria, which is supposed to go down to about magnitude 9.75. Under dark skies, you’d only see down to magnitude 6 or so. Stars which are magnitude 9.75 are about 32 times dimmer, ordinarily you’d need to use a telescope with a 50mm aperature (a large-ish finder scope) to see these stars.

The Big Sunspot, with a sense of perspective…

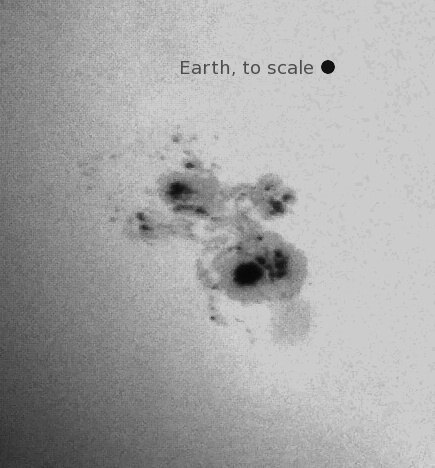
Earlier this week, I snapped a couple of iPhone photos of the partial solar eclipse with my iPhone, through coworker Eric’s mighty spiffy little Questar, equipped with a filter. Despite the glare, I was shocked at how much detail was actually available, especially for sunspot group 2192, which has been busy kicking off solar flares all week (six major events at last count). I decided to crop the image, convert it to grayscale and work on enhancing the contrast. I also thought it would be nice to get some idea of how truly huge this spot was. Using eye protection, I could see the spot clearly without any magnification at all. But I thought it might be cool to see how big it was compared to the earth. I measured the diameter (roughly) of the solar disk on the image, and then divided it by 109 (the sun’s diameter is about 109x the diameter of the earth). Convert that to pixels, and you get the following picture:

howbig

At scale, the earth is only 14 pixels wide.

Does the universe make you feel small?

Rings ‘n things…

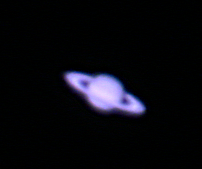
Last night, I took the scope out again and tried to get a few quick images of Saturn. My focus was really soft, but this was what I came up with after processing the video with Registax. It’s actually pretty comparable to the level of detail that I could see through the Meade ETX 90 under the conditions we had, which wasn’t too bad really.

I’ll try to type up a longer post about this later.

First astrophotography with the Microsoft Cinema HD webcam…

A couple of days ago, I mentioned that I had gotten a Microsoft Cinema HD webcam to convert for use in astrophotography. Today, I got my Meade ETX-90 out, and decided to give it a test on the daytime moon. Sadly, my mount’s tracking capabilities seem to be pretty glitchy: the autostar seems to be resetting at odd intervals, probably a power issue. So, I just recorded some short video using SharpCap and letting the Earth’s rotation carry the image across the sensor. Here’s an example of the raw footage, recorded at 800×600.


Pretty wavy, awfully blue, and not that impressive. But luckily, processing with modern image stacking software can work wonders. I used VirtualDub to save the images as an image sequence, and then used AviStack to analyze and stack the resulting images, followed by some contrast enhancement and wavelet filtering. Here’s the result:

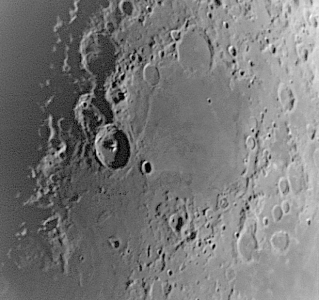
Moon, through my ETX-90, after processing.

Since, I’m going to take pictures, I should probably learn some of the names of the major lunar features. The large, smooth area in the center is the Mare Nectaris. The large crater with the central peak is Theophilus, which overlaps Cyrillus. The tiny crater in the middle of the sea is Rosse, and for a sense of scale, is about 12km across. The crater near the top that seems to have the Mare Nectaris flowing into it is Fracastorius.

Some other footage I snapped resulted in some other nice images:

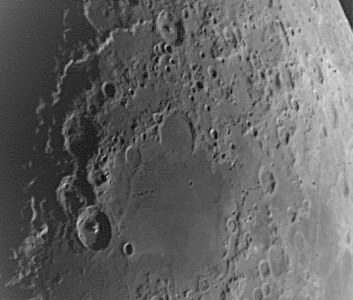
Another image, showing the region around Piccolomini A-E.

This shows the area further south (which is toward the top, which includes the crater Piccolomini, and it’s associated overlapping satellite impact craters.

Not bad for a first try. I wonder what I could accomplish with real equipment.

Addendum: Try rewatching the video above, watching carefully for the Rosse crater in the middle of Mare Nectaris. It flickers into view just a few times in the five second capture, but is a clear and obvious feature in the processed video. Pretty neat.

Adapting a webcam for telescope use…

Over the last few weeks, I’ve been a bit more intrigued by one of my old interests: telescopes and astrophotography. During the transit of Venus, I hooked up an old black and white video camera, and tried to take some snapshots, but wasn’t really pleased with the results. So, I decided to try to adapt a webcam for telescope use. A bit of research online said that the Microsoft Lifecam Cinema HD was a good choice, and an adapter was available that should make a nice, lightweight camera.

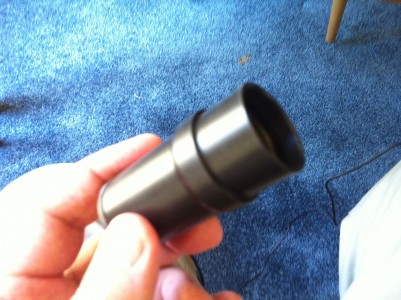
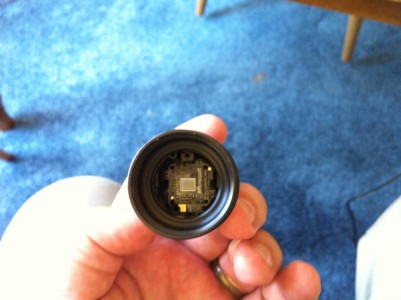
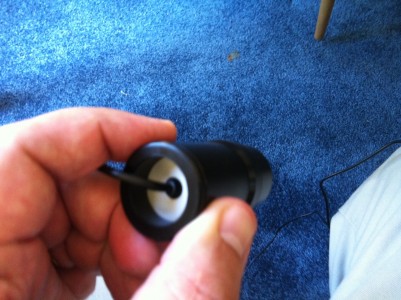
The Microsoft Lifecam Cinema HD is very small, nearly ideal package, but you do have to do some modifications to get it into the barrel and adapt it for telescope use. You can find some of the rough instructions here: you need to disassemble the camera, remove the button and microphone, and then get rid of the lens and IR filter. When you are done, you reassemble it, and it slides into the Billet Parts adapter just as neat as you please and is held in place by an O-ring in front and the back screwing in the back. A very tidy package. Oh, and you probably want to get rid of the bright blue led that remains on the front panel. I took an Exacto knife and just cut it off.

Here are some pictures of the assembled package:


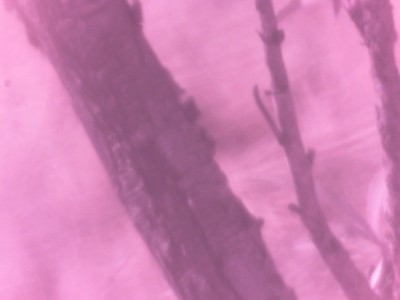
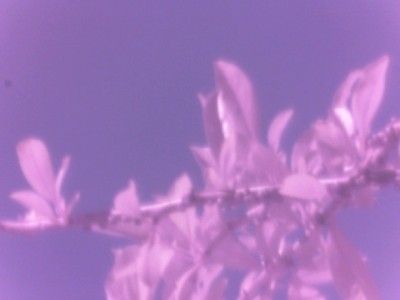
Here are a couple of the pictures I snapped from it after plugging it into a 6″ f/5 reflector I have, and aiming it by hand up the hill. Without a tripod, it wasn’t possible to focus it accurately, but it gives you an idea about what the capabilities are. The colors are wacky precisely because the IR filter of the camera was removed, and it’s a very bright and warm sunny day here.

Twigs on the hill about 100 feet away...

Leaves against the sky, again about 100 feet away

I’ll try to get it hooked up for some real imaging this weekend. Stay tuned.

Still from a video snap of the Venus Transit

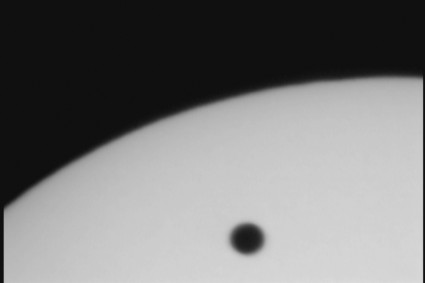
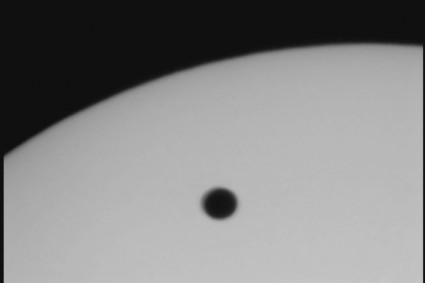
I did try to take some video of the transit, but the higher magnification created by the rather small imager in the video camera, combined with too much AGC and a lot of wind buffeting didn’t make for very interesting imagery compared to the surprisingly excellent iphone snaps I had before. But just to give you an idea of what they look like, here are a couple of snaps…

Shot with my P23C video camera from Supercircuits...

Another, nearly identical image... same setup.

About all these are good for is judging the relative apparent size of the sun with Venus. But it was a fun outing.

iPhone photos of the Venus transit…

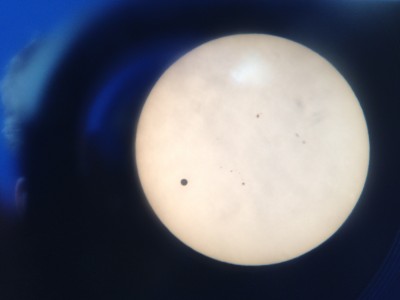
Yesterday, I setup my Meade ETX-90 outside with a solar filter in the courtyard between buildings at work so that my coworkers could have a glimpse of this rather rare astronomical event. I had a pretty steady stream of people coming out to have a peek throughout the day. I managed to shoot some video of it as an experiment, but again, wind buffeting and the like made focus difficult and the overall image was pretty bouncy.

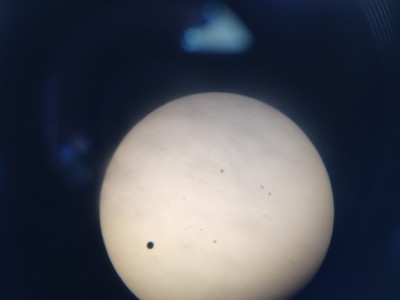
But David Munier, one of my coworkers spent a few minutes clicking away by holding his iPhone at the eyepiece, and came away with these two awesome pictures! Very, very nice! I normally call this style of astrophotography “ghetto astrophotography”, but I think these are good enough to just call them astrophotographs.

Not bad, for an iPhone!

Even better! Great job, Dave!

The blue blobs are light flare from reflections near the eyepiece, but they look kind of cool!

I’ve got some more photos and stuff that I’ll try to get up shortly, but until then, enjoy!

No Saturn, but how ’bout the moon?

I thought I’d give my video camera a test. I considered Saturn, but by the time I got outside the weather was getting colder and blustery, and I wasn’t feeling very good, so I just managed to snap some quick video of the moon. The wind was buffeting the telescope, and I was impatient, but I snagged some video and then used Registax 6 to make the best of a sorry collection. Here’s the result of my amateurish efforts:

The video camera is probably a mistake: even with the mods that I put in, the AGC gets in the way, and the capture seems to have an interlacing problem that causes nothing but trouble. Perhaps it’s time to get a decent webcam + adapter and try the same. Oh well. More when I get better.

Prepping for the upcoming transit of Venus…

I’ve been pretty quiet on the blog, but I’m trying to get some projects going. This week marks a rather rare event: the Tuesday (for us in North America) transit of Venus across the front of the sun. According to this transit calculator, the transit will occur between 3:06 and 9:47 (well after sunset).

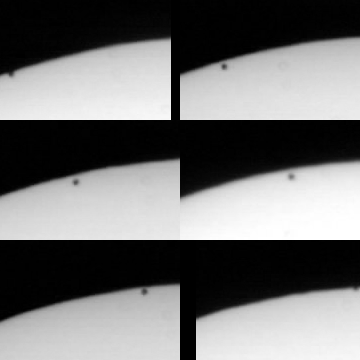
Back on Nov 15, 1999, I observed a transit of the planet Mercury across the sun. I snapped a few pictures, and created this rather unimpressive animated GIF:

Nov. 15, 1999 transit of Mercury in front of the sun

I don’t even recall what crude webcam setup I had back then.

I think that I can do better this time. You may have seen my “ghetto” astrophotographs of the solar eclipse a couple of weeks ago. I shot those using a solar filter over my little Meade Maksutov. I though I’d press it into service again, but instead of doing the crazy “catch as you can” approach of clicking away with a hand held point and shoot at the eyepiece, I thought I’d dig up something better.

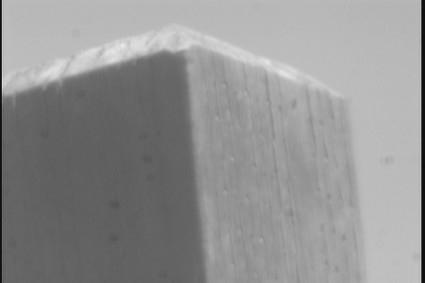
Better in this case was an old black and white security camera that I had bought from Supercircuits years ago with the idea of doing some video astronomy. I even modified the camera to allow the disabling of its automatic gain circuitry, which typically is useless for astronomy, as it causes the camera to overexpose everything you wish to see. More digging found the other necessary bits (various camera adapters and the like). I wanted to capture images to my laptop, so I needed a little Video->USB capture card. A quick trip to Fry’s netted me a MyGico Capit card for the princely sum of $20, with a $15 rebate. It took me a couple of tries to get the drivers installed, but it seemed to work okay. I then aimed my rig out the window up my hill, and shot this picture of the fencepost at the back of my property:

My fencepost, viewed through the Maksutov/Video Camera setup

The focus wasn’t perfect, but I could actually see an ant crawling around on it. Not bad. Not bad at all.

Except for one thing. The distance to the post is about 135 feet, and the post is a 4×4. A little math works out the field of view of this camera as being roughly .2 degrees. The sun is roughly one half a degree in size. This means that whatever I do, I won’t get a full disk image of the sun. That’s kind of a bummer.

Of course, I could have made a math error. I’ll drag this rig out into the sunshine and see if I can shoot some pictures/vids of the sun today (should see some sunspots anyway) and see how close my math is.

I’ll try to shoot some Youtube video that will further document this setup later. Stay tuned.